Thursday, 31 March 2011

Get Android device ID, Settings.Secure.ANDROID_ID

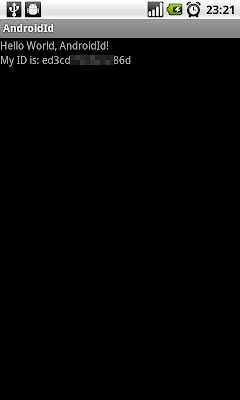
Settings.Secure.ANDROID_ID is a 64-bit number (as a hex string) that is randomly generated on the device's first boot and should remain constant for the lifetime of the device. (The value may change if a factory reset is performed on the device.)

Settings.Secure.ANDROID_ID on Nexus One
Settings.Secure.ANDROID_ID on Android Emulator

ANDROID_ID seems a good choice for a unique device identifier. There are downsides as stated in Android Developers Blog, Identifying App Installations: First, it is not 100% reliable on releases of Android prior to 2.2 (�Froyo�). Also, there has been at least one widely-observed bug in a popular handset from a major manufacturer, where every instance has the same ANDROID_ID.

package com.exercise.AndroidId;

import android.app.Activity;
import android.os.Bundle;
import android.provider.Settings;
import android.widget.TextView;

public class AndroidId extends Activity {
/** Called when the activity is first created. */
@Override
public void onCreate(Bundle savedInstanceState) {
super.onCreate(savedInstanceState);
setContentView(R.layout.main);

TextView textAndroidId = (TextView)findViewById(R.id.androidid);
String AndroidId = Settings.Secure.getString(getContentResolver(),
Settings.Secure.ANDROID_ID);
textAndroidId.setText("My ID is: " + AndroidId);
}
}


<?xml version="1.0" encoding="utf-8"?>
<LinearLayout xmlns:android="http://schemas.android.com/apk/res/android"
android:orientation="vertical"
android:layout_width="fill_parent"
android:layout_height="fill_parent"
>
<TextView
android:layout_width="fill_parent"
android:layout_height="wrap_content"
android:text="@string/hello"
/>
<TextView
android:id="@+id/androidid"
android:layout_width="fill_parent"
android:layout_height="wrap_content"
/>
</LinearLayout>

Wednesday, 30 March 2011

SlidingDrawer

SlidingDrawer hides content out of the screen and allows the user to drag a handle to bring the content on screen. SlidingDrawer can be used vertically or horizontally. A special widget composed of two children views: the handle, that the users drags, and the content, attached to the handle and dragged with it. SlidingDrawer should be used as an overlay inside layouts. This means SlidingDrawer should only be used inside of a FrameLayout or a RelativeLayout for instance. The size of the SlidingDrawer defines how much space the content will occupy once slid out so SlidingDrawer should usually use match_parent for both its dimensions. Inside an XML layout, SlidingDrawer must define the id of the handle and of the content.


<?xml version="1.0" encoding="utf-8"?>
<LinearLayout xmlns:android="http://schemas.android.com/apk/res/android"
android:orientation="vertical"
android:layout_width="fill_parent"
android:layout_height="fill_parent"
>
<TextView
android:layout_width="fill_parent"
android:layout_height="wrap_content"
android:text="@string/hello"
/>
<FrameLayout
android:layout_width="fill_parent"
android:layout_height="300dip"
android:layout_gravity="bottom"
android:background="#808080">
<TextView
android:layout_width="fill_parent"
android:layout_height="wrap_content"
android:text="Something here: \nIt's a exercise \nof SlidingDrawer"
/>
<SlidingDrawer
android:id="@+id/drawer"
android:layout_width="fill_parent"
android:layout_height="wrap_content"
android:orientation="vertical"
android:handle="@+id/handle"
android:content="@+id/content">
<ImageView
android:id="@id/handle"
android:layout_width="fill_parent"
android:layout_height="wrap_content"
android:src="@drawable/icon"
android:background="#404040"/>
<LinearLayout
android:id="@id/content"
android:layout_width="fill_parent"
android:layout_height="200dip"
android:orientation="vertical"
android:background="#606060"
>
<Button
android:layout_width="fill_parent"
android:layout_height="wrap_content"
android:text=" - Button - "/>
<Button
android:layout_width="fill_parent"
android:layout_height="wrap_content"
android:text=" - Button - "/>
<Button
android:layout_width="fill_parent"
android:layout_height="wrap_content"
android:text=" - Button - "/>
<TextView
android:layout_width="fill_parent"
android:layout_height="wrap_content"
android:text="It's content of SlidingDrawer"/>
</LinearLayout>
</SlidingDrawer>
</FrameLayout>
<Button
android:layout_width="fill_parent"
android:layout_height="fill_parent"
android:layout_margin="5dip"
android:text=" - A Bit Button - "/>
</LinearLayout>


Related:
- SlidingDrawer in horizontal
- Inflate SlidingDrawer from XML


Tuesday, 29 March 2011

Let the Battle for Music in the Cloud Begin!

The gauntlet has been thrown down. Amazon today announced a service to store your music and media in the clous and play it back anywhere anytime. CNet has the details:

CNet: Amazon launches digital music locker


So you get 5GB of storage for free. 20GB for $20 a year. You can play your music in any Mac or PC browser and on Android devices. However, you can not play your music on iOS devices. That's right no iPod, iPhone, iPad. Odd isn't it? Mashable has the details and a few word arounds.


Mashable How To: Use Amazon Cloud Player With iOS Devices


So according to the story, there is no technical reason why the player will not work on iOS devices. In fact, only Mobile Safari doesn't work. If you use an alternative web browser, it plays just fine.


So why the rather odd snub to Apple products? There have been a number of reports that both Apple and Google will be announcing similar products this year. That could be the reason, but I don't think so. More likely this has too do with Apple's new subscription policy on the App store. Apple is planning to ban any apps that sell things outside of the app store. That would include Kindle books and newspaper subscriptions. Given the low prices of ebooks, it seems likely that paying Apple a 30% cut is just not feasible. So this move seems directly aimed at that app store environment. It will be interesting to see if Amazon "fixes" this issue in a timely manner.


Anyway, I expect some "leaks" about Apple and Google offerings sooner than later.

Learning Android


Want to build apps for Android devices? This book is the perfect way to master the fundamentals. Written by an expert who's taught this mobile platform to hundreds of developers in large organizations, this gentle introduction shows experienced object-oriented programmers how to use Android�s basic building blocks to create user interfaces, store data, connect to the network, and more.

You'll build a Twitter-like application throughout the course of this book, adding new features with each chapter. Along the way, you'll also create your own toolbox of code patterns to help you program any type of Android application with ease.

  • Get an overview of the Android platform and discover how it fits into the mobile ecosystem
  • Learn about the Android stack, including its application framework, and the structure and distribution of application packages (APK)
  • Set up your Android development environment and get started with simple programs
  • Use Android�s building blocks�Activities, Intents, Services, Content Providers, and Broadcast Receivers
  • Learn how to build basic Android user interfaces and organize UI elements in Views and Layouts
  • Build a service that uses a background process to update data in your application
  • Get an introduction to Android Interface Definition Language (AIDL) and the Native Development Kit (NDK)


Java String Comparison: equals()? ==?

It's a issue of Java programming language, not Android.

String in Java is object, of java.lang.String class. It have some ways to be initialized, such as:
String s = "hello";
String s = new String("hello");
Is it same?

Java's String class provide a method equals() to compare two string. Sometimes we can use "==", but not always! Here are some examples:

String Comparison

package com.exercise.AndroidStringCompare;

import android.app.Activity;
import android.os.Bundle;
import android.widget.TextView;

public class AndroidStringCompare extends Activity {
/** Called when the activity is first created. */
@Override
public void onCreate(Bundle savedInstanceState) {
super.onCreate(savedInstanceState);
setContentView(R.layout.main);
TextView Result1 = (TextView)findViewById(R.id.result1);
TextView Result2 = (TextView)findViewById(R.id.result2);
TextView Result3 = (TextView)findViewById(R.id.result3);
TextView Result4 = (TextView)findViewById(R.id.result4);
TextView Result5 = (TextView)findViewById(R.id.result5);
TextView Result6 = (TextView)findViewById(R.id.result6);
TextView Result7 = (TextView)findViewById(R.id.result7);
TextView Result8 = (TextView)findViewById(R.id.result8);
TextView Result9 = (TextView)findViewById(R.id.result9);
TextView Result10 = (TextView)findViewById(R.id.result10);

String s1 = "hello";
String s2 = "hello";
String s3 = s1;
String s4 = "h" + "e" + "l" + "l" + "o";
String s5 = new String("hello");
String s6 = new String(new char[]{'h', 'e', 'l', 'l', 'o'});


Result1.setText(s1 + " == " + s2 + ": " + (s1 == s2));
Result2.setText(s1 + " equals " + s2 + ": " + (s1.equals(s2)));
Result3.setText(s1 + " == " + s3 + ": " + (s1 == s3));
Result4.setText(s1 + " equals " + s3 + ": " + (s1.equals(s3)));
Result5.setText(s1 + " == " + s4 + ": " + (s1 == s4));
Result6.setText(s1 + " equals " + s4 + ": " + (s1.equals(s4)));
Result7.setText(s1 + " == " + s5 + ": " + (s1 == s5));
Result8.setText(s1 + " equals " + s5 + ": " + (s1.equals(s5)));
Result9.setText(s1 + " == " + s6 + ": " + (s1 == s6));
Result10.setText(s1 + " equals " + s6 + ": " + (s1.equals(s6)));
}
}


<?xml version="1.0" encoding="utf-8"?>
<LinearLayout xmlns:android="http://schemas.android.com/apk/res/android"
android:orientation="vertical"
android:layout_width="fill_parent"
android:layout_height="fill_parent"
>
<TextView
android:layout_width="fill_parent"
android:layout_height="wrap_content"
android:text="@string/hello"
/>
<TextView
android:id="@+id/result1"
android:layout_width="fill_parent"
android:layout_height="wrap_content"
/>
<TextView
android:id="@+id/result2"
android:layout_width="fill_parent"
android:layout_height="wrap_content"
/>
<TextView
android:id="@+id/result3"
android:layout_width="fill_parent"
android:layout_height="wrap_content"
/>
<TextView
android:id="@+id/result4"
android:layout_width="fill_parent"
android:layout_height="wrap_content"
/>
<TextView
android:id="@+id/result5"
android:layout_width="fill_parent"
android:layout_height="wrap_content"
/>
<TextView
android:id="@+id/result6"
android:layout_width="fill_parent"
android:layout_height="wrap_content"
/>
<TextView
android:id="@+id/result7"
android:layout_width="fill_parent"
android:layout_height="wrap_content"
/>
<TextView
android:id="@+id/result8"
android:layout_width="fill_parent"
android:layout_height="wrap_content"
/>
<TextView
android:id="@+id/result9"
android:layout_width="fill_parent"
android:layout_height="wrap_content"
/>
<TextView
android:id="@+id/result10"
android:layout_width="fill_parent"
android:layout_height="wrap_content"
/>
</LinearLayout>

Monday, 28 March 2011

Set Wallpaper using WallpaperManager

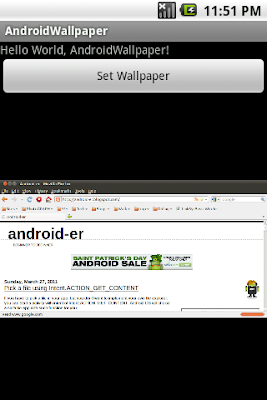
In this exercise, a picture (packed inside our app) will be set as system wallpaper, using WallpaperManager.

* Please note that in order to use WallpaperManager, minimum API level have to be set to 5.

Set Wallpaper using WallpaperManager

First of all, prepare a picture (wallpaper.png in my case) and save it in /res/drawable/ folder of your project.

main code
package com.exercise.AndroidWallpaper;

import java.io.IOException;

import android.app.Activity;
import android.app.WallpaperManager;
import android.graphics.Bitmap;
import android.os.Bundle;
import android.view.View;
import android.widget.Button;
import android.widget.ImageView;

public class AndroidWallpaper extends Activity {

Bitmap bitmap;

/** Called when the activity is first created. */
@Override
public void onCreate(Bundle savedInstanceState) {
super.onCreate(savedInstanceState);
setContentView(R.layout.main);

Button buttonSetWallpaper = (Button)findViewById(R.id.set);
ImageView imagePreview = (ImageView)findViewById(R.id.preview);

imagePreview.setImageResource(R.drawable.wallpaper);

buttonSetWallpaper.setOnClickListener(new Button.OnClickListener(){

@Override
public void onClick(View arg0) {
// TODO Auto-generated method stub
WallpaperManager myWallpaperManager
= WallpaperManager.getInstance(getApplicationContext());
try {
myWallpaperManager.setResource(R.drawable.wallpaper);
} catch (IOException e) {
// TODO Auto-generated catch block
e.printStackTrace();
}

}});

}
}


main.xml
<?xml version="1.0" encoding="utf-8"?>
<LinearLayout xmlns:android="http://schemas.android.com/apk/res/android"
android:orientation="vertical"
android:layout_width="fill_parent"
android:layout_height="fill_parent"
>
<TextView
android:layout_width="fill_parent"
android:layout_height="wrap_content"
android:text="@string/hello"
/>
<Button
android:id="@+id/set"
android:layout_width="fill_parent"
android:layout_height="wrap_content"
android:text="Set Wallpaper"
/>
<ImageView
android:id="@+id/preview"
android:layout_width="fill_parent"
android:layout_height="fill_parent"
/>
</LinearLayout>


Finally, you have to modify AndroidManifest.xml to grant permission of "android.permission.SET_WALLPAPER".
<?xml version="1.0" encoding="utf-8"?>
<manifest xmlns:android="http://schemas.android.com/apk/res/android"
package="com.exercise.AndroidWallpaper"
android:versionCode="1"
android:versionName="1.0">
<uses-sdk android:minSdkVersion="5" />
<uses-permission android:name="android.permission.SET_WALLPAPER"></uses-permission>

<application android:icon="@drawable/icon" android:label="@string/app_name">
<activity android:name=".AndroidWallpaper"
android:label="@string/app_name">
<intent-filter>
<action android:name="android.intent.action.MAIN" />
<category android:name="android.intent.category.LAUNCHER" />
</intent-filter>
</activity>

</application>
</manifest>


Download the files.

Sunday, 27 March 2011

Pick a file using Intent.ACTION_GET_CONTENT

If you have to pick a file in your app, but you don't want to implement your own file explorer; you can start a activity with intent of Intent.ACTION_GET_CONTENT. Android OS will choice a suitable app with such function for you.

Pick a file using Intent.ACTION_GET_CONTENT

package com.exercise.AndroidPick_a_File;

import android.app.Activity;
import android.content.Intent;
import android.os.Bundle;
import android.view.View;
import android.widget.Button;
import android.widget.TextView;

public class AndroidPick_a_File extends Activity {

TextView textFile;

private static final int PICKFILE_RESULT_CODE = 1;

/** Called when the activity is first created. */
@Override
public void onCreate(Bundle savedInstanceState) {
super.onCreate(savedInstanceState);
setContentView(R.layout.main);

Button buttonPick = (Button)findViewById(R.id.buttonpick);
textFile = (TextView)findViewById(R.id.textfile);

buttonPick.setOnClickListener(new Button.OnClickListener(){

@Override
public void onClick(View arg0) {
// TODO Auto-generated method stub

Intent intent = new Intent(Intent.ACTION_GET_CONTENT);
intent.setType("file/*");
startActivityForResult(intent,PICKFILE_RESULT_CODE);

}});
}

@Override
protected void onActivityResult(int requestCode, int resultCode, Intent data) {
// TODO Auto-generated method stub
switch(requestCode){
case PICKFILE_RESULT_CODE:
if(resultCode==RESULT_OK){
String FilePath = data.getData().getPath();
textFile.setText(FilePath);
}
break;

}
}
}


main.xml
<?xml version="1.0" encoding="utf-8"?>
<LinearLayout xmlns:android="http://schemas.android.com/apk/res/android"
android:orientation="vertical"
android:layout_width="fill_parent"
android:layout_height="fill_parent"
>
<TextView
android:layout_width="fill_parent"
android:layout_height="wrap_content"
android:text="@string/hello"
/>
<Button
android:id="@+id/buttonpick"
android:layout_width="fill_parent"
android:layout_height="wrap_content"
android:text="- PICK a file -"
/>
<TextView
android:id="@+id/textfile"
android:layout_width="fill_parent"
android:layout_height="wrap_content"
/>
</LinearLayout>


Download the files.

Related:
- More for Pick a file using Intent.ACTION_GET_CONTENT

Send SMS in Alarm Service at a pre-defined time

In former exercises, it have been shown how to "Send SMS using android.telephony.SmsManager" and "A simple example of Alarm Service, using AlarmManager".

It's a exercise merge them together, start a alarm service in a pre-defined time (10 second), and send SMS using SmsManager inside service when time reached.

Send SMS in Alarm Service at a pre-defined time

In the main activity, data can be passed as bundle as normal.
But there are no getIntent().getExtras() in Service class! It can be retrieved in onStart() call-back method, it will be passed as parameter.

main.xml
<?xml version="1.0" encoding="utf-8"?>
<LinearLayout xmlns:android="http://schemas.android.com/apk/res/android"
android:orientation="vertical"
android:layout_width="fill_parent"
android:layout_height="fill_parent"
>
<TextView
android:layout_width="fill_parent"
android:layout_height="wrap_content"
android:text="@string/hello"
/>
<TextView
android:layout_width="fill_parent"
android:layout_height="wrap_content"
android:text="Enter Phone Number:"
/>
<EditText
android:id="@+id/smsnumber"
android:layout_width="fill_parent"
android:layout_height="wrap_content"
android:inputType="phone"
/>
<TextView
android:layout_width="fill_parent"
android:layout_height="wrap_content"
android:text="Enter Phone SMS Text:"
/>
<EditText
android:id="@+id/smstext"
android:layout_width="fill_parent"
android:layout_height="wrap_content"
/>
<Button
android:id="@+id/startalarm"
android:layout_width="fill_parent"
android:layout_height="wrap_content"
android:text="Start"
/>
<Button
android:id="@+id/cancelalarm"
android:layout_width="fill_parent"
android:layout_height="wrap_content"
android:text="Cancel"
/>
</LinearLayout>


main activity AndroidAlarmSMS.java
package com.exercise.AndroidAlarmSMS;

import java.util.Calendar;

import android.app.Activity;
import android.app.AlarmManager;
import android.app.PendingIntent;
import android.content.Intent;
import android.os.Bundle;
import android.view.View;
import android.widget.Button;
import android.widget.EditText;
import android.widget.Toast;

public class AndroidAlarmSMS extends Activity {

String smsNumber, smsText;
private PendingIntent pendingIntent;

/** Called when the activity is first created. */
@Override
public void onCreate(Bundle savedInstanceState) {
super.onCreate(savedInstanceState);
setContentView(R.layout.main);
final EditText edittextSmsNumber = (EditText)findViewById(R.id.smsnumber);
final EditText edittextSmsText = (EditText)findViewById(R.id.smstext);

Button buttonStart = (Button)findViewById(R.id.startalarm);
Button buttonCancel = (Button)findViewById(R.id.cancelalarm);

buttonStart.setOnClickListener(new Button.OnClickListener(){

@Override
public void onClick(View arg0) {
// TODO Auto-generated method stub
smsNumber = edittextSmsNumber.getText().toString();
smsText = edittextSmsText.getText().toString();

Intent myIntent = new Intent(AndroidAlarmSMS.this, MyAlarmService.class);

Bundle bundle = new Bundle();
bundle.putCharSequence("extraSmsNumber", smsNumber);
bundle.putCharSequence("extraSmsText", smsText);
myIntent.putExtras(bundle);

pendingIntent = PendingIntent.getService(AndroidAlarmSMS.this, 0, myIntent, 0);

AlarmManager alarmManager = (AlarmManager)getSystemService(ALARM_SERVICE);

Calendar calendar = Calendar.getInstance();
calendar.setTimeInMillis(System.currentTimeMillis());
calendar.add(Calendar.SECOND, 10);
alarmManager.set(AlarmManager.RTC_WAKEUP, calendar.getTimeInMillis(), pendingIntent);

Toast.makeText(AndroidAlarmSMS.this,
"Start Alarm with \n" +
"smsNumber = " + smsNumber + "\n" +
"smsText = " + smsText,
Toast.LENGTH_LONG).show();

}});

buttonCancel.setOnClickListener(new Button.OnClickListener(){

@Override
public void onClick(View arg0) {
// TODO Auto-generated method stub
AlarmManager alarmManager = (AlarmManager)getSystemService(ALARM_SERVICE);
alarmManager.cancel(pendingIntent);
Toast.makeText(AndroidAlarmSMS.this, "Cancel!", Toast.LENGTH_LONG).show();

}});
}

}


the service, MyAlarmService.java
package com.exercise.AndroidAlarmSMS;

import android.app.Service;
import android.content.Intent;
import android.os.Bundle;
import android.os.IBinder;
import android.telephony.SmsManager;
import android.widget.Toast;

public class MyAlarmService extends Service {

String smsNumberToSend, smsTextToSend;

@Override
public void onCreate() {
// TODO Auto-generated method stub

Toast.makeText(this, "MyAlarmService.onCreate()", Toast.LENGTH_LONG).show();
}

@Override
public IBinder onBind(Intent arg0) {
// TODO Auto-generated method stub
Toast.makeText(this, "MyAlarmService.onBind()", Toast.LENGTH_LONG).show();
return null;
}

@Override
public void onDestroy() {
// TODO Auto-generated method stub
super.onDestroy();
Toast.makeText(this, "MyAlarmService.onDestroy()", Toast.LENGTH_LONG).show();
}

@Override
public void onStart(Intent intent, int startId) {
// TODO Auto-generated method stub
super.onStart(intent, startId);

Bundle bundle = intent.getExtras();
smsNumberToSend = (String) bundle.getCharSequence("extraSmsNumber");
smsTextToSend = (String) bundle.getCharSequence("extraSmsText");

Toast.makeText(this, "MyAlarmService.onStart()", Toast.LENGTH_LONG).show();
Toast.makeText(this,
"MyAlarmService.onStart() with \n" +
"smsNumberToSend = " + smsNumberToSend + "\n" +
"smsTextToSend = " + smsTextToSend,
Toast.LENGTH_LONG).show();

SmsManager smsManager = SmsManager.getDefault();
smsManager.sendTextMessage(smsNumberToSend, null, smsTextToSend, null, null);
}

@Override
public boolean onUnbind(Intent intent) {
// TODO Auto-generated method stub
Toast.makeText(this, "MyAlarmService.onUnbind()", Toast.LENGTH_LONG).show();
return super.onUnbind(intent);
}

}


Modify AndroidManifest.xml to add <service android:name=".MyAlarmService" />
<?xml version="1.0" encoding="utf-8"?>
<manifest xmlns:android="http://schemas.android.com/apk/res/android"
package="com.exercise.AndroidAlarmSMS"
android:versionCode="1"
android:versionName="1.0">
<uses-sdk android:minSdkVersion="4" />

<application android:icon="@drawable/icon" android:label="@string/app_name">
<activity android:name=".AndroidAlarmSMS"
android:label="@string/app_name">
<intent-filter>
<action android:name="android.intent.action.MAIN" />
<category android:name="android.intent.category.LAUNCHER" />
</intent-filter>
</activity>
<service android:name=".MyAlarmService" />
</application>
<uses-permission android:name="android.permission.SEND_SMS"></uses-permission>
</manifest>


Download the files.

Saturday, 26 March 2011

iOS 4.3.1 Support for iPhone4, 3GS, iPad1 & 2, iPod 3 & 4

TinyUmbrella now supports 4.3.1 for the relevant devices. Currently only iPhone 4 for verizon does not have 4.3.1 support (as there is no 4.3.1 available for the verizon iphone). Enjoy!

Friday, 25 March 2011

How to Permanently Block Sites from Your Google Search

Google LogoSharon Vaknin at CNET has created a very nice short demo on how to permanently block sites from your Google search.

CNet: How to Permanently Block Sites from Your Google Search

I am very glad Sharon made this video, because I am not sure I would have figured it out otherwise. lol. Note that this only blocks the site for you if you are logged into a Google account. In addition, it is only customized for you. Google will use this as a data point but may or may not use this information to remove sites from search results.


As I have written before, I fully expect link farms to try to use this feature to block good sites from search results. Hopefully, Google can combat such efforts.

How to Contact AT&T Customer Service

This might seem a bit silly. But I tried to find a customer support phone number on the AT&T Site. In the end, I had to Google it.


Here is the page:

AT&T Wireless Customer Support Page


And the number:

Customer Service 1-800-331-0500


Update: On another humorous note, my first attempt to look up the number was on my iPhone. I discovered AT&T does not yet have a mobile version of their site. Of course neither does Apple. lol.

Thursday, 24 March 2011

Google Delaying Open Source Release of Honeycomb

iPhone iPad picture

According to Mashable, Google is indefinitely delaying the open sourcing of Honeycomb release of Android. The concern is that this version, designed for tablets, will not work well with mobile phones. So they want to address these issues before a general release.


That sounds reasonable, but I'm not sure how will it will go over with the open source community.

Wednesday, 23 March 2011

Send email using Intent.ACTION_SEND

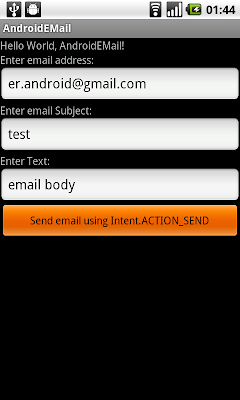
A example to send email using Intent.ACTION_SEND.

Send email using Intent.ACTION_SEND

<?xml version="1.0" encoding="utf-8"?>
<LinearLayout xmlns:android="http://schemas.android.com/apk/res/android"
android:orientation="vertical"
android:layout_width="fill_parent"
android:layout_height="fill_parent"
>
<TextView
android:layout_width="fill_parent"
android:layout_height="wrap_content"
android:text="@string/hello"
/>
<TextView
android:layout_width="fill_parent"
android:layout_height="wrap_content"
android:text="Enter email address:"
/>
<EditText
android:id="@+id/email_address"
android:layout_width="fill_parent"
android:layout_height="wrap_content"
android:inputType="textEmailAddress"
/>
<TextView
android:layout_width="fill_parent"
android:layout_height="wrap_content"
android:text="Enter email Subject:"
/>
<EditText
android:id="@+id/email_subject"
android:layout_width="fill_parent"
android:layout_height="wrap_content"
android:inputType="textEmailSubject"
/>
<TextView
android:layout_width="fill_parent"
android:layout_height="wrap_content"
android:text="Enter Text:"
/>
<EditText
android:id="@+id/email_text"
android:layout_width="fill_parent"
android:layout_height="wrap_content"
/>
<Button
android:id="@+id/sendemail_intent"
android:layout_width="fill_parent"
android:layout_height="wrap_content"
android:text=" Send email using Intent.ACTION_SEND "
/>
</LinearLayout>


package com.exercise.AndroidEMail;

import android.app.Activity;
import android.content.Intent;
import android.os.Bundle;
import android.view.View;
import android.widget.Button;
import android.widget.EditText;

public class AndroidEMail extends Activity {
/** Called when the activity is first created. */
@Override
public void onCreate(Bundle savedInstanceState) {
super.onCreate(savedInstanceState);
setContentView(R.layout.main);

final EditText edittextEmailAddress = (EditText)findViewById(R.id.email_address);
final EditText edittextEmailSubject = (EditText)findViewById(R.id.email_subject);
final EditText edittextEmailText = (EditText)findViewById(R.id.email_text);
Button buttonSendEmail_intent = (Button)findViewById(R.id.sendemail_intent);

buttonSendEmail_intent.setOnClickListener(new Button.OnClickListener(){

@Override
public void onClick(View arg0) {
// TODO Auto-generated method stub

String emailAddress = edittextEmailAddress.getText().toString();
String emailSubject = edittextEmailSubject.getText().toString();
String emailText = edittextEmailText.getText().toString();

String emailAddressList[] = {emailAddress};

Intent intent = new Intent(Intent.ACTION_SEND);
intent.setType("plain/text");
intent.putExtra(Intent.EXTRA_EMAIL, emailAddressList);
intent.putExtra(Intent.EXTRA_SUBJECT, emailSubject);
intent.putExtra(Intent.EXTRA_TEXT, emailText);
startActivity(Intent.createChooser(intent, "Choice App t send email:"));

}});
}
}


Download the files.

Related article:
- No applications can perform this action - Check Instent available and force to install
- Send email with Image by starting activity using Intent of ACTION_SEND

TinyUmbrella - Tiny update for AppleTV 4.3.1

Added 8F202/4.3.1 support for AppleTV 2. No other changes to report. I'm working on a complete rewrite for TinyUmbrella. Goals for the rewrite include: MUCH better linux support, unified device access across platforms, simple and elegant UI, automatic support of new firmware.

All of this will take some work, but will take a little bit of time. Bear with me!

TinyPwn is coming along - I've put HFS* support on the back-burner while I work on my unified device access library. It's still a long way off so thank you all for your continued support. You guys rock!

Send SMS using Intent.ACTION_SENDTO

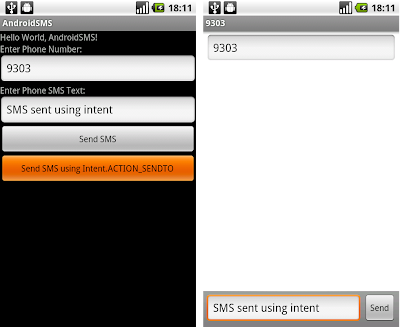
In last exercise, how to "Send SMS using android.telephony.SmsManager" is shown. Alternatively, we can startActivity with Intent.ACTION_SENDTO; the default SMS app will be called out to handle the job. In this method, it's no need to grant permission of "android.permission.SEND_SMS".

Send SMS using Intent.ACTION_SENDTO

Modify main.xml from last exercise "Send SMS using android.telephony.SmsManager" to add a button to startActivity with Intent.ACTION_SENDTO.
<?xml version="1.0" encoding="utf-8"?>
<LinearLayout xmlns:android="http://schemas.android.com/apk/res/android"
android:orientation="vertical"
android:layout_width="fill_parent"
android:layout_height="fill_parent"
>
<TextView
android:layout_width="fill_parent"
android:layout_height="wrap_content"
android:text="@string/hello"
/>
<TextView
android:layout_width="fill_parent"
android:layout_height="wrap_content"
android:text="Enter Phone Number:"
/>
<EditText
android:id="@+id/smsnumber"
android:layout_width="fill_parent"
android:layout_height="wrap_content"
android:inputType="phone"
/>
<TextView
android:layout_width="fill_parent"
android:layout_height="wrap_content"
android:text="Enter Phone SMS Text:"
/>
<EditText
android:id="@+id/smstext"
android:layout_width="fill_parent"
android:layout_height="wrap_content"
/>
<Button
android:id="@+id/sendsms"
android:layout_width="fill_parent"
android:layout_height="wrap_content"
android:text=" Send SMS "
/>
<Button
android:id="@+id/sendsms_intent"
android:layout_width="fill_parent"
android:layout_height="wrap_content"
android:text=" Send SMS using Intent.ACTION_SENDTO "
/>
</LinearLayout>


Modify the code, AndroidSMS.java.
package com.exercise.AndroidSMS;

import android.app.Activity;
import android.content.Intent;
import android.net.Uri;
import android.os.Bundle;
import android.telephony.SmsManager;
import android.view.View;
import android.widget.Button;
import android.widget.EditText;

public class AndroidSMS extends Activity {
/** Called when the activity is first created. */
@Override
public void onCreate(Bundle savedInstanceState) {
super.onCreate(savedInstanceState);
setContentView(R.layout.main);

final EditText edittextSmsNumber = (EditText)findViewById(R.id.smsnumber);
final EditText edittextSmsText = (EditText)findViewById(R.id.smstext);
Button buttonSendSms = (Button)findViewById(R.id.sendsms);
Button buttonSendSms_intent = (Button)findViewById(R.id.sendsms_intent);

buttonSendSms.setOnClickListener(new Button.OnClickListener(){

@Override
public void onClick(View arg0) {
// TODO Auto-generated method stub
SmsManager smsManager = SmsManager.getDefault();
String smsNumber = edittextSmsNumber.getText().toString();
String smsText = edittextSmsText.getText().toString();
smsManager.sendTextMessage(smsNumber, null, smsText, null, null);
}});

buttonSendSms_intent.setOnClickListener(new Button.OnClickListener(){

@Override
public void onClick(View arg0) {
// TODO Auto-generated method stub

String smsNumber = edittextSmsNumber.getText().toString();
String smsText = edittextSmsText.getText().toString();

Uri uri = Uri.parse("smsto:" + smsNumber);
Intent intent = new Intent(Intent.ACTION_SENDTO, uri);
intent.putExtra("sms_body", smsText);
startActivity(intent);
}});
}
}


Download the files.

Tuesday, 22 March 2011

Why The AT&T & T-Mobile Deal Won�t Change the Industry

Why The AT&T & T-Mobile Deal Won�t Change the Industry - Mashable - Christina Warren


Christina Warren over at Mashable has a great write up on the proposed AT&T and T-Mobile Merger. A balanced article compared to most of the biased anti-merger reporting by most of the tech media. From the article.


Reports indicate that T-Mobile USA�s churn rate � the number of customers who leave the system for another provider � is around 25% per year. That�s double the industry average. We�ve seen numbers that indicate that T-Mobile�s churn is even higher than that. Customers are consistently choosing more expensive carriers over T-Mobile.


If T-Mobile is so great, why are they losing so many customers? Why does Deutsche Telekom want to sell this wonderful business? Because T-Mobile is not doing that great. Someone is gonna buy up T-Mobile, let the market decide.


Disclosure: The author of this post has a small financial interest in AT&T.

Samsung's Galaxy Player - Android-based iPod Touch

iPhone iPad pictureHands on with Samsung's Android-based Galaxy Players | Crave - CNET


Samsung hosted a hands on event last week introducing the Galaxy Player 4" and 5" devices. These are Android based iPod Touches. All the features of an iPod, just bigger.


It surprises me how long it has taken the Android hardware manufacturers to come out with devices like this. I would love to have an Android device to try out. However, spending $600 or more to buy a full featured phone that I do not need, seems a bit foolish to me. A $200 or $300 Wifi based iPod Touch device makes a lot more sense. There has to be thousands of developers and gadget hobbyists out there like me.


Anyway, more updates to come as we still do not have a price or release date.

Where is the Insert Key on Mac Metal Chiclet Keyboard?

I ran into a problem this morning. I needed to edit the command line in Windows 7 and insert some text. On a Windows/PC keyboard this is easy, just hit the Insert key.


However, I am using a MacBook Pro with an Apple brushed metal chiclet USB keyboard. There is no Insert Key. On older Mac Keyboards you could just use the Help key. But there is no Help key. lol. The answer is in the help documentation, but its buried deep. So here it is.


Insert Key on Mac Keyboard

Old Mac Keyboards: Help key

New Mac Keyboard: Function-Return


You could call it Function-Enter too, but my keyboard says "Return" on the enter key. Anyway, works like a champ for me. Thought I would share to save some other people a little time.

Send SMS using android.telephony.SmsManager

Android OS provide android.telephony.SmsManager, to manages SMS operations such as sending data, text, and pdu SMS messages. Get this object by calling the static method SmsManager.getDefault(). Here is a example to send SMS sing android.telephony.SmsManager.

Send SMS using android.telephony.SmsManager

Modify main.xml to have two EditText for user to enter phone number and text.
<?xml version="1.0" encoding="utf-8"?>
<LinearLayout xmlns:android="http://schemas.android.com/apk/res/android"
android:orientation="vertical"
android:layout_width="fill_parent"
android:layout_height="fill_parent"
>
<TextView
android:layout_width="fill_parent"
android:layout_height="wrap_content"
android:text="@string/hello"
/>
<TextView
android:layout_width="fill_parent"
android:layout_height="wrap_content"
android:text="Enter Phone Number:"
/>
<EditText
android:id="@+id/smsnumber"
android:layout_width="fill_parent"
android:layout_height="wrap_content"
android:inputType="phone"
/>
<TextView
android:layout_width="fill_parent"
android:layout_height="wrap_content"
android:text="Enter Phone SMS Text:"
/>
<EditText
android:id="@+id/smstext"
android:layout_width="fill_parent"
android:layout_height="wrap_content"
/>
<Button
android:id="@+id/sendsms"
android:layout_width="fill_parent"
android:layout_height="wrap_content"
android:text=" Send SMS "
/>
</LinearLayout>


main code, AndroidSMS.java
package com.exercise.AndroidSMS;

import android.app.Activity;
import android.os.Bundle;
import android.telephony.SmsManager;
import android.view.View;
import android.widget.Button;
import android.widget.EditText;

public class AndroidSMS extends Activity {
/** Called when the activity is first created. */
@Override
public void onCreate(Bundle savedInstanceState) {
super.onCreate(savedInstanceState);
setContentView(R.layout.main);

final EditText edittextSmsNumber = (EditText)findViewById(R.id.smsnumber);
final EditText edittextSmsText = (EditText)findViewById(R.id.smstext);
Button buttonSendSms = (Button)findViewById(R.id.sendsms);

buttonSendSms.setOnClickListener(new Button.OnClickListener(){

@Override
public void onClick(View arg0) {
// TODO Auto-generated method stub
SmsManager smsManager = SmsManager.getDefault();
String smsNumber = edittextSmsNumber.getText().toString();
String smsText = edittextSmsText.getText().toString();
smsManager.sendTextMessage(smsNumber, null, smsText, null, null);
}});
}
}


Modify AndroidManifest.xml to grant permission of "android.permission.SEND_SMS".
<?xml version="1.0" encoding="utf-8"?>
<manifest xmlns:android="http://schemas.android.com/apk/res/android"
package="com.exercise.AndroidSMS"
android:versionCode="1"
android:versionName="1.0">
<uses-sdk android:minSdkVersion="4" />
<application android:icon="@drawable/icon" android:label="@string/app_name">
<activity android:name=".AndroidSMS"
android:label="@string/app_name">
<intent-filter>
<action android:name="android.intent.action.MAIN" />
<category android:name="android.intent.category.LAUNCHER" />
</intent-filter>
</activity>
</application>
<uses-permission android:name="android.permission.SEND_SMS"></uses-permission>
</manifest>


Download the files.

Related Articles:
- Send SMS using Intent.ACTION_SENDTO
- Send SMS in Alarm Service at a pre-defined time

Monday, 21 March 2011

ViewFlipper Animation

ViewFlipper is a subclass of android.widget.ViewAnimator, so we can apply Animation on ViewFlipper also. Here is a example; the ViwFlipper change in shifting from one view to another view slowly.

create a folder /res/anim, create two xml file to define the flip-in and flip-out animation.
/res/anim/flipin.xml
<?xml version="1.0" encoding="utf-8"?>
<set xmlns:android="http://schemas.android.com/apk/res/android"
android:interpolator="@android:anim/decelerate_interpolator">
<translate
android:fromXDelta="-100%"
android:toXDelta="0%"
android:duration="500" />
</set>


/res/anim/flipout.xml
<?xml version="1.0" encoding="utf-8"?>
<set xmlns:android="http://schemas.android.com/apk/res/android"
android:interpolator="@android:anim/decelerate_interpolator">
<translate
android:fromXDelta="0%"
android:toXDelta="100%"
android:duration="500" />
</set>


main.xml (It's sam as that in the exercise "ViewFlipper")
<?xml version="1.0" encoding="utf-8"?>
<LinearLayout xmlns:android="http://schemas.android.com/apk/res/android"
android:orientation="vertical"
android:layout_width="fill_parent"
android:layout_height="fill_parent"
>
<TextView
android:layout_width="fill_parent"
android:layout_height="wrap_content"
android:text="@string/hello"
/>
<ViewFlipper
android:id="@+id/viewflipper"
android:layout_width="fill_parent"
android:layout_height="fill_parent">
<LinearLayout
android:layout_width="fill_parent"
android:layout_height="wrap_content"
android:orientation="vertical">
<TextView
android:layout_width="wrap_content"
android:layout_height="wrap_content"
android:text="First Screen"/>
<Button
android:id="@+id/button1"
android:layout_width="fill_parent"
android:layout_height="wrap_content"
android:text="Flip to second page"/>
</LinearLayout>
<LinearLayout
android:layout_width="fill_parent"
android:layout_height="fill_parent"
android:orientation="vertical">
<TextView
android:layout_width="wrap_content"
android:layout_height="wrap_content"
android:text="Second Screen"/>
<Button
android:id="@+id/button2"
android:layout_width="fill_parent"
android:layout_height="fill_parent"
android:text="Flip back"/>
</LinearLayout>
</ViewFlipper>
</LinearLayout>


main code, AndroidViewFlipper.java
package com.exercise.AndroidViewFlipper;

import android.app.Activity;
import android.os.Bundle;
import android.view.View;
import android.view.animation.Animation;
import android.view.animation.AnimationUtils;
import android.widget.Button;
import android.widget.ViewFlipper;

public class AndroidViewFlipper extends Activity {

/** Called when the activity is first created. */
@Override
public void onCreate(Bundle savedInstanceState) {
super.onCreate(savedInstanceState);
setContentView(R.layout.main);
final ViewFlipper MyViewFlipper = (ViewFlipper)findViewById(R.id.viewflipper);
Button button1 = (Button)findViewById(R.id.button1);
Button button2 = (Button)findViewById(R.id.button2);

Animation animationFlipIn = AnimationUtils.loadAnimation(this, R.anim.flipin);
Animation animationFlipOut = AnimationUtils.loadAnimation(this, R.anim.flipout);
MyViewFlipper.setInAnimation(animationFlipIn);
MyViewFlipper.setOutAnimation(animationFlipOut);

button1.setOnClickListener(new Button.OnClickListener(){

@Override
public void onClick(View arg0) {
// TODO Auto-generated method stub
MyViewFlipper.showNext();
}});

button2.setOnClickListener(new Button.OnClickListener(){

@Override
public void onClick(View arg0) {
// TODO Auto-generated method stub
MyViewFlipper.showPrevious();
}});
}
}


Download the files.

This is the MacBook Air Alternative You've Been Looking For: Lenovo X120e

Yes folks, this is the MacBook Air alternative you have been looking for.


Lenovo X120e


Ever since the MacBook Air came out last fall, I have been looking for a comparable PC alternative. Don't get me wrong, the MacBook Air is a wonderful machine. Fast, amazingly light, and elegant, the Air has everything you want in a laptop. However, after configuring the Air with everything I want, the machine costs north of $1500. Ouch!


The Lenovo X120e provides a PC/Windows 7 alternative. With models starting at $399 and $449, the X120e provides a lot of the bang for the buck. Features include:

  • AMD Fusion E-240 or E350 Dual Core Processor with build in GPU (Deep Dive into Processor Here)

  • 11.6" Matte Screen. Yes folks a matte screen! (For those of us who use our screen for reading and not combing our hair.) The 1366x768 resolution screen is sharp and clear.

  • At 2.93 lbs, its super light. Not quite as light as the 2.3lbs of an Air, but close enough.

  • Super responsive keyboard. This is the nicest ultra-portable keyboard I have encountered. A springy feel and a really nice layout.

  • Battery life is really good. About 3 hrs on the 3 cell and twice that on the 6 cell. With the included utilities, power consumption is very configurable. So you can get a little more life or a little less depending upon the configured power consumption.

  • A really solid feel to the system. Everything feels sturdy, from the keyboard to the screen hinge.

  • Choice of Windows 7 32 bit or 64 bit.

So those are the highlights as I see them. The only feature I would like to see added is a backlit keyboard. But the Air does not have that feature either.


Anyway, if you are looking for an ultra portable laptop you can carry around all day on those long business trips, give this machine a look. I think you will like it.

Sunday, 20 March 2011

Auto flipping of ViewFlipper

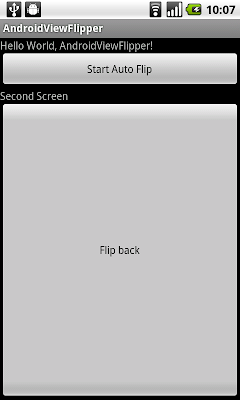
Further work on the last exercise "ViewFlipper", we can start and stop auto flipping of ViewFlipper by calling function startFlipping() and stopFlipping(), on interval set by function setFlipInterval(int milliseconds), and the state of flipping can be read by calling function isFlipping().

Auto flipping of ViewFlipper

Modify the layout, main.xml, to add a button to toggle flipping
<?xml version="1.0" encoding="utf-8"?>
<LinearLayout xmlns:android="http://schemas.android.com/apk/res/android"
android:orientation="vertical"
android:layout_width="fill_parent"
android:layout_height="fill_parent"
>
<TextView
android:layout_width="fill_parent"
android:layout_height="wrap_content"
android:text="@string/hello"
/>
<Button
android:id="@+id/buttonautoflip"
android:layout_width="fill_parent"
android:layout_height="wrap_content"
android:text="Start Auto Flip"/>
<ViewFlipper
android:id="@+id/viewflipper"
android:layout_width="fill_parent"
android:layout_height="fill_parent">
<LinearLayout
android:layout_width="fill_parent"
android:layout_height="wrap_content"
android:orientation="vertical">
<TextView
android:layout_width="wrap_content"
android:layout_height="wrap_content"
android:text="First Screen"/>
<Button
android:id="@+id/button1"
android:layout_width="fill_parent"
android:layout_height="wrap_content"
android:text="Flip to second page"/>
</LinearLayout>
<LinearLayout
android:layout_width="fill_parent"
android:layout_height="fill_parent"
android:orientation="vertical">
<TextView
android:layout_width="wrap_content"
android:layout_height="wrap_content"
android:text="Second Screen"/>
<Button
android:id="@+id/button2"
android:layout_width="fill_parent"
android:layout_height="fill_parent"
android:text="Flip back"/>
</LinearLayout>
</ViewFlipper>
</LinearLayout>


main code, AndroidViewFlipper.java
package com.exercise.AndroidViewFlipper;

import android.app.Activity;
import android.os.Bundle;
import android.view.View;
import android.widget.Button;
import android.widget.ViewFlipper;

public class AndroidViewFlipper extends Activity {

/** Called when the activity is first created. */
@Override
public void onCreate(Bundle savedInstanceState) {
super.onCreate(savedInstanceState);
setContentView(R.layout.main);
final ViewFlipper MyViewFlipper = (ViewFlipper)findViewById(R.id.viewflipper);
final Button buttonAutoFlip = (Button)findViewById(R.id.buttonautoflip);
//Button button1 = (Button)findViewById(R.id.button1);
//Button button2 = (Button)findViewById(R.id.button2);

MyViewFlipper.setFlipInterval(500);
buttonAutoFlip.setOnClickListener(new Button.OnClickListener(){

@Override
public void onClick(View arg0) {
// TODO Auto-generated method stub

if(MyViewFlipper.isFlipping()){
MyViewFlipper.stopFlipping();
buttonAutoFlip.setText("Start Auto Flip");
}else{
MyViewFlipper.startFlipping();
buttonAutoFlip.setText("Stop Auto Flip");
}


}});


}
}


Download the files.

next:
- ViewFlipper Animation


A New Affiliate for Books, eBooks, DVDs and Music

Find books fast I want to welcome Barnes and Noble as the new book, ebook, dvd, music, and toy affiliate for Blue Sky Workshop. Not all my product and book links have been updated, but a number of them have been. All of my web sites should be updated in the next couple of weeks.


It's nice to be an affiliate of a company who's stores I actually frequent and enjoy.


So welcome Barnes and Noble and thanks!

How To Pages Updated

Over this weekend, I updated all of my how to pages on http://blueskyworkshop.com. The main change is new and improved PHP templates. The changes were necessary to update all my Google search boxes to a new format. I also discovered I had left out the Google Analytics telemetry out of my Java Pages. All that is fixed now.


The topics are linked on the right side of the page and also here.


Saturday, 19 March 2011

FixRecovery Updated - 4.3 supported

I've set up a couple downloads for the external fixrecovery app (based on the amazing greenpois0n by Chronic-Dev) These zip files contain windows and osx executables for 4.2.1 and 4.3. Unfortunately, there isn't currently a way for me to put all of this in a single executable. I'm working on packaging this all together with TinyUmbrella but it's tedious since it requires separate executables currently. I'll clean that up soon. I just wanted you all to have the ability to RESTORE your iPhone 4 to 4.3 and keep your 01.59 baseband and be able to get out of the ensuing recovery loop.


USAGE:


  1. Once you've restored your device to 4.2.1 or 4.3 and have entered the dreaded 'recovery loop'

  2. KILL ITUNES

  3. Put your device into DFU

  4. Run the appropriate executable ie. fixrecovery421 for 4.2.1

  5. ...???

  6. Profit - you should see the activation screen shortly...

Note that this app does /NOT/ hactivate. You must have a valid/official sim to activate your phone.


Enjoy

Friday, 18 March 2011

ViewFlipper

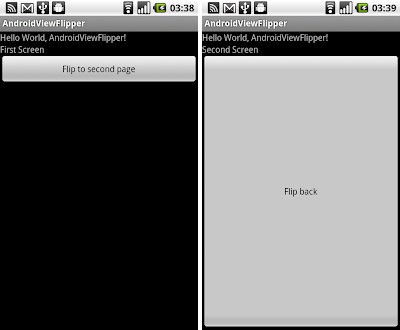
ViewFlipper is a simple ViewAnimator that will animate between two or more views that have been added to it. Only one child is shown at a time. If requested, can automatically flip between each child at a regular interval.

Here is a simple example to implement ViewFlipper.

ViewFlipper

Modify main.xml to have a ViewFlipper, with two LinearLayout inside.
<?xml version="1.0" encoding="utf-8"?>
<LinearLayout xmlns:android="http://schemas.android.com/apk/res/android"
android:orientation="vertical"
android:layout_width="fill_parent"
android:layout_height="fill_parent"
>
<TextView
android:layout_width="fill_parent"
android:layout_height="wrap_content"
android:text="@string/hello"
/>
<ViewFlipper
android:id="@+id/viewflipper"
android:layout_width="fill_parent"
android:layout_height="fill_parent">
<LinearLayout
android:layout_width="fill_parent"
android:layout_height="wrap_content"
android:orientation="vertical">
<TextView
android:layout_width="wrap_content"
android:layout_height="wrap_content"
android:text="First Screen"/>
<Button
android:id="@+id/button1"
android:layout_width="fill_parent"
android:layout_height="wrap_content"
android:text="Flip to second page"/>
</LinearLayout>
<LinearLayout
android:layout_width="fill_parent"
android:layout_height="fill_parent"
android:orientation="vertical">
<TextView
android:layout_width="wrap_content"
android:layout_height="wrap_content"
android:text="Second Screen"/>
<Button
android:id="@+id/button2"
android:layout_width="fill_parent"
android:layout_height="fill_parent"
android:text="Flip back"/>
</LinearLayout>
</ViewFlipper>
</LinearLayout>


main code
package com.exercise.AndroidViewFlipper;

import android.app.Activity;
import android.os.Bundle;
import android.view.View;
import android.widget.Button;
import android.widget.ViewFlipper;

public class AndroidViewFlipper extends Activity {
/** Called when the activity is first created. */
@Override
public void onCreate(Bundle savedInstanceState) {
super.onCreate(savedInstanceState);
setContentView(R.layout.main);
final ViewFlipper MyViewFlipper = (ViewFlipper)findViewById(R.id.viewflipper);
Button button1 = (Button)findViewById(R.id.button1);
Button button2 = (Button)findViewById(R.id.button2);

button1.setOnClickListener(new Button.OnClickListener(){

@Override
public void onClick(View arg0) {
// TODO Auto-generated method stub
MyViewFlipper.showNext();
}});

button2.setOnClickListener(new Button.OnClickListener(){

@Override
public void onClick(View arg0) {
// TODO Auto-generated method stub
MyViewFlipper.showPrevious();
}});

}
}


Download the files.

next:
- Auto flipping of ViewFlipper
- ViewFlipper Animation

Wednesday, 16 March 2011

Jeff Prosise's Blog : Using HTML5 Web Storage for Interprocess Communication


This article is a real deep dive into HTML5's local storage feature. Regular features are are covered along with the how to use interprocess communication.


Jeff Prosise's Blog : Using HTML5 Web Storage for Interprocess Communication

Tuesday, 15 March 2011

North Denver iPad Supply Intel Report

iPhone iPad pictureDue to work and family obligations, I was unable to wait in line for an iPad 2 on Friday. So starting about 5:15pm I hit my first North Denver store. I didn't get an iPad 2 but I did talk to a lot of people.


  • Target stores got 5 Wifi-only iPad 2's each. I checked 2 stores and both had the same number of iPads and sold out in about 5 minutes.

  • AT&T got ZERO iPad 2's!  I was surprised. As opposed to Target the salesman there thought they would only receive 3G iPads, no Wifi.

  • Select Walmart stores got over 100 each. The store near my house got none. The sales person there thought that stores would only get single digit ships after the initial release.

  • The Flatirons Crossing Apple Store got several hundred (200 to 300) and sold out very quickly.

Based on this information put in an online order in the Apple store. I think the iPad 2 is gonna be very hard to come by in the near term.

Custom GridView

In the old exercise "GridView" show how to implement a simple GridView (like the build in Gallery app) with a simple ImageView on each grid. Here it will be modified to implement custom GridView, have a ImageView and TextView in each grid.

Custom GridView

Create a folder /res/drawable to hold the pictures.

Modify main.xml to have a GridView.
<?xml version="1.0" encoding="utf-8"?>
<GridView xmlns:android="http://schemas.android.com/apk/res/android"
android:id="@+id/gridview"
android:layout_width="fill_parent"
android:layout_height="fill_parent"
android:numColumns="auto_fit"
android:verticalSpacing="10dp"
android:horizontalSpacing="10dp"
android:columnWidth="90dp"
android:stretchMode="columnWidth"
android:gravity="center"
/>


Implement mygrid.xml in folder /res/layout/, it's the layout of individual grid.
<?xml version="1.0" encoding="utf-8"?>
<LinearLayout xmlns:android="http://schemas.android.com/apk/res/android"
android:layout_width="fill_parent"
android:layout_height="wrap_content"
android:orientation="vertical">
<ImageView
android:id="@+id/imagepart"
android:layout_width="fill_parent"
android:layout_height="wrap_content"/>
<TextView
android:id="@+id/textpart"
android:layout_width="fill_parent"
android:layout_height="wrap_content"/>
</LinearLayout>


Modify the main Java code. Modify mThumbIds to update with your own drawable rsource name.
package com.exercise.CustomGridView;

import android.app.Activity;
import android.content.Context;
import android.os.Bundle;
import android.view.LayoutInflater;
import android.view.View;
import android.view.ViewGroup;
import android.widget.BaseAdapter;
import android.widget.GridView;
import android.widget.ImageView;
import android.widget.TextView;

public class CustomGridView extends Activity {

// references to our images
private Integer[] mThumbIds = {
R.drawable.androider_01,
R.drawable.androider_02,
R.drawable.androider_03,
R.drawable.androider_04,
R.drawable.androider_05,
R.drawable.androider_06,
R.drawable.androider_07,
R.drawable.androider_08,
R.drawable.androider_09,
R.drawable.androider_10,
R.drawable.androider_11,
R.drawable.androider_12,
R.drawable.androider_13,
R.drawable.androider_14,
R.drawable.androider_15,
R.drawable.androider_16
};

public class MyAdapter extends BaseAdapter {

private Context mContext;

public MyAdapter(Context c) {
// TODO Auto-generated constructor stub
mContext = c;
}

@Override
public int getCount() {
// TODO Auto-generated method stub
return mThumbIds.length;
}

@Override
public Object getItem(int arg0) {
// TODO Auto-generated method stub
return mThumbIds[arg0];
}

@Override
public long getItemId(int arg0) {
// TODO Auto-generated method stub
return arg0;
}

@Override
public View getView(int position, View convertView, ViewGroup parent) {
// TODO Auto-generated method stub

View grid;

if(convertView==null){
grid = new View(mContext);
LayoutInflater inflater=getLayoutInflater();
grid=inflater.inflate(R.layout.mygrid, parent, false);
}else{
grid = (View)convertView;
}

ImageView imageView = (ImageView)grid.findViewById(R.id.imagepart);
TextView textView = (TextView)grid.findViewById(R.id.textpart);
imageView.setImageResource(mThumbIds[position]);
textView.setText(String.valueOf(position));

return grid;
}

}

/** Called when the activity is first created. */
@Override
public void onCreate(Bundle savedInstanceState) {
super.onCreate(savedInstanceState);
setContentView(R.layout.main);

GridView gridview = (GridView) findViewById(R.id.gridview);
gridview.setAdapter(new MyAdapter(this));

}
}


Download the files.

Monday, 14 March 2011

Google to Block Useless Sites? Well Maybe...

Google LogoGoogle announced last Friday that they are gonna allow you to block useless sites. The gist of this feature is that when a link farm shows up in your search results, a link allowing you to block that site from future results is provided. Pretty cool. This will be a great help on some of those rare searches that result in nothing but link spam.


However, there is a danger if Google wants to use this feature to improve search results. Remember the first immutable law of the Internet. The first thing spammers will do is use this feature to block any good content. It is inevitable and predictable. Hundreds of spam servers requesting that any good content be blocked.


But I expect Google will figure a counter strategy in short order.

Saturday, 12 March 2011

iOS 4.2.1 signing is really closed

Looks like Apple has stopped signing 4.2.1 for all devices that can run 4.3. As a result TinyUmbrella needs a small update (until i fix the code that handles that).


Sorry for the update. This is the last time you guys will need to update for this case. In the code, currently, I use an enum to determine the hardware and the associated 'current' iOS firmware for each hardware. Yes this is inefficient. I don't need a reminder. Tonight is not the night to fix that as it is all bundled together in a much larger refactoring that I'm smack in the middle of. This update should help those of you having problems 'saving' 4.3 while Cydia is unchecked.

Friday, 11 March 2011

iPad 2 Buying Options

iPhone iPad picture

Mac Rumors has all the details for you iPad 2 buyers out there.


In addition to the Apple Store, Wal-Mart, Target, and certain Best Buys will also be selling iPad 2s. From the article, it sounds like stores will have anywhere from a few hundred to a couple dozen.


Don't forget phone companies. AT&T and Verizon should also have some inventory.


Good luck to all the buyers out there. It sounds like there will b a 2 or 3 week wait if you have to buy online.

Thursday, 10 March 2011

Android Application Development For Dummies


The fun and friendly guide to creating applications on the Android platform

The popularity of the Android market is soaring with no sign of slowing down. The open nature of the Android OS offers programmers the freedom to access the platform's capabilities and this straightforward guide walks you through the steps for creating amazing Android applications. Android programming expert Donn Felker explains how to download the SDK, get Eclipse up and running, code Android applications, and submit your finished products to the Android Market. Featuring two sample programs, this introductory book explores everything from the simple basics to more advanced aspects of the Android platform.

  • Takes you soup through nuts of developing applications for the Android platform
  • Begins with downloading the SDK, then explains how to code Android applications and submit projects to the Android Market
  • Written by Android guru Donn Felker, who breaks every aspect of developing applications for the Android platform into easily digestible pieces

No matter your level of programming experience, Android Application Development For Dummies is an ideal guide for getting started with developing applications for the Android platform.

From the Back Cover

Here's just what you need to start developing feature-rich, amazing Android apps

Even if you've never written a mobile application, this book has the know-how you need to turn your great ideas into cool apps for the Android platform. With millions of smartphone users and a cornucopia of carriers, Android is a great place to ply the app development trade. This book shows you from the ground up how to set up your environment and create an app. Read on to become an Android developer extraordinaire!

  • Welcome to Android � learn what makes a great Android app, how to use the SDK, ways to work with mobile screens, and how the development process works

  • Make users happy � find out how to design an interface that mobile users will love

  • Learn the code � work with the activity lifecycle and Android framework classes, use the Eclipse debugger, and create a home screen widget for your app

  • Beyond the basics � take your skills up a notch with apps that involve SQLite databases and multiple screens

  • Price and publish � pick the right price for your app and get it into the Android Market

Open the book and find:

  • Cool ways to use the accelerometer in your app

  • How to turn mobile limitations into opportunities

  • Tips on installing and setting up the tools

  • Step-by-step coding directions

  • Ways to make your apps more marketable

  • How to create really useful menus

  • Advice on app pricing

  • Ten great sample apps and SDKs, including code

Learn to:

  • Create apps for hot smartphones like Droid X, Galaxy S, and MyTouch

  • Download the SDK and get Eclipse up and running

  • Code Android applications

  • Submit your apps to the Android Market


Wednesday, 9 March 2011

Welcome iPad2,1 - iPad2,2 - iPad2,3 - We can save your SHSH

TinyUmbrella now supports all three new models of iPad 2. I've also added a much-needed tweak per saurik's request. If you don't update to the latest version, you may experience /significant/ slowness when saving your SHSHs in the future. With this release, 4.3 is supported. I plan on making some changes to the UI to help out the poor saps stuck on vertical resolutions < 900. I'm also going to be removing the proxy section of the app and simply using the system proxy settings.

Enjoy!

EDIT: There have been some reports of issues on the Windows version. I've addressed the '.bak' issue as well as the Windows recovery device issue. I've also fixed (as far as I can tell) the 'fix recovery' on most Windows builds. Please let me know if you have issues.

EDIT: I had a small issue with iPad2 detection (that's what I get for putting out a version without a device to test on :) ) All should be fine now though with 4.30.02

EDIT: I've added links to the fix recovery program for windows and mac. Use this app if TinyUmbrella is not able to fix recovery for you from DFU. Put your device into DFU mode and run the fixrecovery app appropriate to your OS.