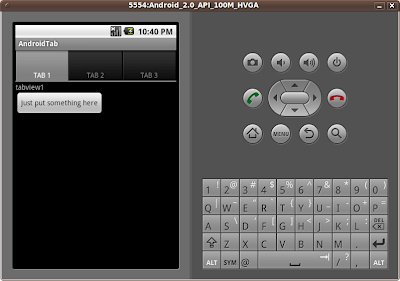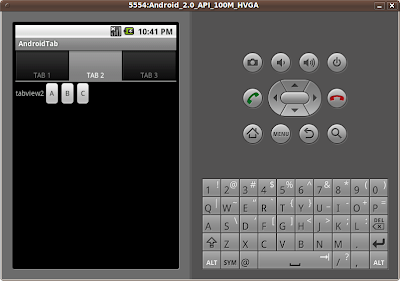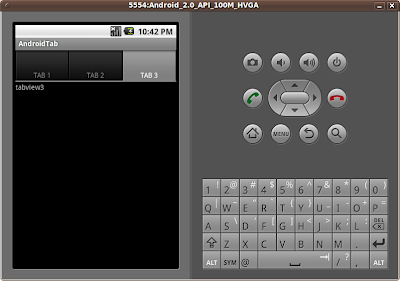


Start a new Android Application, named AndrodTab extends TabActivity.
To use TabWidget, a TabHost have to be used to contain the entire layout of the Activity. A TabHost requires two descendant elements: a TabWidget and a FrameLayout. In order to properly layout these elements, we've put them inside a vertical LinearLayout. Otherwise, the TabWidget and FrameLayout will overlay each other. The FrameLayout is where we keep the content that will change with each tab. Each child in the FrameLayout will be associated with a different tab.
Modify the main.xml
<?xml version="1.0" encoding="utf-8"?>
<TabHost xmlns:android="http://schemas.android.com/apk/res/android"
   android:id="@android:id/tabhost"
   android:layout_width="fill_parent"
   android:layout_height="fill_parent">
   <LinearLayout
       android:orientation="vertical"
       android:layout_width="fill_parent"
       android:layout_height="fill_parent">
       <TabWidget
           android:id="@android:id/tabs"
           android:layout_width="fill_parent"
           android:layout_height="wrap_content" />
       <FrameLayout
           android:id="@android:id/tabcontent"
           android:layout_width="fill_parent"
           android:layout_height="fill_parent">
           <LinearLayout
            android:orientation="vertical"
            android:layout_width="fill_parent"
               android:layout_height="fill_parent"
            android:id="@+id/tabview1">
            <TextView
                android:layout_width="wrap_content"
                android:layout_height="wrap_content"
                android:text="tabview1" />
               <Button
                android:layout_width="wrap_content"
                android:layout_height="wrap_content"
                android:text="Just put something here" />
                />
           </LinearLayout>
           <LinearLayout
            android:orientation="horizontal"
            android:layout_width="fill_parent"
               android:layout_height="fill_parent"
            android:id="@+id/tabview2">
            <TextView
                android:layout_width="wrap_content"
                android:layout_height="wrap_content"
                android:text="tabview2" />
               <Button
                android:layout_width="wrap_content"
                android:layout_height="wrap_content"
                android:text="A" />
                />
               <Button
                android:layout_width="wrap_content"
                android:layout_height="wrap_content"
                android:text="B" />
                />
               <Button
                android:layout_width="wrap_content"
                android:layout_height="wrap_content"
                android:text="C" />
                />
           </LinearLayout>
           <TextView
               android:id="@+id/tabview3"
               android:layout_width="fill_parent"
               android:layout_height="fill_parent"
               android:text="tabview3" />
       </FrameLayout>
   </LinearLayout>
</TabHost>
Finally, modify the method onCreate() in AndroidTab.java
   public void onCreate(Bundle savedInstanceState) {
       super.onCreate(savedInstanceState);
       setContentView(R.layout.main);

       TabHost mTabHost = getTabHost();

       mTabHost.addTab(mTabHost.newTabSpec("tab_test1")
         .setIndicator("TAB 1")
         .setContent(R.id.tabview1));
       mTabHost.addTab(mTabHost.newTabSpec("tab_test2")
         .setIndicator("TAB 2")
         .setContent(R.id.tabview2));
       mTabHost.addTab(mTabHost.newTabSpec("tab_test3")
         .setIndicator("TAB 3")
         .setContent(R.id.tabview3));

       mTabHost.setCurrentTab(0);
   }
getTabHost() returns a reference to the TabHost. Then call addTab() for each of the tabs to add them into the TabHost. setIndicator() set the text for the tab button, and setContent() define the View associate with the tab. At the end, call setCurrentTab() to define which tab should be opened by default.
No comments:
Post a Comment