Monday, 26 July 2010

Google Notebook is a Fantastic Journaling Tool!

Google LogoJust a quick note on a diamond in the rough dear readers. A few years ago, Google created Google NoteBook as a link sharing service. Something like Delicious I suppose. Well... as a link sharing service it was a failure and they stopped development on the project in the spring of 2009.


Well a month our two back I started playing around with the tool and realized this thing is freaking awesome as a personal journal. I keep a journal for work so I can prove what I did when the year end review comes up. Also, I like to store any sort of text data or links I may need for future reference. Google notebook is just great at this! It is easy to create individual entries. Just click and start typing. You can label each entry for easy search later. In addition, it is easy to create hierarchy to put your entries into different buckets and thus making it easy to navigate around your journal. Plus, its really easy to export the whole to HTML for safe keeping.


As an online personal journal tool, Google Notebook is pretty much perfect. So if you are interested in that sort if thing, check it out. You will be glad you did. And Google... change the name from Notebook to Journal or Diary and I think you have a hit on your hands. :)

Developing Android application on real phone

In my case, I develope on Eclipse 3.6 under Ubuntu 10.04. A HTC Wildfire have been purchased recently, so I can develope my exercises using real phone.

To setup the system, the phone and the code, refer to Google document "Developing on a Device".

If you are going to run/debug a project which have been setup to run on emulator, may be you have to unselect the preferred Android Virtual Device.

- In Eclipse, right click on the project, -> Run As -> Run Configurations...

- Select the configuration under Android Application on left, and Target on Right, un-select the preferred Android Virtual Device, and click Apply.


Play mp3 in SD Card, using Android's MediaPlayer

In the exercise "Android MediaPlayer", the application play mp3 file in /res/raw folder. In this exercise, it will be modified to play a mp3 file, named music.mp3, in SD Card.

First of all, copy a mp3 file (music.mp3) to SD Card. Refer to the article "Create SD Card in Android Emulator and copy files into, in Eclipse, Emulator and DDMS" to copy mp3 file to SD Card.

main.xm have no change, refer to the exercise "Android MediaPlayer".

AndroidMediaPlayer.java
package com.exercise.AndroidMediaPlayer;

import java.io.IOException;

import android.app.Activity;
import android.media.MediaPlayer;
import android.os.Bundle;
import android.view.View;
import android.widget.Button;
import android.widget.TextView;
import android.widget.Toast;

public class AndroidMediaPlayer extends Activity {

MediaPlayer mediaPlayer;
Button buttonPlayPause, buttonQuit;
TextView textState;

private int stateMediaPlayer;
private final int stateMP_Error = 0;
private final int stateMP_NotStarter = 1;
private final int stateMP_Playing = 2;
private final int stateMP_Pausing = 3;

/** Called when the activity is first created. */
@Override
public void onCreate(Bundle savedInstanceState) {
super.onCreate(savedInstanceState);
setContentView(R.layout.main);

buttonPlayPause = (Button)findViewById(R.id.playpause);
buttonQuit = (Button)findViewById(R.id.quit);
textState = (TextView)findViewById(R.id.state);

buttonPlayPause.setOnClickListener(buttonPlayPauseOnClickListener);
buttonQuit.setOnClickListener(buttonQuitOnClickListener);

initMediaPlayer();

}

private void initMediaPlayer()
{
String PATH_TO_FILE = "/sdcard/music.mp3";
mediaPlayer = new MediaPlayer();

try {
mediaPlayer.setDataSource(PATH_TO_FILE);
mediaPlayer.prepare();
Toast.makeText(this, PATH_TO_FILE, Toast.LENGTH_LONG).show();
stateMediaPlayer = stateMP_NotStarter;
textState.setText("- IDLE -");
} catch (IllegalArgumentException e) {
// TODO Auto-generated catch block
e.printStackTrace();
Toast.makeText(this, e.toString(), Toast.LENGTH_LONG).show();
stateMediaPlayer = stateMP_Error;
textState.setText("- ERROR!!! -");
} catch (IllegalStateException e) {
// TODO Auto-generated catch block
e.printStackTrace();
Toast.makeText(this, e.toString(), Toast.LENGTH_LONG).show();
stateMediaPlayer = stateMP_Error;
textState.setText("- ERROR!!! -");
} catch (IOException e) {
// TODO Auto-generated catch block
e.printStackTrace();
Toast.makeText(this, e.toString(), Toast.LENGTH_LONG).show();
stateMediaPlayer = stateMP_Error;
textState.setText("- ERROR!!! -");
}
}

Button.OnClickListener buttonPlayPauseOnClickListener
= new Button.OnClickListener(){

@Override
public void onClick(View v) {
// TODO Auto-generated method stub
switch(stateMediaPlayer){
case stateMP_Error:
break;
case stateMP_NotStarter:
mediaPlayer.start();
buttonPlayPause.setText("Pause");
textState.setText("- PLAYING -");
stateMediaPlayer = stateMP_Playing;
break;
case stateMP_Playing:
mediaPlayer.pause();
buttonPlayPause.setText("Play");
textState.setText("- PAUSING -");
stateMediaPlayer = stateMP_Pausing;
break;
case stateMP_Pausing:
mediaPlayer.start();
buttonPlayPause.setText("Pause");
textState.setText("- PLAYING -");
stateMediaPlayer = stateMP_Playing;
break;
}

}
};

Button.OnClickListener buttonQuitOnClickListener
= new Button.OnClickListener(){

@Override
public void onClick(View v) {
// TODO Auto-generated method stub
mediaPlayer.stop();
mediaPlayer.release();
finish();
}
};
}


Download the files.

Processing SHSH request bug fix

I fixed a bug with folks having the 'Processing SHSH request' hang indefinitely. Apparently my logic to detect invalid ECIDs was a bit too paranoid. Please download the update for the fix.


Note this doesn't impact any folks that have saved their SHSHs. You are all fine.


For those of you that were having the indefinite 'Processing...' issue I'm very sorry. This was a complete mea culpa. Thank you for your bug reports as they were vital in finding this defect.

73% of iPhone Users are Very Satisfied

According to Mashable, a Yankee group study found 73% of iPhone users are very satisfied with AT&T.


This does not surprise me as my iPhone seems to work really well most of the time. In addition, it has performed well on most of my business and pleasure trips. When I hear it does not work well for many prominent bloggers I believe them. However, just because the phone does not work well in a few cities, doesn't mean it performs badly in all cities. I think the AT&T haters are in the "distortion field" not most of the actual users as indicated by the study.

Sunday, 25 July 2010

Dojo 1.5 is out and its Feature Packed

Dojo LogoDojo 1.5 is out and its feature packed, details from Ajaxian.


From the Ajaxian, story Dojo certainly looks to be a lot prettier. If you don't know, Dojo is a full featured open source JavaScript framework. It provides all the controls and widgets you would find in something like Visual Basic. And from the sounds of it, they are getting a lot of help from IBM. Definitely worth a look if you are comparing JavaScript frameworks for your next project.

Saturday, 24 July 2010

Instance two object from the same custom view class

In the exercise "Custom View with User Interaction", ONE custom view was instanced to engage the whole screen (Activity). Here, I try to instance two object from the same customer view, in the same screen.


Only change the code in onCreate() of AndroidViewUI.java
package com.exercise.AndroidViewUI;

import android.app.Activity;
import android.content.Context;
import android.graphics.Canvas;
import android.graphics.Color;
import android.graphics.Paint;
import android.os.Bundle;
import android.util.AttributeSet;
import android.view.MotionEvent;
import android.view.View;
import android.view.ViewGroup.LayoutParams;
import android.widget.LinearLayout;

public class AndroidViewUI extends Activity {
public class MyView extends View {

private Paint paint = new Paint(Paint.ANTI_ALIAS_FLAG);

private float initX, initY, radius;
private boolean drawing = false;

public MyView(Context context) {
super(context);
// TODO Auto-generated constructor stub
init();
}

public MyView(Context context, AttributeSet attrs) {
super(context, attrs);
// TODO Auto-generated constructor stub
init();
}

public MyView(Context context, AttributeSet attrs, int defStyle) {
super(context, attrs, defStyle);
// TODO Auto-generated constructor stub
init();
}

private void init(){
paint.setStyle(Paint.Style.STROKE);
paint.setStrokeWidth(3);
paint.setColor(Color.WHITE);
}

@Override
protected void onMeasure(int widthMeasureSpec, int heightMeasureSpec) {
// TODO Auto-generated method stub
setMeasuredDimension(MeasureSpec.getSize(widthMeasureSpec),
MeasureSpec.getSize(heightMeasureSpec));
}

@Override
protected void onDraw(Canvas canvas) {
// TODO Auto-generated method stub
if(drawing){
canvas.drawCircle(initX, initY, radius, paint);
}
}

@Override
public boolean onTouchEvent(MotionEvent event) {
// TODO Auto-generated method stub

int action = event.getAction();
if (action==MotionEvent.ACTION_MOVE){
float x = event.getX();
float y = event.getY();

radius = (float) Math.sqrt(Math.pow(x-initX, 2) + Math.pow(y-initY, 2));

}
else if (action==MotionEvent.ACTION_DOWN){
initX = event.getX();
initY = event.getY();
radius = 1;
drawing = true;
}
else if (action==MotionEvent.ACTION_UP){
drawing = false;
}
invalidate();
return true;
}

}


/** Called when the activity is first created. */
@Override
public void onCreate(Bundle savedInstanceState) {
super.onCreate(savedInstanceState);
//setContentView(R.layout.main);

LinearLayout mainLayout = new LinearLayout(this);
mainLayout.setOrientation(LinearLayout.VERTICAL);

MyView myView1 = new MyView(this);
LayoutParams myView1Params = new LayoutParams(200, 200);
myView1.setLayoutParams(myView1Params);
myView1.setBackgroundColor(Color.GREEN);

MyView myView2 = new MyView(this);
LayoutParams myView2Params = new LayoutParams(300, 200);
myView2.setLayoutParams(myView2Params);
myView2.setBackgroundColor(Color.BLUE);

mainLayout.addView(myView1);
mainLayout.addView(myView2);
setContentView(mainLayout);
}
}


Download the files.


Friday, 23 July 2010

Android MediaPlayer

The exercise play, pause and stop a mp3 file in /res/raw folder, using android.media.MediaPlayer.

Android MediaPlayer

First of all, copy a mp3 file in /res/raw folder.
(You have to create the folder "raw" under "res", and copy a mp3 file named "music.mp3" into it.)

main.xml

<?xml version="1.0" encoding="utf-8"?>
<LinearLayout xmlns:android="http://schemas.android.com/apk/res/android"
android:orientation="vertical"
android:layout_width="fill_parent"
android:layout_height="fill_parent"
>
<TextView
android:layout_width="fill_parent"
android:layout_height="wrap_content"
android:text="@string/hello"
/>
<Button
android:id="@+id/playpause"
android:layout_width="fill_parent"
android:layout_height="wrap_content"
android:text="Play"
/>
<Button
android:id="@+id/quit"
android:layout_width="fill_parent"
android:layout_height="wrap_content"
android:text="Quit!"
/>
<TextView
android:id="@+id/state"
android:layout_width="fill_parent"
android:layout_height="wrap_content"
/>
</LinearLayout>


AndroidMediaPlayer.java

package com.exercise.AndroidMediaPlayer;

import android.app.Activity;
import android.media.MediaPlayer;
import android.os.Bundle;
import android.view.View;
import android.widget.Button;
import android.widget.TextView;

public class AndroidMediaPlayer extends Activity {

MediaPlayer mediaPlayer;
Button buttonPlayPause, buttonQuit;
TextView textState;

private int stateMediaPlayer;
private final int stateMP_NotStarter = 0;
private final int stateMP_Playing = 1;
private final int stateMP_Pausing = 2;

/** Called when the activity is first created. */
@Override
public void onCreate(Bundle savedInstanceState) {
super.onCreate(savedInstanceState);
setContentView(R.layout.main);

buttonPlayPause = (Button)findViewById(R.id.playpause);
buttonQuit = (Button)findViewById(R.id.quit);
textState = (TextView)findViewById(R.id.state);

buttonPlayPause.setOnClickListener(buttonPlayPauseOnClickListener);
buttonQuit.setOnClickListener(buttonQuitOnClickListener);

initMediaPlayer();

}

private void initMediaPlayer()
{
mediaPlayer = new MediaPlayer();
mediaPlayer = MediaPlayer.create(AndroidMediaPlayer.this, R.raw.music);
stateMediaPlayer = stateMP_NotStarter;
textState.setText("- IDLE -");
}

Button.OnClickListener buttonPlayPauseOnClickListener
= new Button.OnClickListener(){

@Override
public void onClick(View v) {
// TODO Auto-generated method stub
switch(stateMediaPlayer){
case stateMP_NotStarter:
mediaPlayer.start();
buttonPlayPause.setText("Pause");
textState.setText("- PLAYING -");
stateMediaPlayer = stateMP_Playing;
break;
case stateMP_Playing:
mediaPlayer.pause();
buttonPlayPause.setText("Play");
textState.setText("- PAUSING -");
stateMediaPlayer = stateMP_Pausing;
break;
case stateMP_Pausing:
mediaPlayer.start();
buttonPlayPause.setText("Pause");
textState.setText("- PLAYING -");
stateMediaPlayer = stateMP_Playing;
break;
}

}
};

Button.OnClickListener buttonQuitOnClickListener
= new Button.OnClickListener(){

@Override
public void onClick(View v) {
// TODO Auto-generated method stub
mediaPlayer.stop();
mediaPlayer.release();
finish();
}
};
}


Download the files.

next: Play mp3 in SD Card, using Android's MediaPlayer

Thursday, 22 July 2010

More on Generate a mirror image using Matrix.postConcat()

More function of mirror image, such as mirror about X axis, mirror about center, will be as in this exercise; base on the last exercise "Generate a mirror image using Matrix.postConcat()".

More on Generate a mirror image using Matrix.postConcat()

main.xml
<?xml version="1.0" encoding="utf-8"?>
<LinearLayout xmlns:android="http://schemas.android.com/apk/res/android"
android:orientation="vertical"
android:layout_width="fill_parent"
android:layout_height="fill_parent"
>
<TextView
android:layout_width="fill_parent"
android:layout_height="wrap_content"
android:text="@string/hello"
/>
<Spinner
android:id="@+id/mirrorselection"
android:layout_width="fill_parent"
android:layout_height="wrap_content"
/>
<ImageView
android:id="@+id/imageview"
android:layout_gravity="center"
android:layout_width="fill_parent"
android:layout_height="fill_parent"
android:scaleType="center"
/>
</LinearLayout>


AndroidMirrorImage.java
package com.exercise.AndroidMirrorImage;

import android.app.Activity;
import android.graphics.Bitmap;
import android.graphics.BitmapFactory;
import android.graphics.Matrix;
import android.os.Bundle;
import android.view.View;
import android.widget.AdapterView;
import android.widget.ArrayAdapter;
import android.widget.ImageView;
import android.widget.Spinner;

public class AndroidMirrorImage extends Activity {

private final String imageInSD = "/sdcard/google.png";

private static final String[] optionMirror =
{"Normal", "Mirror about X", "Mirror about Y", "Mirror about Center"};
private ArrayAdapter<String> adapter;

Spinner mirrorSelection;
ImageView myImageView;

Bitmap bitmap;
int bmpWidth, bmpHeight;

Matrix matrixMirrorNormal, matrixMirrorX, matrixMirrorY, matrixMirrorC;

/** Called when the activity is first created. */
@Override
public void onCreate(Bundle savedInstanceState) {
super.onCreate(savedInstanceState);
setContentView(R.layout.main);

myImageView = (ImageView)findViewById(R.id.imageview);
mirrorSelection = (Spinner)findViewById(R.id.mirrorselection);

adapter = new ArrayAdapter<String>(this,
android.R.layout.simple_spinner_item, optionMirror);
adapter.setDropDownViewResource(android.R.layout.simple_spinner_dropdown_item);
mirrorSelection.setAdapter(adapter);

mirrorSelection.setSelection(0);

mirrorSelection.setOnItemSelectedListener(new Spinner.OnItemSelectedListener(){

@Override
public void onItemSelected(AdapterView<?> arg0, View arg1,
int arg2, long arg3) {
// TODO Auto-generated method stub
drawMatrix();
}

@Override
public void onNothingSelected(AdapterView<?> arg0) {
// TODO Auto-generated method stub
mirrorSelection.setSelection(0);
}});

bitmap = BitmapFactory.decodeFile(imageInSD);
bmpWidth = bitmap.getWidth();
bmpHeight = bitmap.getHeight();

initMirrorMatrix();

drawMatrix();
}

private void initMirrorMatrix()
{
float[] mirrorNormal =
{ 1, 0, 0,
0, 1, 0,
0, 0, 1
};

float[] mirrorX =
{ 1, 0, 0,
0, -1, 0,
0, 0, 1
};

float[] mirrorY =
{ -1, 0, 0,
0, 1, 0,
0, 0, 1
};

float[] mirrorC =
{ -1, 0, 0,
0, -1, 0,
0, 0, 1
};
matrixMirrorNormal = new Matrix();
matrixMirrorNormal.setValues(mirrorNormal);
matrixMirrorX = new Matrix();
matrixMirrorX.setValues(mirrorX);
matrixMirrorY = new Matrix();
matrixMirrorY.setValues(mirrorY);
matrixMirrorC = new Matrix();
matrixMirrorC.setValues(mirrorC);
}

private void drawMatrix()
{
Matrix matrix = new Matrix();
switch (mirrorSelection.getSelectedItemPosition()){
case 0: //Normal
matrix.postConcat(matrixMirrorNormal);
break;
case 1: //Mirror about X
matrix.postConcat(matrixMirrorX);
break;
case 2: //Mirror about Y
matrix.postConcat(matrixMirrorY);
break;
case 3: //Mirror about Center
matrix.postConcat(matrixMirrorC);
break;
}
Bitmap mirrorBitmap = Bitmap.createBitmap(bitmap, 0, 0, bmpWidth, bmpHeight, matrix, true);
myImageView.setImageBitmap(mirrorBitmap);
}
}


Download the files.

Wednesday, 21 July 2010

Two Good Articles on Designing Mobile Apps

These are not new, I have been meaning to post links for a week, but two good stories on designing for mobile platforms. It is a sponsored series on Mashable. Let's hope a few more of this quality are written.


The second article is especially important. Only a few sites are doing this now, but everyone should be designing for the desktop, laptop/netbook/iPad, and mobile devices. In just a few short years, my guess is the majority of sites will be browsed on something other than a desktop computer. Does your site look good on something other than Windows and IE?

Ever Want to Know How Fast a Thumb/Flash Drive is?

Ever Want to Know How Fast a Thumb/Flash Drive is? I have. It is really hard to get any good decent information on speed. The reviews I find by Googling around cover all the frickin' features except the drives speed! That is the only feature I really care about other than size. Plus if I want to encrypt something, I am going to use an open source tool like truecypt, not some proprietary piece of feces.


Anyway, I found a good free Windows tool to do a little benchmarking, Crystal Disk Mark. It gets the job done and is really easy to use. Based on my testing, the only thing that seems to matter is the sequential read and write tests. That, in effect, is a file copy test, which is what I would use the drive for most of the time. All the drives I tested were horrible in the random access tests. You are much better off getting an external USB hard drive for that purpose.

Tuesday, 20 July 2010

Generate a mirror image using Matrix.postConcat()

Generate a mirror image using Matrix.postConcat()

We can use the matrix below, with the Matrix.postConcat() to generate a mirror image about Y axis.
{ -1, 0, 0,
0, 1, 0,
0, 0, 1
};

Generate a mirror image using Matrix.postConcat()

main.xml
<?xml version="1.0" encoding="utf-8"?>
<LinearLayout xmlns:android="http://schemas.android.com/apk/res/android"
android:orientation="vertical"
android:layout_width="fill_parent"
android:layout_height="fill_parent"
>
<TextView
android:layout_width="fill_parent"
android:layout_height="wrap_content"
android:text="@string/hello"
/>
<CheckBox
android:id="@+id/enablemirror"
android:layout_width="fill_parent"
android:layout_height="wrap_content"
android:text="Mirror Image"
/>
<ImageView
android:id="@+id/imageview"
android:layout_gravity="center"
android:layout_width="fill_parent"
android:layout_height="fill_parent"
android:scaleType="center"
/>
</LinearLayout>


AndroidMirrorImage.java
package com.exercise.AndroidMirrorImage;

import android.app.Activity;
import android.graphics.Bitmap;
import android.graphics.BitmapFactory;
import android.graphics.Matrix;
import android.os.Bundle;
import android.widget.CheckBox;
import android.widget.CompoundButton;
import android.widget.ImageView;

public class AndroidMirrorImage extends Activity {

private final String imageInSD = "/sdcard/google.png";

CheckBox enableMirror;
ImageView myImageView;

Bitmap bitmap;
int bmpWidth, bmpHeight;

Matrix matrixMirrorY;

/** Called when the activity is first created. */
@Override
public void onCreate(Bundle savedInstanceState) {
super.onCreate(savedInstanceState);
setContentView(R.layout.main);

enableMirror = (CheckBox)findViewById(R.id.enablemirror);
myImageView = (ImageView)findViewById(R.id.imageview);

enableMirror.setOnCheckedChangeListener(new CheckBox.OnCheckedChangeListener(){

@Override
public void onCheckedChanged(CompoundButton buttonView,
boolean isChecked) {
// TODO Auto-generated method stub
drawMatrix();
}});

bitmap = BitmapFactory.decodeFile(imageInSD);
bmpWidth = bitmap.getWidth();
bmpHeight = bitmap.getHeight();

initMirrorMatrix();

drawMatrix();
}

private void initMirrorMatrix()
{
float[] mirrorY =
{ -1, 0, 0,
0, 1, 0,
0, 0, 1
};
matrixMirrorY = new Matrix();
matrixMirrorY.setValues(mirrorY);
}

private void drawMatrix()
{
if(enableMirror.isChecked())
{
Matrix matrix = new Matrix();
matrix.postConcat(matrixMirrorY);

Bitmap mirrorBitmap = Bitmap.createBitmap(bitmap, 0, 0, bmpWidth, bmpHeight, matrix, true);
myImageView.setImageBitmap(mirrorBitmap);
}
else{
myImageView.setImageBitmap(bitmap);
}
}
}


Download the files.


previous: Skew bitmap image, using Matrix


iPhone 3G & iPod Touch 2G (MC) Support

For those of you on Mac that are having issues running the app. Do the following:


  • Download the Linux version.

  • In the Safari Downloads window, right click (or option click) the umbrella jar file and select 'Show In Finder' (It is likely to be /Users/<your username/Downloads)

  • Open Terminal (Spotlight "Terminal" click it)

  • cd <Directory from #2>

    • ie cd Downloads

  • Type:

    • sudo java -jar umbrella-4.01.03.jar

    • Enter your admin password

This should get you around the authenticated launcher issues on only some machines. A VAST majority of you don't have any issues but there are a few of you that do.


I've updated TinyUmbrella to support the new 3G & iPod Touch 2G SHSH requirements that iTunes 9.2 imposes on firmware 4.0 and above. 


Unfortunately, there is no way to save your 4.0 SHSH for ANY DEVICE as the window for 4.0 SHSH signatures has closed.


However, you can save your 4.0.1 SHSH for those devices and still be safe as @comex has said:

"SHSH blobs for 4.0.1 or 4.0 are fine; AFAIK there are no substantive differences except the bars"

I've also added a few preferences for those of you that care to dig into the app. Enjoy.

Monday, 19 July 2010

Skew bitmap image, using Matrix

To generate a skewed bitmap, Matrix.postSkew() can be used.

Skew bitmap image, using Matrix

Extend the last exercisse "Rotate bitmap image, using Matrix".

Modify main.xml to add two SeekBar to set the skew for x and y.
<?xml version="1.0" encoding="utf-8"?>
<LinearLayout xmlns:android="http://schemas.android.com/apk/res/android"
android:orientation="vertical"
android:layout_width="fill_parent"
android:layout_height="fill_parent"
>
<TextView
android:layout_width="fill_parent"
android:layout_height="wrap_content"
android:text="@string/hello"
/>
<Spinner
android:id="@+id/scale"
android:layout_width="fill_parent"
android:layout_height="wrap_content"
/>
<SeekBar
android:id="@+id/rotate"
android:layout_width="fill_parent"
android:layout_height="wrap_content"
android:layout_margin="5px"
android:max="360"
android:progress="0"
/>
<LinearLayout
android:orientation="horizontal"
android:layout_width="fill_parent"
android:layout_height="wrap_content"
>
<LinearLayout
android:orientation="vertical"
android:layout_height="wrap_content"
android:layout_width="0dip"
android:layout_weight="1"
android:layout_margin="5px"
>
<TextView
android:id="@+id/textskewx"
android:layout_height="wrap_content"
android:layout_width="fill_parent"
android:textSize="10px"
android:text="Skew-X: 0"
/>
<SeekBar
android:id="@+id/skewx"
android:layout_height="wrap_content"
android:layout_width="fill_parent"
android:max="200"
android:progress="100"
/>
</LinearLayout>
<LinearLayout
android:orientation="vertical"
android:layout_height="wrap_content"
android:layout_width="0dip"
android:layout_weight="1"
android:layout_margin="5px"
>
<TextView
android:id="@+id/textskewy"
android:layout_height="wrap_content"
android:layout_width="fill_parent"
android:textSize="10px"
android:text="Skew-Y: 0"
/>
<SeekBar
android:id="@+id/skewy"
android:layout_height="wrap_content"
android:layout_width="fill_parent"
android:max="200"
android:progress="100"
/>
</LinearLayout>
</LinearLayout>
<ImageView
android:id="@+id/imageview"
android:layout_gravity="center"
android:layout_width="fill_parent"
android:layout_height="fill_parent"
android:scaleType="center"
/>
</LinearLayout>


AndroidBitmap.java
package com.exercise.AndroidBitmap;

import android.app.Activity;
import android.graphics.Bitmap;
import android.graphics.BitmapFactory;
import android.graphics.Matrix;
import android.os.Bundle;
import android.view.View;
import android.widget.AdapterView;
import android.widget.ArrayAdapter;
import android.widget.ImageView;
import android.widget.SeekBar;
import android.widget.Spinner;
import android.widget.TextView;

public class AndroidBitmap extends Activity {

private final String imageInSD = "/sdcard/er.PNG";

ImageView myImageView;
Spinner spinnerScale;
SeekBar seekbarRotate;
SeekBar seekbarSkewX, seekbarSkewY;
TextView textSkewX, textSkewY;

private static final String[] strScale
= {"0.2x", "0.5x", "1.0x", "2.0x", "5.0x"};
private static final Float[] floatScale
= {0.2F, 0.5F, 1F, 2F, 5F};
private final int defaultSpinnerScaleSelection = 2;

private ArrayAdapter<String> adapterScale;

private float curScale = 1F;
private float curRotate = 0F;
private float curSkewX = 0F;
private float curSkewY = 0F;

Bitmap bitmap;
int bmpWidth, bmpHeight;

/** Called when the activity is first created. */
@Override
public void onCreate(Bundle savedInstanceState) {
super.onCreate(savedInstanceState);
setContentView(R.layout.main);

myImageView = (ImageView)findViewById(R.id.imageview);

spinnerScale = (Spinner)findViewById(R.id.scale);
seekbarRotate = (SeekBar)findViewById(R.id.rotate);
seekbarSkewX = (SeekBar)findViewById(R.id.skewx);
seekbarSkewY = (SeekBar)findViewById(R.id.skewy);
textSkewX = (TextView)findViewById(R.id.textskewx);
textSkewY = (TextView)findViewById(R.id.textskewy);

adapterScale = new ArrayAdapter<String>(this,
android.R.layout.simple_spinner_item, strScale);
adapterScale.setDropDownViewResource(android.R.layout.simple_spinner_dropdown_item);
spinnerScale.setAdapter(adapterScale);
spinnerScale.setSelection(defaultSpinnerScaleSelection);
curScale = floatScale[defaultSpinnerScaleSelection];

bitmap = BitmapFactory.decodeFile(imageInSD);
bmpWidth = bitmap.getWidth();
bmpHeight = bitmap.getHeight();

drawMatrix();

spinnerScale.setOnItemSelectedListener(spinnerScaleOnItemSelectedListener);
seekbarRotate.setOnSeekBarChangeListener(seekbarRotateSeekBarChangeListener);
seekbarSkewX.setOnSeekBarChangeListener(seekbarSkewXSeekBarChangeListener);
seekbarSkewY.setOnSeekBarChangeListener(seekbarSkewYSeekBarChangeListener);
}

private void drawMatrix(){

Matrix matrix = new Matrix();
matrix.postScale(curScale, curScale);
matrix.postRotate(curRotate);
matrix.postSkew(curSkewX, curSkewY);

Bitmap resizedBitmap = Bitmap.createBitmap(bitmap, 0, 0, bmpWidth, bmpHeight, matrix, true);
myImageView.setImageBitmap(resizedBitmap);

}

private SeekBar.OnSeekBarChangeListener seekbarSkewYSeekBarChangeListener
= new SeekBar.OnSeekBarChangeListener() {

@Override
public void onStopTrackingTouch(SeekBar seekBar) {
// TODO Auto-generated method stub

}

@Override
public void onStartTrackingTouch(SeekBar seekBar) {
// TODO Auto-generated method stub

}

@Override
public void onProgressChanged(SeekBar seekBar, int progress,
boolean fromUser) {
// TODO Auto-generated method stub
curSkewY = (float)(progress-100)/100;
textSkewY.setText("Skew-Y: " + String.valueOf(curSkewY));
drawMatrix();
}
};

private SeekBar.OnSeekBarChangeListener seekbarSkewXSeekBarChangeListener
= new SeekBar.OnSeekBarChangeListener(){

@Override
public void onProgressChanged(SeekBar seekBar, int progress,
boolean fromUser) {
// TODO Auto-generated method stub
curSkewX = (float)(progress-100)/100;
textSkewX.setText("Skew-X: " + String.valueOf(curSkewX));
drawMatrix();
}

@Override
public void onStartTrackingTouch(SeekBar seekBar) {
// TODO Auto-generated method stub

}

@Override
public void onStopTrackingTouch(SeekBar seekBar) {
// TODO Auto-generated method stub

}};

private SeekBar.OnSeekBarChangeListener seekbarRotateSeekBarChangeListener
= new SeekBar.OnSeekBarChangeListener(){

@Override
public void onProgressChanged(SeekBar seekBar, int progress,
boolean fromUser) {
// TODO Auto-generated method stub
curRotate = (float)progress;
drawMatrix();
}

@Override
public void onStartTrackingTouch(SeekBar seekBar) {
// TODO Auto-generated method stub

}

@Override
public void onStopTrackingTouch(SeekBar seekBar) {
// TODO Auto-generated method stub

}};

private Spinner.OnItemSelectedListener spinnerScaleOnItemSelectedListener
= new Spinner.OnItemSelectedListener(){

@Override
public void onItemSelected(AdapterView<?> arg0, View arg1,
int arg2, long arg3) {
// TODO Auto-generated method stub
curScale = floatScale[arg2];
drawMatrix();
}

@Override
public void onNothingSelected(AdapterView<?> arg0) {
// TODO Auto-generated method stub
spinnerScale.setSelection(defaultSpinnerScaleSelection);
curScale = floatScale[defaultSpinnerScaleSelection];
}};
}


Download the files.

next: Generate a mirror image using Matrix.postConcat()


Sunday, 18 July 2010

Rotate bitmap image, using Matrix

Here Rotating function is going to be added on the last exercise "Scale bitmap image, using Matrix". It's a SeekBar on the screen to change the degree to rotate the bitmap, by using of Matrix.postRotate().

Rotate bitmap image, using Matrix

main.xml

<?xml version="1.0" encoding="utf-8"?>
<LinearLayout xmlns:android="http://schemas.android.com/apk/res/android"
android:orientation="vertical"
android:layout_width="fill_parent"
android:layout_height="fill_parent"
>
<TextView
android:layout_width="fill_parent"
android:layout_height="wrap_content"
android:text="@string/hello"
/>
<Spinner
android:id="@+id/scale"
android:layout_width="fill_parent"
android:layout_height="wrap_content"
/>
<SeekBar
android:id="@+id/rotate"
android:layout_width="fill_parent"
android:layout_height="wrap_content"
android:layout_margin="5px"
android:max="360"
android:progress="0"
/>
<ImageView
android:id="@+id/imageview"
android:layout_gravity="center"
android:layout_width="fill_parent"
android:layout_height="fill_parent"
android:scaleType="center"
/>
</LinearLayout>


AndroidBitmap.java

package com.exercise.AndroidBitmap;

import android.app.Activity;
import android.graphics.Bitmap;
import android.graphics.BitmapFactory;
import android.graphics.Matrix;
import android.os.Bundle;
import android.view.View;
import android.widget.AdapterView;
import android.widget.ArrayAdapter;
import android.widget.ImageView;
import android.widget.SeekBar;
import android.widget.Spinner;

public class AndroidBitmap extends Activity {

private final String imageInSD = "/sdcard/er.PNG";

ImageView myImageView;
Spinner spinnerScale;
SeekBar seekbarRotate;

private static final String[] strScale
= {"0.2x", "0.5x", "1.0x", "2.0x", "5.0x"};
private static final Float[] floatScale
= {0.2F, 0.5F, 1F, 2F, 5F};
private final int defaultSpinnerScaleSelection = 2;

private ArrayAdapter<String> adapterScale;

private float curScale = 1F;
private float curRotate = 0F;

Bitmap bitmap;
int bmpWidth, bmpHeight;

/** Called when the activity is first created. */
@Override
public void onCreate(Bundle savedInstanceState) {
super.onCreate(savedInstanceState);
setContentView(R.layout.main);

myImageView = (ImageView)findViewById(R.id.imageview);

spinnerScale = (Spinner)findViewById(R.id.scale);
seekbarRotate = (SeekBar)findViewById(R.id.rotate);

adapterScale = new ArrayAdapter<String>(this,
android.R.layout.simple_spinner_item, strScale);
adapterScale.setDropDownViewResource(android.R.layout.simple_spinner_dropdown_item);
spinnerScale.setAdapter(adapterScale);
spinnerScale.setSelection(defaultSpinnerScaleSelection);
curScale = floatScale[defaultSpinnerScaleSelection];

bitmap = BitmapFactory.decodeFile(imageInSD);
bmpWidth = bitmap.getWidth();
bmpHeight = bitmap.getHeight();

drawMatrix();

spinnerScale.setOnItemSelectedListener(spinnerScaleOnItemSelectedListener);
seekbarRotate.setOnSeekBarChangeListener(seekbarRotateSeekBarChangeListener);

}

private void drawMatrix(){

Matrix matrix = new Matrix();
matrix.postScale(curScale, curScale);
matrix.postRotate(curRotate);

Bitmap resizedBitmap = Bitmap.createBitmap(bitmap, 0, 0, bmpWidth, bmpHeight, matrix, true);
myImageView.setImageBitmap(resizedBitmap);

}

private SeekBar.OnSeekBarChangeListener seekbarRotateSeekBarChangeListener
= new SeekBar.OnSeekBarChangeListener(){

@Override
public void onProgressChanged(SeekBar seekBar, int progress,
boolean fromUser) {
// TODO Auto-generated method stub
curRotate = (float)progress;
drawMatrix();
}

@Override
public void onStartTrackingTouch(SeekBar seekBar) {
// TODO Auto-generated method stub

}

@Override
public void onStopTrackingTouch(SeekBar seekBar) {
// TODO Auto-generated method stub

}};

private Spinner.OnItemSelectedListener spinnerScaleOnItemSelectedListener
= new Spinner.OnItemSelectedListener(){

@Override
public void onItemSelected(AdapterView<?> arg0, View arg1,
int arg2, long arg3) {
// TODO Auto-generated method stub
curScale = floatScale[arg2];
drawMatrix();
}

@Override
public void onNothingSelected(AdapterView<?> arg0) {
// TODO Auto-generated method stub
spinnerScale.setSelection(defaultSpinnerScaleSelection);
curScale = floatScale[defaultSpinnerScaleSelection];
}};
}


Download the files.

next: Skew bitmap image, using Matrix

Friday, 16 July 2010

Free Open Source JQuery Training Materials

JQuery LogoI have been wanting to post this link for a couple of weeks. Rebecca Murphey has released open source training materials for JQuery! The materials are first rate and are available under a creative commons share license.


The training materials looks to be quite comprehensive. I really need to read through everything, myself. But, this sleeping at night thing is really getting in the way of my personal development. :)

Scale bitmap image, using Matrix

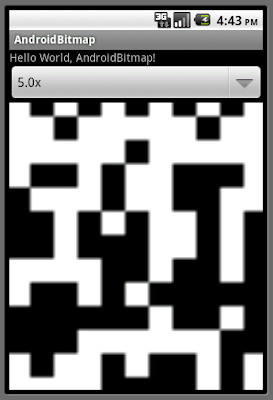
Modify the last exercise "Load bitmap file from SD Card", to implement function to post-scale the bitmap image using Matrix.

Scale bitmap image, using Matrix

In order to create a new bitmap with selected scale: A new Matrix object have to be created, with postScale. Then create a new bitmap from the image in SD Card, using the matrix.

Modify main.xml
<?xml version="1.0" encoding="utf-8"?>
<LinearLayout xmlns:android="http://schemas.android.com/apk/res/android"
android:orientation="vertical"
android:layout_width="fill_parent"
android:layout_height="fill_parent"
>
<TextView
android:layout_width="fill_parent"
android:layout_height="wrap_content"
android:text="@string/hello"
/>
<Spinner
android:id="@+id/scale"
android:layout_width="fill_parent"
android:layout_height="wrap_content"
/>
<ImageView
android:id="@+id/imageview"
android:layout_gravity="center"
android:layout_width="fill_parent"
android:layout_height="fill_parent"
android:scaleType="center"
/>
</LinearLayout>


AndroidBitmap.java
package com.exercise.AndroidBitmap;

import android.app.Activity;
import android.graphics.Bitmap;
import android.graphics.BitmapFactory;
import android.graphics.Matrix;
import android.os.Bundle;
import android.view.View;
import android.widget.AdapterView;
import android.widget.ArrayAdapter;
import android.widget.ImageView;
import android.widget.Spinner;

public class AndroidBitmap extends Activity {

private final String imageInSD = "/sdcard/er.PNG";

ImageView myImageView;
Spinner spinnerScale;

private static final String[] strScale
= {"0.2x", "0.5x", "1.0x", "2.0x", "5.0x"};
private static final Float[] floatScale
= {0.2F, 0.5F, 1F, 2F, 5F};
private final int defaultSpinnerScaleSelection = 2;

private ArrayAdapter<String> adapterScale;

private float curScale = 1F;

Bitmap bitmap;
int bmpWidth, bmpHeight;

/** Called when the activity is first created. */
@Override
public void onCreate(Bundle savedInstanceState) {
super.onCreate(savedInstanceState);
setContentView(R.layout.main);

myImageView = (ImageView)findViewById(R.id.imageview);

spinnerScale = (Spinner)findViewById(R.id.scale);
adapterScale = new ArrayAdapter<String>(this,
android.R.layout.simple_spinner_item, strScale);
adapterScale.setDropDownViewResource(android.R.layout.simple_spinner_dropdown_item);
spinnerScale.setAdapter(adapterScale);
spinnerScale.setSelection(defaultSpinnerScaleSelection);
curScale = floatScale[defaultSpinnerScaleSelection];

bitmap = BitmapFactory.decodeFile(imageInSD);
bmpWidth = bitmap.getWidth();
bmpHeight = bitmap.getHeight();

drawMatrix();

spinnerScale.setOnItemSelectedListener(spinnerScaleOnItemSelectedListener);

}

private void drawMatrix(){

Matrix matrix = new Matrix();
matrix.postScale(curScale, curScale);

Bitmap resizedBitmap = Bitmap.createBitmap(bitmap, 0, 0, bmpWidth, bmpHeight, matrix, true);
myImageView.setImageBitmap(resizedBitmap);

}

private Spinner.OnItemSelectedListener spinnerScaleOnItemSelectedListener
= new Spinner.OnItemSelectedListener(){

@Override
public void onItemSelected(AdapterView<?> arg0, View arg1,
int arg2, long arg3) {
// TODO Auto-generated method stub
curScale = floatScale[arg2];
drawMatrix();
}

@Override
public void onNothingSelected(AdapterView<?> arg0) {
// TODO Auto-generated method stub
spinnerScale.setSelection(defaultSpinnerScaleSelection);
curScale = floatScale[defaultSpinnerScaleSelection];
}};
}


Download the files.

next: Rotate bitmap image, using Matrix


Thursday, 15 July 2010

Serialize and Deserialize an Object in Java

Duke WavingFor work today I had to write a short program to serialize and deserialize an object. Since I could not find an example that include both steps, here is my own serialize deserialize example. Its pretty easy once you see an example.


Thanks to Example Depot for their examples: Deserialize an Object and Serialize an Object.

iOS 4.0.1 and iPad 3.2.1 is out

For all of you that did not get your iOS 4.0 shsh or 3.2 shsh I'm sorry. Apple has stopped signing them. It is now confirmed.


I have updated TinyUmbrella to work with 4.0.1 and 3.2.1. I have now released
4.01.01 which will allow you to save 4.0.1 and 3.2.1 SHSHs for iphone/ipt/iphone4 and ipad respectively.


I've made mediafire the mirror for downloads and ifile.it the primary. I'm still working on a better solution for hosting. (I'm possibly going to go the torrent route)


I've also linked the source. Don't bug me about building it.


EDIT: If you have a Mac and the app is bouncing - you likely did not read the readme.


I've received many instances where folks would get some error message about WinSock or jvm_bind etc. This is likely due to a firewall restriction on your machine. You may need to disable your firewall and/or Anti virus software because I do the following:


  1. Load an unrelated library (iTunesMobileDevice.dll)

  2. Edit your hosts file (some anti virus software does not like this)

  3. Start a server accepting connections on port 80

  4. Write a file named (hosts.umbrella) next to your hosts file saving your original hosts file so you have a permanent backup before any of my changes (hosts.umbrella never gets overwritten)

These things raise flags with some very paranoid AV software.


Also folks. Selecting Apple will request your SHSH from apple. Select Cydia will request your SHSH from Cydia (if he has it he will return it if he does not, he will request it from Apple and then save it


Wednesday, 14 July 2010

Load bitmap file from SD Card

In last exercise "Save file to SD Card", a file have been saved in SD Card. In this exercise, the bitmap file in SD Card will be loaded, using BitmapFactory.

Load bitmap file from SD Card

main.xml
<?xml version="1.0" encoding="utf-8"?>
<LinearLayout xmlns:android="http://schemas.android.com/apk/res/android"
android:orientation="vertical"
android:layout_width="fill_parent"
android:layout_height="fill_parent"
>
<TextView
android:layout_width="fill_parent"
android:layout_height="wrap_content"
android:text="@string/hello"
/>
<ImageView
android:id="@+id/imageview"
android:layout_gravity="center"
android:layout_width="fill_parent"
android:layout_height="fill_parent"
android:scaleType="center"
/>
</LinearLayout>


AndroidBitmap.java
package com.exercise.AndroidBitmap;

import android.app.Activity;
import android.graphics.Bitmap;
import android.graphics.BitmapFactory;
import android.os.Bundle;
import android.widget.ImageView;

public class AndroidBitmap extends Activity {

private final String imageInSD = "/sdcard/er.PNG";

/** Called when the activity is first created. */
@Override
public void onCreate(Bundle savedInstanceState) {
super.onCreate(savedInstanceState);
setContentView(R.layout.main);

Bitmap bitmap = BitmapFactory.decodeFile(imageInSD);
ImageView myImageView = (ImageView)findViewById(R.id.imageview);
myImageView.setImageBitmap(bitmap);

}
}


Download the files.

next: Scale bitmap image, using Matrix

Visual Basic for Android?

Google Logo

Visual Basic for Android? Well sorta. Google has announced AppInventor for Android, which looks more or less like VB for Android to me.


This is probably a really good idea. The more people you have developing for your platform, the better. It seems like there were a few good apps developed with VB, even though none come to mind at the moment. :) Anyway, at a minimum, geeks can write little custom utilities for themselves with this.


Update (2011/04/26): Today I became aware of a LUA based tool that looks really amazing. You may also want to check out Corona SDK.

Save file to SD Card

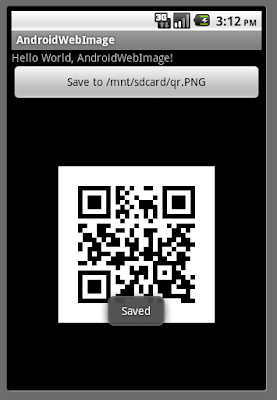
In the previous exercises "Load ImageView with bitmap from internet" and "Generate QR code using Google Chart API", images were downloaded from internet for display only. Here, we are going to save the download image to SD Card.

Save file to SD Card

The path to SD Card can be retrieved using
Environment.getExternalStorageDirectory();

Then compress and write to SD Card by:
outStream = new FileOutputStream(file);
bm.compress(Bitmap.CompressFormat.PNG, 100, outStream);
outStream.flush();
outStream.close();

In order to premit the App to access internet and write to SD Card, we need "android.permission.INTERNET" and "android.permission.WRITE_EXTERNAL_STORAGE".
Modify AndroidManifest.xml
<?xml version="1.0" encoding="utf-8"?>
<manifest xmlns:android="http://schemas.android.com/apk/res/android"
package="com.exercise.AndroidWebImage"
android:versionCode="1"
android:versionName="1.0">
<application android:icon="@drawable/icon" android:label="@string/app_name">
<activity android:name=".AndroidWebImage"
android:label="@string/app_name">
<intent-filter>
<action android:name="android.intent.action.MAIN" />
<category android:name="android.intent.category.LAUNCHER" />
</intent-filter>
</activity>

</application>
<uses-sdk android:minSdkVersion="4" />
<uses-permission android:name="android.permission.INTERNET" />
<uses-permission android:name="android.permission.WRITE_EXTERNAL_STORAGE" />
</manifest>


main.xml
<?xml version="1.0" encoding="utf-8"?>
<LinearLayout xmlns:android="http://schemas.android.com/apk/res/android"
android:orientation="vertical"
android:layout_width="fill_parent"
android:layout_height="fill_parent"
>
<TextView
android:layout_width="fill_parent"
android:layout_height="wrap_content"
android:text="@string/hello"
/>
<Button
android:id="@+id/save"
android:layout_width="fill_parent"
android:layout_height="wrap_content"
android:text="Save"
/>
<ImageView
android:id="@+id/image"
android:scaleType="center"
android:layout_width="fill_parent"
android:layout_height="fill_parent"
/>
</LinearLayout>


AndroidWebImage.java
package com.exercise.AndroidWebImage;

import java.io.File;
import java.io.FileNotFoundException;
import java.io.FileOutputStream;
import java.io.IOException;
import java.io.InputStream;
import java.io.OutputStream;
import java.net.HttpURLConnection;
import java.net.URL;
import java.net.URLConnection;

import android.app.Activity;
import android.graphics.Bitmap;
import android.graphics.BitmapFactory;
import android.os.Bundle;
import android.os.Environment;
import android.view.View;
import android.widget.Button;
import android.widget.ImageView;
import android.widget.Toast;

public class AndroidWebImage extends Activity {

String image_URL=
"http://chart.apis.google.com/chart?chs=200x200&cht=qr&chl=http%3A%2F%2Fandroid-er.blogspot.com%2F";

String extStorageDirectory;

Bitmap bm;

/** Called when the activity is first created. */
@Override
public void onCreate(Bundle savedInstanceState) {
super.onCreate(savedInstanceState);
setContentView(R.layout.main);

Button buttonSave = (Button)findViewById(R.id.save);

ImageView bmImage = (ImageView)findViewById(R.id.image);
BitmapFactory.Options bmOptions;
bmOptions = new BitmapFactory.Options();
bmOptions.inSampleSize = 1;
bm = LoadImage(image_URL, bmOptions);
bmImage.setImageBitmap(bm);

extStorageDirectory = Environment.getExternalStorageDirectory().toString();

buttonSave.setText("Save to " + extStorageDirectory + "/qr.PNG");
buttonSave.setOnClickListener(buttonSaveOnClickListener);
}

private Bitmap LoadImage(String URL, BitmapFactory.Options options)
{
Bitmap bitmap = null;
InputStream in = null;
try {
in = OpenHttpConnection(URL);
bitmap = BitmapFactory.decodeStream(in, null, options);
in.close();
} catch (IOException e1) {
}
return bitmap;
}

private InputStream OpenHttpConnection(String strURL) throws IOException{
InputStream inputStream = null;
URL url = new URL(strURL);
URLConnection conn = url.openConnection();

try{
HttpURLConnection httpConn = (HttpURLConnection)conn;
httpConn.setRequestMethod("GET");
httpConn.connect();

if (httpConn.getResponseCode() == HttpURLConnection.HTTP_OK) {
inputStream = httpConn.getInputStream();
}
}
catch (Exception ex)
{
}
return inputStream;
}

Button.OnClickListener buttonSaveOnClickListener
= new Button.OnClickListener(){

@Override
public void onClick(View arg0) {
// TODO Auto-generated method stub
OutputStream outStream = null;
File file = new File(extStorageDirectory, "er.PNG");
try {
outStream = new FileOutputStream(file);
bm.compress(Bitmap.CompressFormat.PNG, 100, outStream);
outStream.flush();
outStream.close();

Toast.makeText(AndroidWebImage.this, "Saved", Toast.LENGTH_LONG).show();

} catch (FileNotFoundException e) {
// TODO Auto-generated catch block
e.printStackTrace();
Toast.makeText(AndroidWebImage.this, e.toString(), Toast.LENGTH_LONG).show();
} catch (IOException e) {
// TODO Auto-generated catch block
e.printStackTrace();
Toast.makeText(AndroidWebImage.this, e.toString(), Toast.LENGTH_LONG).show();
}

}

};

}


Download the files.

next: Load bitmap file from SD Card

Related Article:
- How to create sub-folder in SD Card, using Java code


Tuesday, 13 July 2010

Toy Story 3 is Awesome

I saw Toy Story 3 last night and it is freaking awesome. It totally lived up to its great reviews. Those guys at Pixar really know how to tell a story.


Too bad the same thing can't be said about the Last Airbender movie.


Monday, 12 July 2010

App Inventor for Android - create mobile applications without having to write any code!

App Inventor is a new tool in Google Labs that makes it easy for anyone�programmers and non-programmers, professionals and students�to create mobile applications for Android-powered devices.

source: Official Google Blog: App Inventor for Android


A 60 second video showing an app being made with App inventor for Android.

Sunday, 11 July 2010

Generate QR code using Google Chart API

The Google Chart API lets you dynamically generate charts with a URL string. You can embed these charts on your web page, or download the image for local or offline use.

Generate QR code using Google Chart API

QR codes are a popular type of two-dimensional barcode. They are also known as hardlinks or physical world hyperlinks. QR Codes store up to 4,296 alphanumeric characters of arbitrary text. This text can be anything, for example URL, contact information, a telephone number, even a poem! QR codes can be read by an optical device with the appropriate software. Such devices range from dedicated QR code readers to mobile phones.

With the previous exercise "Load ImageView with bitmap from internet", we can generate our own QR Code by changing of image_URL.

String image_URL="http://chart.apis.google.com/chart?chs=200x200&cht=qr&chl=http%3A%2F%2Fandroid-er.blogspot.com%2F";

You can try to use the Chart Wizard to generate the URL of your image charts.

Example of MultiAutoCompleteTextView

MultiAutoCompleteTextView is an editable text view, extending AutoCompleteTextView, that can show completion suggestions for the substring of the text where the user is typing instead of necessarily for the entire thing.

You must must provide a MultiAutoCompleteTextView.Tokenizer to distinguish the various substrings.

Example of MultiAutoCompleteTextView

It can be comapred with "Example of AutoCompleteTextView".

main.xml
<?xml version="1.0" encoding="utf-8"?>
<LinearLayout xmlns:android="http://schemas.android.com/apk/res/android"
android:orientation="vertical"
android:layout_width="fill_parent"
android:layout_height="fill_parent"
>
<TextView
android:layout_width="fill_parent"
android:layout_height="wrap_content"
android:text="@string/hello"
/>
<MultiAutoCompleteTextView android:id="@+id/multiautocompletetextview"
android:layout_width="fill_parent"
android:layout_height="wrap_content"
android:completionThreshold="1"
/>
</LinearLayout>


java main code
package com.exercise.AndroidMultiAutoCompleteTextView;

import android.app.Activity;
import android.os.Bundle;
import android.widget.ArrayAdapter;
import android.widget.MultiAutoCompleteTextView;

public class AndroidMultiAutoCompleteTextView extends Activity {

MultiAutoCompleteTextView myMultiAutoCompleteTextView;
String item[]={
"January", "February", "March", "April",
"May", "June", "July", "August",
"September", "October", "November", "December"
};

/** Called when the activity is first created. */
@Override
public void onCreate(Bundle savedInstanceState) {
super.onCreate(savedInstanceState);
setContentView(R.layout.main);

MultiAutoCompleteTextView myMultiAutoCompleteTextView
= (MultiAutoCompleteTextView)findViewById(
R.id.multiautocompletetextview);

myMultiAutoCompleteTextView.setAdapter(
new ArrayAdapter<String>(this,
android.R.layout.simple_dropdown_item_1line, item));
myMultiAutoCompleteTextView.setTokenizer(
new MultiAutoCompleteTextView.CommaTokenizer());


}
}


Saturday, 10 July 2010

TinyUmbrella - Multi-Device

I've added support for multiple concurrent devices. Now when you plug in more than one device, each device will show up in a combo box. You can select the device and the currently selected device's ECID will populate in the ECID field and the proper default firmware will be selected appropriate to the device.


I've also made some significant changes to the underlying framework under the hood. In doing so I've added a few new features. First, the links that show up in the console are now clickable. This means when you pastebin your log file you can click on the link and it'll open in your default browser. Also when you save your shsh file you will see a 'Click here to Open' link that, when clicked, will open Finder (OSX) or Explorer (WIN) to the SHSH file saved. No more whining about where the files are saved. (Not that any of you have any reason to tinker with the files outside of backing up the entire directory right?) :) Also, the list of files that show up in the console when you 'Display SHSH' are also clickable and will reveal themselves in Finder/Explorer as well.


I've made some performance tweaks as well so the app should be slightly faster. Lastly, I have added some much needed feedback to the console when saving SHSHs. The messages are quite verbose and explain much more plainly the situation if you are unable to get SHSHs because your device is 'not eligible'.


I'm working on some more features for future releases. Thanks for your comments!

Friday, 9 July 2010

About Me: PackageInfo.versionName and PackageInfo.versionCode

PackageManager is a class for retrieving various kinds of information related to the application packages that are currently installed on the device. You can find this class through getPackageManager(). And PackageInfo hold the overall information about the contents of a package. This corresponds to all of the information collected from AndroidManifest.xml.

About Me: PackageInfo.versionName and PackageInfo.versionCode

The information of android:versionCode and android:versionName in AndroidManifest.xml can be retrieved from PackageInfo.versionName and PackageInfo.versionCode.

main.xml
<?xml version="1.0" encoding="utf-8"?>
<LinearLayout xmlns:android="http://schemas.android.com/apk/res/android"
android:orientation="vertical"
android:layout_width="fill_parent"
android:layout_height="fill_parent"
>
<TextView
android:layout_width="fill_parent"
android:layout_height="wrap_content"
android:text="@string/hello"
/>
<LinearLayout
android:orientation="vertical"
android:gravity="bottom"
android:layout_width="fill_parent"
android:layout_height="fill_parent"
>
<Button
android:id="@+id/aboutme"
android:layout_gravity="center_horizontal"
android:layout_width="wrap_content"
android:layout_height="wrap_content"
android:text="- About Me -"
/>
</LinearLayout>
</LinearLayout>


AndroidAboutMe.java
package com.exercise.AndroidAboutMe;

import android.app.Activity;
import android.app.AlertDialog;
import android.content.DialogInterface;
import android.content.pm.PackageInfo;
import android.content.pm.PackageManager.NameNotFoundException;
import android.os.Bundle;
import android.view.View;
import android.widget.Button;

public class AndroidAboutMe extends Activity {
/** Called when the activity is first created. */
@Override
public void onCreate(Bundle savedInstanceState) {
super.onCreate(savedInstanceState);
setContentView(R.layout.main);
Button buttonAboutMe = (Button)findViewById(R.id.aboutme);

buttonAboutMe.setOnClickListener(new Button.OnClickListener(){

@Override
public void onClick(View v) {
// TODO Auto-generated method stub

String strVersion;

PackageInfo packageInfo;
try {
packageInfo = getPackageManager().getPackageInfo(getPackageName(), 0);
strVersion = "Version Name: " + packageInfo.versionName +"\n"
+ "Version Code: " + String.valueOf(packageInfo.versionCode);
} catch (NameNotFoundException e) {
// TODO Auto-generated catch block
e.printStackTrace();
strVersion = "Cannot load Version!";
}

new AlertDialog.Builder(AndroidAboutMe.this)
.setTitle("About Me!").setMessage(strVersion)
.setPositiveButton("OK",
new DialogInterface.OnClickListener() {
public void onClick(DialogInterface dialog, int which) {}
}).show();
}});
}
}


Download the files.

Thursday, 8 July 2010

Load ListView in background AsyncTask

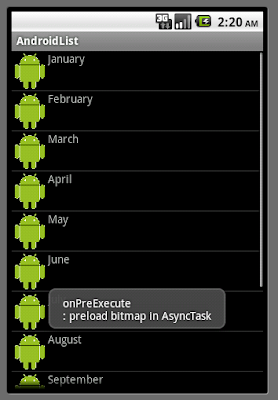
Refer to the old exercise "ListView with icon loaded from internet", it's a time-consume task to load bitmap from internet. So the code is modified in this exercise, a AsyncTask is implemented to handle the ListView: the bitmap is loaded in background thread, and setListAdapter() in onPostExecute().
Load ListView in background AsyncTask

row.xml
<?xml version="1.0" encoding="utf-8"?>
<LinearLayout xmlns:android="http://schemas.android.com/apk/res/android"
android:layout_width="fill_parent"
android:layout_height="wrap_content"
android:orientation="horizontal">
<ImageView
android:id="@+id/icon"
android:layout_width="wrap_content"
android:layout_height="wrap_content"
android:src="@drawable/icon"/>
<TextView
android:id="@+id/weekofday"
android:layout_width="wrap_content"
android:layout_height="wrap_content"/>
</LinearLayout>


AndroidList.java

package com.exercise.AndroidList;

import java.io.IOException;
import java.io.InputStream;
import java.net.HttpURLConnection;
import java.net.URL;
import java.net.URLConnection;

import android.app.ListActivity;
import android.content.Context;
import android.graphics.Bitmap;
import android.graphics.BitmapFactory;
import android.os.AsyncTask;
import android.os.Bundle;
import android.view.LayoutInflater;
import android.view.View;
import android.view.ViewGroup;
import android.widget.ArrayAdapter;
import android.widget.ImageView;
import android.widget.ListView;
import android.widget.TextView;
import android.widget.Toast;

public class AndroidList extends ListActivity {

public class backgroundLoadListView extends
AsyncTask<Void, Void, Void> {

@Override
protected void onPostExecute(Void result) {
// TODO Auto-generated method stub
setListAdapter(new MyCustomAdapter(AndroidList.this, R.layout.row, month));
Toast.makeText(AndroidList.this,
"onPostExecute \n: setListAdapter after bitmap preloaded",
Toast.LENGTH_LONG).show();
}

@Override
protected void onPreExecute() {
// TODO Auto-generated method stub
Toast.makeText(AndroidList.this,
"onPreExecute \n: preload bitmap in AsyncTask",
Toast.LENGTH_LONG).show();
}

@Override
protected Void doInBackground(Void... params) {
// TODO Auto-generated method stub
preLoadSrcBitmap();
return null;
}

}

String image_URL=
"https://blogger.googleusercontent.com/img/b/R29vZ2xl/AVvXsEhksTzch5dDj7Re1S7swjNTOTGXJt5Z8hdF7qRSSs3xA98mE4h_-Qac-JjoEI8K4KWGXi76p0f8zuoac9xHCSSzrv5BMmfUyg3EBtdcrIMf_yuc2bITFMb92LpdUi6n1AILG5pmkGI26Ql9/s1600-r/android.png";

public class MyCustomAdapter extends ArrayAdapter<String> {
Bitmap bm;

public MyCustomAdapter(Context context, int textViewResourceId,
String[] objects) {
super(context, textViewResourceId, objects);
// TODO Auto-generated constructor stub

bm = srcBitmap;
}

@Override
public View getView(int position, View convertView, ViewGroup parent) {
// TODO Auto-generated method stub
//return super.getView(position, convertView, parent);

View row = convertView;

if(row==null){
LayoutInflater inflater=getLayoutInflater();
row=inflater.inflate(R.layout.row, parent, false);
}

TextView label=(TextView)row.findViewById(R.id.weekofday);
label.setText(month[position]);
ImageView icon=(ImageView)row.findViewById(R.id.icon);

icon.setImageBitmap(bm);

return row;
}
}

Bitmap srcBitmap;
private void preLoadSrcBitmap(){
BitmapFactory.Options bmOptions;
bmOptions = new BitmapFactory.Options();
bmOptions.inSampleSize = 1;
srcBitmap = LoadImage(image_URL, bmOptions);
}

String[] month = {
"January", "February", "March", "April",
"May", "June", "July", "August",
"September", "October", "November", "December"
};

/** Called when the activity is first created. */
@Override
public void onCreate(Bundle savedInstanceState) {
super.onCreate(savedInstanceState);
//setContentView(R.layout.main);

/*setListAdapter(new ArrayAdapter<String>(this,
R.layout.row, R.id.weekofday, DayOfWeek));*/
new backgroundLoadListView().execute();
}

@Override
protected void onListItemClick(ListView l, View v, int position, long id) {
// TODO Auto-generated method stub
//super.onListItemClick(l, v, position, id);
String selection = l.getItemAtPosition(position).toString();
Toast.makeText(this, selection, Toast.LENGTH_LONG).show();
}

private Bitmap LoadImage(String URL, BitmapFactory.Options options)
{
Bitmap bitmap = null;
InputStream in = null;
try {
in = OpenHttpConnection(URL);
bitmap = BitmapFactory.decodeStream(in, null, options);
in.close();
} catch (IOException e1) {
}

return bitmap;
}

private InputStream OpenHttpConnection(String strURL) throws IOException{
InputStream inputStream = null;
URL url = new URL(strURL);
URLConnection conn = url.openConnection();

try{
HttpURLConnection httpConn = (HttpURLConnection)conn;
httpConn.setRequestMethod("GET");
httpConn.connect();

if (httpConn.getResponseCode() == HttpURLConnection.HTTP_OK) {
inputStream = httpConn.getInputStream();
}
}
catch (Exception ex){
}

return inputStream;
}
}

please note that in order to permit the App to access to internet, we have to grand it permission of "android.permission.INTERNET"; refer to the last exercise "Load ImageView with bitmap from internet"


Download the files.