Thursday, 30 December 2010

Implement takePicture function of Android Camera

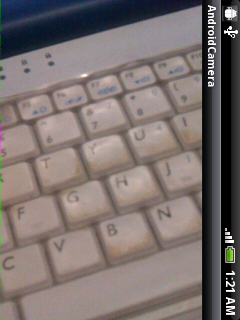
In order to implement takePicture function of Android Camera, we have to implement ShutterCallback, PictureCallback for RAW and PictureCallback for JPG. To take picture, simple call camera.takePicture() method passing with the Callbacks.

takePicture

Modify from the last exercise "Add a overlay on Camera Preview SurfaceView". Modify AndroidCamera.java
package com.exercise.AndroidCamera;

import java.io.IOException;

import android.app.Activity;
import android.content.pm.ActivityInfo;
import android.graphics.Bitmap;
import android.graphics.BitmapFactory;
import android.graphics.PixelFormat;
import android.hardware.Camera;
import android.hardware.Camera.PictureCallback;
import android.hardware.Camera.ShutterCallback;
import android.os.Bundle;
import android.view.LayoutInflater;
import android.view.SurfaceHolder;
import android.view.SurfaceView;
import android.view.View;
import android.view.ViewGroup.LayoutParams;
import android.widget.Button;

public class AndroidCamera extends Activity implements SurfaceHolder.Callback{

Camera camera;
SurfaceView surfaceView;
SurfaceHolder surfaceHolder;
boolean previewing = false;
LayoutInflater controlInflater = null;

/** Called when the activity is first created. */
@Override
public void onCreate(Bundle savedInstanceState) {
super.onCreate(savedInstanceState);
setContentView(R.layout.main);
setRequestedOrientation(ActivityInfo.SCREEN_ORIENTATION_LANDSCAPE);

getWindow().setFormat(PixelFormat.UNKNOWN);
surfaceView = (SurfaceView)findViewById(R.id.camerapreview);
surfaceHolder = surfaceView.getHolder();
surfaceHolder.addCallback(this);
surfaceHolder.setType(SurfaceHolder.SURFACE_TYPE_PUSH_BUFFERS);

controlInflater = LayoutInflater.from(getBaseContext());
View viewControl = controlInflater.inflate(R.layout.control, null);
LayoutParams layoutParamsControl
= new LayoutParams(LayoutParams.FILL_PARENT,
LayoutParams.FILL_PARENT);
this.addContentView(viewControl, layoutParamsControl);

Button buttonTakePicture = (Button)findViewById(R.id.takepicture);
buttonTakePicture.setOnClickListener(new Button.OnClickListener(){

@Override
public void onClick(View arg0) {
// TODO Auto-generated method stub
camera.takePicture(myShutterCallback,
myPictureCallback_RAW, myPictureCallback_JPG);
}});
}

ShutterCallback myShutterCallback = new ShutterCallback(){

@Override
public void onShutter() {
// TODO Auto-generated method stub

}};

PictureCallback myPictureCallback_RAW = new PictureCallback(){

@Override
public void onPictureTaken(byte[] arg0, Camera arg1) {
// TODO Auto-generated method stub

}};

PictureCallback myPictureCallback_JPG = new PictureCallback(){

@Override
public void onPictureTaken(byte[] arg0, Camera arg1) {
// TODO Auto-generated method stub
Bitmap bitmapPicture
= BitmapFactory.decodeByteArray(arg0, 0, arg0.length);
}};

@Override
public void surfaceChanged(SurfaceHolder holder, int format, int width,
int height) {
// TODO Auto-generated method stub
if(previewing){
camera.stopPreview();
previewing = false;
}

if (camera != null){
try {
camera.setPreviewDisplay(surfaceHolder);
camera.startPreview();
previewing = true;
} catch (IOException e) {
// TODO Auto-generated catch block
e.printStackTrace();
}
}
}

@Override
public void surfaceCreated(SurfaceHolder holder) {
// TODO Auto-generated method stub
camera = Camera.open();
}

@Override
public void surfaceDestroyed(SurfaceHolder holder) {
// TODO Auto-generated method stub
camera.stopPreview();
camera.release();
camera = null;
previewing = false;
}
}


Download the files.

next:
- Save the camera image using MediaStore


Wednesday, 29 December 2010

Add a overlay on Camera Preview SurfaceView

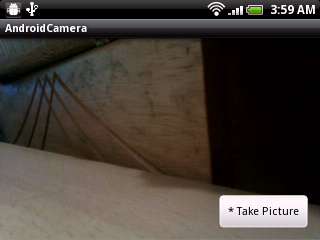
Modify from last exercise "Camera Preview, version II", a overlay will be add on the Camera Preview SurfaceView. Controls; such as "Take Picture" button is added on the overlay.

Add a overlay on Camera Preview SurfaceView

Keep using the AndroidManifest.xml and main.xml in last exercise "Camera Preview, version II" without change.

Add a layout xml file, control.xml, under /res/layout folder. It define the layout of the control layer.
<?xml version="1.0" encoding="utf-8"?>
<LinearLayout xmlns:android="http://schemas.android.com/apk/res/android"
android:orientation="vertical"
android:layout_width="fill_parent"
android:layout_height="fill_parent"
android:gravity="bottom"
>
<Button
android:id="@+id/takepicture"
android:layout_width="wrap_content"
android:layout_height="wrap_content"
android:text=" * Take Picture "
android:layout_gravity="right"
android:layout_margin="10px"
/>
</LinearLayout>


Modify AndroidCamera.java to inflate a layer using control.xml
package com.exercise.AndroidCamera;

import java.io.IOException;

import android.app.Activity;
import android.content.pm.ActivityInfo;
import android.graphics.PixelFormat;
import android.hardware.Camera;
import android.os.Bundle;
import android.view.LayoutInflater;
import android.view.SurfaceHolder;
import android.view.SurfaceView;
import android.view.View;
import android.view.ViewGroup.LayoutParams;

public class AndroidCamera extends Activity implements SurfaceHolder.Callback{

Camera camera;
SurfaceView surfaceView;
SurfaceHolder surfaceHolder;
boolean previewing = false;
LayoutInflater controlInflater = null;

/** Called when the activity is first created. */
@Override
public void onCreate(Bundle savedInstanceState) {
super.onCreate(savedInstanceState);
setContentView(R.layout.main);
setRequestedOrientation(ActivityInfo.SCREEN_ORIENTATION_LANDSCAPE);

getWindow().setFormat(PixelFormat.UNKNOWN);
surfaceView = (SurfaceView)findViewById(R.id.camerapreview);
surfaceHolder = surfaceView.getHolder();
surfaceHolder.addCallback(this);
surfaceHolder.setType(SurfaceHolder.SURFACE_TYPE_PUSH_BUFFERS);

controlInflater = LayoutInflater.from(getBaseContext());
View viewControl = controlInflater.inflate(R.layout.control, null);
LayoutParams layoutParamsControl
= new LayoutParams(LayoutParams.FILL_PARENT,
LayoutParams.FILL_PARENT);
this.addContentView(viewControl, layoutParamsControl);

}


@Override
public void surfaceChanged(SurfaceHolder holder, int format, int width,
int height) {
// TODO Auto-generated method stub
if(previewing){
camera.stopPreview();
previewing = false;
}

if (camera != null){
try {
camera.setPreviewDisplay(surfaceHolder);
camera.startPreview();
previewing = true;
} catch (IOException e) {
// TODO Auto-generated catch block
e.printStackTrace();
}
}
}

@Override
public void surfaceCreated(SurfaceHolder holder) {
// TODO Auto-generated method stub
camera = Camera.open();
}

@Override
public void surfaceDestroyed(SurfaceHolder holder) {
// TODO Auto-generated method stub
camera.stopPreview();
camera.release();
camera = null;
previewing = false;
}
}


Download the files.

next:
- Implement takePicture function of Android Camera

Tuesday, 28 December 2010

Pro Android Media: Developing Graphics, Music, Video, and Rich Media Apps for Smartphones and Tablets


Product Description

Mobile devices have evolved to focus on rich media production and consumption. Developers of mobile applications are able to create applications that allow people to play, capture, and share media in a variety of new ways on mobile devices. The popularity of Android has soared in part because the platform offers developers a rich set of capabilities including access to media capturing and playback functions.

Pro Android Media provides concise and clear instruction on how to utilize the media APIs made available through Android to create dynamic apps. It takes you from a simple means to gain access to the camera to complex video capture and sharing examples. It also covers sound, graphics, painting, and more�everything you need to make your app come "alive."

After reading this book, the app you create will showcase the best of multimedia that Android has to offer.

What you�ll learn

  • Develop graphics, music, video and rich media apps for Android smartphones and tablets
  • Build touchscreen input features into Android apps that allow users to draw, paint, and do other creative forms of input.
  • Turn the Android smartphone into a full fledged media player
  • How to integrate and use location based services and media related web service APIs

Who this book is for

This book is aimed primarily at the growing market of Android developers. It is written in such a way that it may be used by those who are familiar with Android, but have no experience developing applications that deal with images, audio, or video.


Tron Legacy Review

Reading this story on Slashdot got me thinking that I should write down a few words on Tron Legacy. The basic premise of the Tron films is that a world exists inside of computers. Our heros get sucked into this world and have all sorts of cool adventures. In theory, this film is a sequel to the original Tron movie which came out in the 1980s.


In practice, there is quite a bit of overlap between the two films thematically. Of course, this makes sense given that most people will not have seen the first film. The film is visually stunning full of some really cool visual effects. So if you are into that sort of thing, definitely see this movie in the theater. If you have not seen the first film, read the plot on Wikipedia or you will be a little confused I think. Overall is a good film, but not a great one: 3 stars out of 5 for me.


A few observations are in order.


  • Whenever computer based life evolves, the first thing they build in their cities is a techno club. Apparently, the night clubs with techno music is a universal constant and requirement of any alien life form. (See this movie and the Matrix) Why can't the head of the resistance work in a grocery store? :)

  • The computer world in this movie didn't incorporate many of the technology advances made since the first movie.  In 1982, no one had heard of the Internet. It just seemed to me things inside the computer had not changed much in 30 years.

  • If the movie does at all well, expect a sequel. The ending of the movie left open quite a few possibilities.

  • Definitely not enough Tron in this film. Goodness sake, the film is named after him. He deserves a lot more than a flashback and a brief cameo here and there.


Camera Preview, version II

In the exercise "Camera Preview on SurfaceView", I show how to using Android's camera preview on a SurfaceView. The preview is set Start/Stop using buttons, it's not a good approach I think. In this exercise, it is re-arranged to handle the preview in SurfaceHolder.Callback methods: surfaceCreated(), surfaceChanged() and surfaceDestroyed().

Android's Camera Preview

Remember to grant permission to access Camera AndroidManifest.xml
<?xml version="1.0" encoding="utf-8"?>
<manifest xmlns:android="http://schemas.android.com/apk/res/android"
package="com.exercise.AndroidCamera"
android:versionCode="1"
android:versionName="1.0">
<application android:icon="@drawable/icon" android:label="@string/app_name">
<activity android:name=".AndroidCamera"
android:label="@string/app_name">
<intent-filter>
<action android:name="android.intent.action.MAIN" />
<category android:name="android.intent.category.LAUNCHER" />
</intent-filter>
</activity>

</application>
<uses-sdk android:minSdkVersion="4" />
<uses-permission android:name="android.permission.CAMERA"></uses-permission>
</manifest>


main.xml
<?xml version="1.0" encoding="utf-8"?>
<LinearLayout xmlns:android="http://schemas.android.com/apk/res/android"
android:orientation="vertical"
android:layout_width="fill_parent"
android:layout_height="fill_parent"
>
<SurfaceView
android:id="@+id/camerapreview"
android:layout_width="fill_parent"
android:layout_height="wrap_content"
/>
</LinearLayout>


AndroidCamera.java
package com.exercise.AndroidCamera;

import java.io.IOException;

import android.app.Activity;
import android.content.pm.ActivityInfo;
import android.graphics.PixelFormat;
import android.hardware.Camera;
import android.os.Bundle;
import android.view.SurfaceHolder;
import android.view.SurfaceView;

public class AndroidCamera extends Activity implements SurfaceHolder.Callback{

Camera camera;
SurfaceView surfaceView;
SurfaceHolder surfaceHolder;
boolean previewing = false;;

/** Called when the activity is first created. */
@Override
public void onCreate(Bundle savedInstanceState) {
super.onCreate(savedInstanceState);
setContentView(R.layout.main);
setRequestedOrientation(ActivityInfo.SCREEN_ORIENTATION_LANDSCAPE);

getWindow().setFormat(PixelFormat.UNKNOWN);
surfaceView = (SurfaceView)findViewById(R.id.camerapreview);
surfaceHolder = surfaceView.getHolder();
surfaceHolder.addCallback(this);
surfaceHolder.setType(SurfaceHolder.SURFACE_TYPE_PUSH_BUFFERS);
}


@Override
public void surfaceChanged(SurfaceHolder holder, int format, int width,
int height) {
// TODO Auto-generated method stub
if(previewing){
camera.stopPreview();
previewing = false;
}

if (camera != null){
try {
camera.setPreviewDisplay(surfaceHolder);
camera.startPreview();
previewing = true;
} catch (IOException e) {
// TODO Auto-generated catch block
e.printStackTrace();
}
}
}

@Override
public void surfaceCreated(SurfaceHolder holder) {
// TODO Auto-generated method stub
camera = Camera.open();
}

@Override
public void surfaceDestroyed(SurfaceHolder holder) {
// TODO Auto-generated method stub
camera.stopPreview();
camera.release();
camera = null;
previewing = false;
}
}


Download the files.

next:
- Add a overlay on Camera Preview SurfaceView


Sunday, 26 December 2010

In-correct arrow icon on Spinner with custom ArrayAdapter

Refer to the exercise "Custom ArrayAdapter for Spinner, with different icons"; it implement a Spinner with custom ArrayAdapter, base on Build Target of Android 1.6, and android:minSdkVersion="4".

When it run on AVD of Android 2.1, the drop-down arrow on the right side is in-corret.
Run on AVD of Android 2.1

The same code, when it run on AVD of Android 2.3, the arrow is displayed correctly.
Run on AVD of Android 2.3

Up to this minute, I have no any idea on this problem. Sorry for any inconvenience caused!

Updated@2012-01-13: Please read command by RSZ below.

Saturday, 25 December 2010

Custom ArrayAdapter for Spinner, with different icons

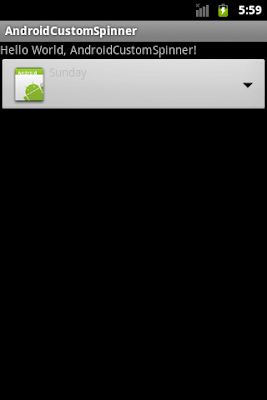
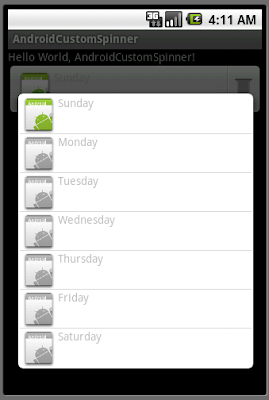
In last exercise "Custom Spinner with icon", a custom spinner have been implemented. But all row have the same icon. In order to display a spinner with difference icons on each row, we can implement our own ArrayAdapter, override getDropDownView() and getView() methods.

Custom ArrayAdapter for Spinner, with different icons

row.xml and main.xml keep no change as in the exercise "Custom Spinner with icon".

AndroidCustomSpinner.java
package com.exercise.AndroidCustomSpinner;

import android.app.Activity;
import android.content.Context;
import android.os.Bundle;
import android.view.LayoutInflater;
import android.view.View;
import android.view.ViewGroup;
import android.widget.ArrayAdapter;
import android.widget.ImageView;
import android.widget.Spinner;
import android.widget.TextView;

public class AndroidCustomSpinner extends Activity {

String[] DayOfWeek = {"Sunday", "Monday", "Tuesday",
"Wednesday", "Thursday", "Friday", "Saturday"};

/** Called when the activity is first created. */
@Override
public void onCreate(Bundle savedInstanceState) {
super.onCreate(savedInstanceState);
setContentView(R.layout.main);

Spinner mySpinner = (Spinner)findViewById(R.id.spinner);
mySpinner.setAdapter(new MyCustomAdapter(AndroidCustomSpinner.this, R.layout.row, DayOfWeek));
}

public class MyCustomAdapter extends ArrayAdapter<String>{

public MyCustomAdapter(Context context, int textViewResourceId,
String[] objects) {
super(context, textViewResourceId, objects);
// TODO Auto-generated constructor stub
}

@Override
public View getDropDownView(int position, View convertView,
ViewGroup parent) {
// TODO Auto-generated method stub
return getCustomView(position, convertView, parent);
}

@Override
public View getView(int position, View convertView, ViewGroup parent) {
// TODO Auto-generated method stub
return getCustomView(position, convertView, parent);
}

public View getCustomView(int position, View convertView, ViewGroup parent) {
// TODO Auto-generated method stub
//return super.getView(position, convertView, parent);

LayoutInflater inflater=getLayoutInflater();
View row=inflater.inflate(R.layout.row, parent, false);
TextView label=(TextView)row.findViewById(R.id.weekofday);
label.setText(DayOfWeek[position]);

ImageView icon=(ImageView)row.findViewById(R.id.icon);

if (DayOfWeek[position]=="Sunday"){
icon.setImageResource(R.drawable.icon);
}
else{
icon.setImageResource(R.drawable.icongray);
}

return row;
}
}
}
***********
It's a programmatic pitfall here:
in getCustomView(), Condition checking of String ("Sunday") should be checked with:
(DayOfWeek[position].equals("Sunday"))

"==" not always work! refer String Comparison: equals()? ==?
***********


Download the files.

* Please see the article "In-correct arrow icon on Spinner with custom ArrayAdapter"!

Friday, 24 December 2010

Detecting Browsers with PHP

PHP LogoBeen looking for a way to detect a browser in PHP. Blogger has added a feature to automatically deliver a mobile web version of my blog. However, this doesn't seem to work well with my frameset setup on blueskyworkshop.com. Plus blogger doesn't include any of my navigation features or ads on the mobile version. So I want to roll my own.


So here are a couple links on browser detection.

Thursday, 23 December 2010

Details on iPad 2

More details on the iPad 2 from CNet. A little bit thinner and squarer the the first generation it sounds like. Plus dual cameras like the iPhone 4.

Wednesday, 15 December 2010

Google Chrome OS is a Swing and Miss

Webkit icon
John C Dvorak has a column on the new Google Chrome OS over at PC Mag. This was discussed a lot in this weeks TWIT podcast. Basically, you are getting a getting a laptop that cannot do much of anything without an Internet connection. That does not sound very promising.


As Dvorak points out, this sort of solution makes a lot more sense on a desktop. In my opinion, an iPad makes a product like this moot. Too little too late on this one Google. More Android touch pads please.

iPhone to Verizon will Screw AT&T

iPhone iPad pictureCourtesy of Cult of Mac blog, yet another analyst predicts AT&T's demise once the iPhone becomes available on the Verizon network.


I still don't get this. My iPhone works great in Denver, in San Jose, in North Carolina, and Tennessee. Everywhere I have been in the last 2 or 3 years, no problems. It doesn't work well up in the mountains, but of course, the mountains tend to get in the way of the cell towers.


The only place I have heard AT&T reception is terrible is in San Francisco. Yet, according to the tech media, the AT&T network is terrible! Everyone will move to Verizon instantly! AT&T is doomed.


Frankly, I can't wait for the iPhone to become available on Verizon. Then I don't have to listen to this nonsense any more. And... there will be a lot more extra bandwidth for the rest of us. :)

Tuesday, 14 December 2010

Custom Spinner with icon

Refer to the exercise "HelloAndroid with Spinner", it's a basic spinner with default format to display simple text in the spinner. Current exercise is modified to have custom display with icon in the spinner, actually it is Spinner version of another exercise "ListView, with icon".

Custom Spinner with icon

Create a row.xml in /res/layout/. To to setup the layout on each row.
<?xml version="1.0" encoding="utf-8"?>
<LinearLayout xmlns:android="http://schemas.android.com/apk/res/android"
android:layout_width="fill_parent"
android:layout_height="wrap_content"
android:orientation="horizontal">
<ImageView
android:id="@+id/icon"
android:layout_width="wrap_content"
android:layout_height="wrap_content"
android:src="@drawable/icon"/>
<TextView
android:id="@+id/weekofday"
android:layout_width="wrap_content"
android:layout_height="wrap_content"/>
</LinearLayout>


main.xml layout
<?xml version="1.0" encoding="utf-8"?>
<LinearLayout xmlns:android="http://schemas.android.com/apk/res/android"
android:orientation="vertical"
android:layout_width="fill_parent"
android:layout_height="fill_parent"
>
<TextView
android:layout_width="fill_parent"
android:layout_height="wrap_content"
android:text="@string/hello"
/>
<Spinner
android:id="@+id/spinner"
android:layout_width="fill_parent"
android:layout_height="wrap_content"
/>
</LinearLayout>


Main Java code, AndroidCustomSpinner.java
package com.exercise.AndroidCustomSpinner;

import android.app.Activity;
import android.os.Bundle;
import android.widget.ArrayAdapter;
import android.widget.Spinner;

public class AndroidCustomSpinner extends Activity {

String[] DayOfWeek = {"Sunday", "Monday", "Tuesday",
"Wednesday", "Thursday", "Friday", "Saturday"};

/** Called when the activity is first created. */
@Override
public void onCreate(Bundle savedInstanceState) {
super.onCreate(savedInstanceState);
setContentView(R.layout.main);

Spinner mySpinner = (Spinner)findViewById(R.id.spinner);
ArrayAdapter<String> adapter = new ArrayAdapter<String>(this,
R.layout.row, R.id.weekofday, DayOfWeek);
mySpinner.setAdapter(adapter);
}
}

Download the files.

Related Article:
- Custom ArrayAdapter for Spinner, with different icons

* Please see the article "In-correct arrow icon on Spinner with custom ArrayAdapter"!


Monday, 13 December 2010

Implement a SeekBar to control the volume of Video Player

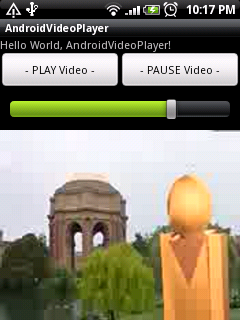
Modify the former exercise "Play 3gp video file using MediaPlayer" to add a SeekBar to control the volume.


In order to create a volume control using SeekBar, we have to know the maximum volume and current volume. It can be retrieved using the method audioManager.getStreamMaxVolume(AudioManager.STREAM_MUSIC) and audioManager.getStreamVolume(AudioManager.STREAM_MUSIC). And we can change the volume when SeekBar changed, using the method audioManager.setStreamVolume(AudioManager.STREAM_MUSIC, volume index, flags).

Firstly, modify main.xml to add a SeekBar as Volume Control.
<?xml version="1.0" encoding="utf-8"?>
<LinearLayout xmlns:android="http://schemas.android.com/apk/res/android"
android:orientation="vertical"
android:layout_width="fill_parent"
android:layout_height="fill_parent"
>
<TextView
android:layout_width="fill_parent"
android:layout_height="wrap_content"
android:text="@string/hello"
/>
<LinearLayout
android:orientation="horizontal"
android:layout_height="wrap_content"
android:layout_width="fill_parent"
>
<Button
android:id="@+id/playvideoplayer"
android:layout_width="0dip"
android:layout_height="wrap_content"
android:layout_weight="1"
android:text="- PLAY Video -"
/>
<Button
android:id="@+id/pausevideoplayer"
android:layout_width="0dip"
android:layout_height="wrap_content"
android:layout_weight="1"
android:text="- PAUSE Video -"
/>
</LinearLayout>
<SeekBar
android:id="@+id/volbar"
android:layout_width="fill_parent"
android:layout_height="wrap_content"
android:layout_margin="10px"
/>
<SurfaceView
android:id="@+id/surfaceview"
android:layout_width="fill_parent"
android:layout_height="wrap_content"
/>
</LinearLayout>


Modify AndroidVideoPlayer to handle the SeekBar as Volume Control.
package com.exercise.AndroidVideoPlayer;

import java.io.IOException;

import android.app.Activity;
import android.content.Context;
import android.graphics.PixelFormat;
import android.media.AudioManager;
import android.media.MediaPlayer;
import android.os.Bundle;
import android.view.SurfaceHolder;
import android.view.SurfaceView;
import android.view.View;
import android.widget.Button;
import android.widget.SeekBar;

public class AndroidVideoPlayer extends Activity implements SurfaceHolder.Callback{

MediaPlayer mediaPlayer;
SurfaceView surfaceView;
SurfaceHolder surfaceHolder;
boolean pausing = false;

AudioManager audioManager;

String stringPath = "/sdcard/samplevideo.3gp";

/** Called when the activity is first created. */
@Override
public void onCreate(Bundle savedInstanceState) {
super.onCreate(savedInstanceState);
setContentView(R.layout.main);


audioManager = (AudioManager)getSystemService(Context.AUDIO_SERVICE);
int maxVolume = audioManager.getStreamMaxVolume(AudioManager.STREAM_MUSIC);
int curVolume = audioManager.getStreamVolume(AudioManager.STREAM_MUSIC);
SeekBar volControl = (SeekBar)findViewById(R.id.volbar);
volControl.setMax(maxVolume);
volControl.setProgress(curVolume);
volControl.setOnSeekBarChangeListener(new SeekBar.OnSeekBarChangeListener() {

@Override
public void onStopTrackingTouch(SeekBar arg0) {
// TODO Auto-generated method stub

}

@Override
public void onStartTrackingTouch(SeekBar arg0) {
// TODO Auto-generated method stub

}

@Override
public void onProgressChanged(SeekBar arg0, int arg1, boolean arg2) {
// TODO Auto-generated method stub
audioManager.setStreamVolume(AudioManager.STREAM_MUSIC, arg1, 0);
}
});


Button buttonPlayVideo = (Button)findViewById(R.id.playvideoplayer);
Button buttonPauseVideo = (Button)findViewById(R.id.pausevideoplayer);

getWindow().setFormat(PixelFormat.UNKNOWN);
surfaceView = (SurfaceView)findViewById(R.id.surfaceview);
surfaceHolder = surfaceView.getHolder();
surfaceHolder.addCallback(this);
surfaceHolder.setFixedSize(176, 144);
surfaceHolder.setType(SurfaceHolder.SURFACE_TYPE_PUSH_BUFFERS);
mediaPlayer = new MediaPlayer();

buttonPlayVideo.setOnClickListener(new Button.OnClickListener(){

@Override
public void onClick(View v) {
// TODO Auto-generated method stub
pausing = false;

if(mediaPlayer.isPlaying()){
mediaPlayer.reset();
}

mediaPlayer.setAudioStreamType(AudioManager.STREAM_MUSIC);
mediaPlayer.setDisplay(surfaceHolder);

try {
mediaPlayer.setDataSource(stringPath);
mediaPlayer.prepare();
} catch (IllegalArgumentException e) {
// TODO Auto-generated catch block
e.printStackTrace();
} catch (IllegalStateException e) {
// TODO Auto-generated catch block
e.printStackTrace();
} catch (IOException e) {
// TODO Auto-generated catch block
e.printStackTrace();
}

mediaPlayer.start();


}});

buttonPauseVideo.setOnClickListener(new Button.OnClickListener(){

@Override
public void onClick(View v) {
// TODO Auto-generated method stub
if(pausing){
pausing = false;
mediaPlayer.start();
}
else{
pausing = true;
mediaPlayer.pause();
}
}});

}


@Override
public void surfaceChanged(SurfaceHolder holder, int format, int width,
int height) {
// TODO Auto-generated method stub

}

@Override
public void surfaceCreated(SurfaceHolder holder) {
// TODO Auto-generated method stub

}

@Override
public void surfaceDestroyed(SurfaceHolder holder) {
// TODO Auto-generated method stub

}
}


Download the files.

Saturday, 11 December 2010

Get supported picture sizes of Android device's camera: getSupportedPictureSizes()

To read the info of supporte picture size of camera, the method getSupportedPictureSizes() can be used. It return a list of supported picture sizes. This method will always return a list with at least one element.

List of Supported Picture Sizes

In order to access Camera, we have to modify AndroidManifest.xml to grant permission of Camera.
<uses-permission android:name="android.permission.CAMERA" />
<uses-feature android:name="android.hardware.camera" />
<uses-feature android:name="android.hardware.camera.autofocus" />

<?xml version="1.0" encoding="utf-8"?>
<manifest xmlns:android="http://schemas.android.com/apk/res/android"
package="com.exercise.AndroidCameraPictureSizes"
android:versionCode="1"
android:versionName="1.0">
<application android:icon="@drawable/icon" android:label="@string/app_name">
<activity android:name=".AndroidCameraPictureSizes"
android:label="@string/app_name">
<intent-filter>
<action android:name="android.intent.action.MAIN" />
<category android:name="android.intent.category.LAUNCHER" />
</intent-filter>
</activity>

</application>
<uses-sdk android:minSdkVersion="7" />
<uses-permission android:name="android.permission.CAMERA" />
<uses-feature android:name="android.hardware.camera" />
<uses-feature android:name="android.hardware.camera.autofocus" />
</manifest>


Modify main.xml to have a Spinner to display the list.
<?xml version="1.0" encoding="utf-8"?>
<LinearLayout xmlns:android="http://schemas.android.com/apk/res/android"
android:orientation="vertical"
android:layout_width="fill_parent"
android:layout_height="fill_parent"
>
<TextView
android:layout_width="fill_parent"
android:layout_height="wrap_content"
android:text="@string/hello"
/>
<Spinner
android:id="@+id/supportedpicturesizes"
android:layout_width="fill_parent"
android:layout_height="wrap_content"
/>
</LinearLayout>


Main Java code
package com.exercise.AndroidCameraPictureSizes;

import java.util.ArrayList;
import java.util.List;

import android.app.Activity;
import android.hardware.Camera;
import android.os.Bundle;
import android.widget.ArrayAdapter;
import android.widget.Spinner;
import android.widget.Toast;

public class AndroidCameraPictureSizes extends Activity {
/** Called when the activity is first created. */
@Override
public void onCreate(Bundle savedInstanceState) {
super.onCreate(savedInstanceState);
setContentView(R.layout.main);

Spinner spinnerSupportedPictureSizes = (Spinner)findViewById(R.id.supportedpicturesizes);

Camera camera = Camera.open();
Camera.Parameters cameraParameters = camera.getParameters();
List<Camera.Size> listSupportedPictureSizes = cameraParameters.getSupportedPictureSizes();

List<String> listStrSupportedPictureSizes = new ArrayList<String>();

for (int i=0; i < listSupportedPictureSizes.size(); i++){

String strSize = String.valueOf(i) + " : "
+ String.valueOf(listSupportedPictureSizes.get(i).height)
+ " x "
+ String.valueOf(listSupportedPictureSizes.get(i).width);
listStrSupportedPictureSizes.add(strSize);
}

ArrayAdapter<String> adapter = new ArrayAdapter<String>(this,
android.R.layout.simple_spinner_item, listStrSupportedPictureSizes);
adapter.setDropDownViewResource(android.R.layout.simple_spinner_dropdown_item);
spinnerSupportedPictureSizes.setAdapter(adapter);

camera.release();
}
}


Download the files.


Wednesday, 8 December 2010

New iDevice Tool In Progress...

I've been working on a new and improved version of TinyUmbrella that will, among other things, allow you to restore your iDevice without iTunes. With the holiday season and work, this will take me a bit to get working the way I want it. I appreciate your patience and your support. You guys are awesome :) No ETAs yet but I'll post updates here and on twitter.

UPDATE: By popular demand I've updated 4.21 to support Apple TV 4.2.1 SHSH's. I'm still working on the new iteration of the Tiny family. Stay tuned!

Tuesday, 7 December 2010

NEWest update of ADT 8.0.1

If you had updated/installed Android SDK for 2.3 with ADT version 8.0.0, It's a new update ADT version 8.0.1 available.

To update ADT, click Help in Eclipse, Check for Updateds, select and install the available updates.

NEWest update of ADT 8.0.1


Monday, 6 December 2010

3 Cool JQuery and JavaScript Tools

JQuery Logo

The folks at WebAppers had three really good posts I wanted to link too. Here they are.


  1. Easy to Customize Slideshow Plugin for JQuery

  2. SlideNote Sliding Notification Tool

  3. HeadJS Javascript Loader

Best Free Calendar Tool for Windows 7

Microsoft Logo

The other day I was looking for a good free calendar tool for Windows 7. Much to my surprise, I already had it. Click on the date and time in the lower right hand corner of the desktop and look what you get.


The calendar is in read only mode by default. Making it a great browsable calendar widget.

GALAXY Tab emulator on Android SDK 2.3

GALAXY Tab emulator on Android SDK 2.3
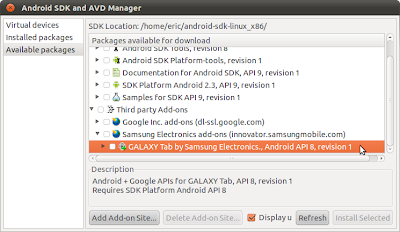
When you install packages in Android SDK and AVD Manager (Eclipse -> Window -> Android SDK and AVD Manager -> Available packages). You can note that there is a new option of Third party Add-ons. It's a GALAXY Tab by Samsung Electronics under it. Click to include it in your installation.

SDK and AVD Manager
A new Virtual device have to be created before it can be used to run your apps.
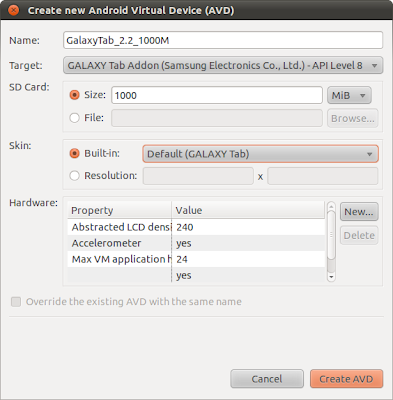
Eclipse -> Window -> Android SDK and AVD Manager -> Virtual devices, click New button. You can select Target of GALAXY Tab
Create AVD of GALAXY Tab

Once you create new AVD using GALAXY Tab properly, you can create new project with GALAXY Tab as the Build Target.
Create new project with GALAXY Tab as the Build Target

HelloGalaxyTab run on GALAXY Tab Emulator

A problem when update existing Android SDK to 2.3: .../tools/lib/proguard.cfg (No such file or directory)

As stated in Android web site, you can update Android SDK to 2.3 by adding as an SDK component, or install the fresh new SDK starter package.

In my case, I update as an SDK component. I tried to set-up a new project after updated, the error of ".../tools/lib/proguard.cfg (No such file or directory)" reported. proguard.cfg file is automatically generated when you create an Android project(http://developer.android.com/guide/developing/tools/proguard.html).


I compare the content of my existing Android SDK folder after updated, and that of a fresh new downloaded Android SDK, the file /tools/lib/proguard.cfg is missing in my case; may be that's why I can't generate proguard.cfg accordingly. So I re-setup my Eclipse to use the fresh new SDK, the problem have been solved. As it should be, I have to re-setup the Android SDK location and AVD.


Android 2.3 Platform and Updated SDK Tools is here!


Google just announced a new version of the Android platform � Android 2.3 (Gingerbread). It includes many new platform technologies and APIs to help developers create great apps. Some of the highlights include:

Enhancements for game development: To improve overall responsiveness, we�ve added a new concurrent garbage collector and optimized the platform�s overall event handling. We�ve also given developers native access to more parts of the system by exposing a broad set of native APIs. From native code, applications can now access input and sensor events, EGL/OpenGL ES, OpenSL ES, and assets, as well a new framework for managing lifecycle and windows. For precise motion processing, developers can use several new sensor types, including gyroscope.

Rich multimedia: To provide a great multimedia environment for games and other applications, we�ve added support for the new video formats VP8 and WebM, as well as support for AAC and AMR-wideband encoding. The platform also provides new audio effects such as reverb, equalization, headphone virtualization, and bass boost.

New forms of communication: The platform now includes support for front-facing camera, SIP/VOIP, and Near Field Communications (NFC), to let developers include new capabilities in their applications.

For a complete overview of what�s new in the platform, see the Android 2.3 Platform Highlights.

Alongside the new platform, we are releasing updates to the SDK Tools (r8), NDK, and ADT Plugin for Eclipse (8.0.0). New features include:

Simplified debug builds: Developers can easily generate debug packages without having to manually configure the application�s manifest, making workflow more efficient.

Integrated ProGuard support: ProGuard is now packaged with the SDK Tools. Developers can now obfuscate their code as an integrated part of a release build.

HierarchyViewer improvements: The HierarchyViewer tool includes an updated UI and is now accessible directly from the ADT Plugin.

Preview of new UI Builder: An early release of a new visual layout editor lets developers create layouts in ADT by dragging and dropping UI elements from contextual menus. It�s a work in progress and we intend to iterate quickly on it.

To get started developing or testing applications on Android 2.3, visit the Android Developers site for information about theAndroid 2.3 platform, the SDK Tools, the ADT Plugin and the new NDK.


Source: Android Developers Blog - Android 2.3 Platform and Updated SDK Tools


Personally, I suggest to install as a fresh new SDK Tools, because there is "A problem when update existing Android SDK to 2.3: .../tools/lib/proguard.cfg (No such file or directory)".

Friday, 3 December 2010

Camera Preview on SurfaceView

With little bit of modification on last exercise "Play 3gp video file using MediaPlayer", it's easy to implement a app to preview Android camera on SurfaceView.

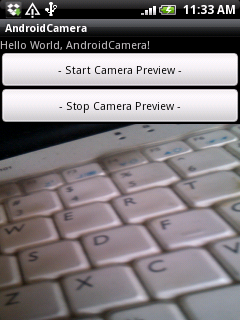
Camera Preview on SurfaceView

Modify AndroidManifest.xml to grant permission to access Camera
<?xml version="1.0" encoding="utf-8"?>
<manifest xmlns:android="http://schemas.android.com/apk/res/android"
package="com.exercise.AndroidCamera"
android:versionCode="1"
android:versionName="1.0">
<application android:icon="@drawable/icon" android:label="@string/app_name">
<activity android:name=".AndroidCamera"
android:label="@string/app_name">
<intent-filter>
<action android:name="android.intent.action.MAIN" />
<category android:name="android.intent.category.LAUNCHER" />
</intent-filter>
</activity>

</application>
<uses-sdk android:minSdkVersion="4" />

<uses-permission android:name="android.permission.CAMERA"></uses-permission>
</manifest>


Modify main.xml, basically same as the one in the last exercise.
<?xml version="1.0" encoding="utf-8"?>
<LinearLayout xmlns:android="http://schemas.android.com/apk/res/android"
android:orientation="vertical"
android:layout_width="fill_parent"
android:layout_height="fill_parent"
>
<TextView
android:layout_width="fill_parent"
android:layout_height="wrap_content"
android:text="@string/hello"
/>
<Button
android:id="@+id/startcamerapreview"
android:layout_width="fill_parent"
android:layout_height="wrap_content"
android:text="- Start Camera Preview -"
/>
<Button
android:id="@+id/stopcamerapreview"
android:layout_width="fill_parent"
android:layout_height="wrap_content"
android:text="- Stop Camera Preview -"
/>
<SurfaceView
android:id="@+id/surfaceview"
android:layout_width="fill_parent"
android:layout_height="wrap_content"
/>
</LinearLayout>


Modify the source code, AndroidCamera.
package com.exercise.AndroidCamera;

import java.io.IOException;

import android.app.Activity;
import android.graphics.PixelFormat;
import android.hardware.Camera;
import android.os.Bundle;
import android.view.SurfaceHolder;
import android.view.SurfaceView;
import android.view.View;
import android.widget.Button;

public class AndroidCamera extends Activity implements SurfaceHolder.Callback{

Camera camera;
SurfaceView surfaceView;
SurfaceHolder surfaceHolder;
boolean previewing = false;;

String stringPath = "/sdcard/samplevideo.3gp";

/** Called when the activity is first created. */
@Override
public void onCreate(Bundle savedInstanceState) {
super.onCreate(savedInstanceState);
setContentView(R.layout.main);

Button buttonStartCameraPreview = (Button)findViewById(R.id.startcamerapreview);
Button buttonStopCameraPreview = (Button)findViewById(R.id.stopcamerapreview);

getWindow().setFormat(PixelFormat.UNKNOWN);
surfaceView = (SurfaceView)findViewById(R.id.surfaceview);
surfaceHolder = surfaceView.getHolder();
surfaceHolder.addCallback(this);
surfaceHolder.setType(SurfaceHolder.SURFACE_TYPE_PUSH_BUFFERS);

buttonStartCameraPreview.setOnClickListener(new Button.OnClickListener(){

@Override
public void onClick(View v) {
// TODO Auto-generated method stub
if(!previewing){
camera = Camera.open();
if (camera != null){
try {
camera.setPreviewDisplay(surfaceHolder);
camera.startPreview();
previewing = true;
} catch (IOException e) {
// TODO Auto-generated catch block
e.printStackTrace();
}
}
}
}});

buttonStopCameraPreview.setOnClickListener(new Button.OnClickListener(){

@Override
public void onClick(View v) {
// TODO Auto-generated method stub
if(camera != null && previewing){
camera.stopPreview();
camera.release();
camera = null;

previewing = false;
}
}});

}


@Override
public void surfaceChanged(SurfaceHolder holder, int format, int width,
int height) {
// TODO Auto-generated method stub

}

@Override
public void surfaceCreated(SurfaceHolder holder) {
// TODO Auto-generated method stub

}

@Override
public void surfaceDestroyed(SurfaceHolder holder) {
// TODO Auto-generated method stub

}
}


Download the files.

Related Article:
- Camera Preview, version II


Wednesday, 1 December 2010

iPad Catching up to Kindle

iPhone iPad pictureThe iPad is gonna crush the Kindle? Well that's what the folks over at All Things D think.


However, the article is an oversimplification. Kindle books can be read on the iPad as well as on the Kindle. So the one device is outselling the other device is a very narrow view. My guess would be that Amazon is selling more Kindles not less because of the iPad. Plus, the Kindle for iPad is the best book reader available on the iPad. More books, better interface, you name it.


Without eBook sales included in the analysis, you are not getting the whole picture.

Why one developer dropped Google App Engine

ReadWriteWeb has this post on why one developer dropped the Goggle app engine. It just goes to show, that you need to test a lot before putting an application on a particular platform.


However, I wonder if the issues he ran into were documented. Or, written about in a way you would find them before implementation. Nonetheless, even though its a little old, it is definitely makes interesting reading.