Tuesday 30 November 2010

Play 3gp video file using MediaPlayer

The former exercise show how to "play MIDI audio using MediaPlayer". MediaPlayer can play video file also. This exercise show hoe to play 3gp video file in sdcard using MediaPlayer

(Remark: In my case, the video (and sound) can not be displayed on emulator. But it can work as expected on true phone.)

Play 3gp video file using MediaPlayer

Copy 3gp file to root folder on SD Card.

Modify main.xml to have two buttons and a SurfaceView to show the video.
<?xml version="1.0" encoding="utf-8"?>
<LinearLayout xmlns:android="http://schemas.android.com/apk/res/android"
android:orientation="vertical"
android:layout_width="fill_parent"
android:layout_height="fill_parent"
>
<TextView
android:layout_width="fill_parent"
android:layout_height="wrap_content"
android:text="@string/hello"
/>
<Button
android:id="@+id/playvideoplayer"
android:layout_width="fill_parent"
android:layout_height="wrap_content"
android:text="- PLAY Video -"
/>
<Button
android:id="@+id/pausevideoplayer"
android:layout_width="fill_parent"
android:layout_height="wrap_content"
android:text="- PAUSE Video -"
/>
<SurfaceView
android:id="@+id/surfaceview"
android:layout_width="fill_parent"
android:layout_height="wrap_content"
/>
</LinearLayout>


Modify source code, AndroidVideoPlayer.java.
package com.exercise.AndroidVideoPlayer;

import java.io.IOException;

import android.app.Activity;
import android.graphics.PixelFormat;
import android.media.AudioManager;
import android.media.MediaPlayer;
import android.os.Bundle;
import android.view.SurfaceHolder;
import android.view.SurfaceView;
import android.view.View;
import android.widget.Button;

public class AndroidVideoPlayer extends Activity implements SurfaceHolder.Callback{

MediaPlayer mediaPlayer;
SurfaceView surfaceView;
SurfaceHolder surfaceHolder;
boolean pausing = false;;

String stringPath = "/sdcard/samplevideo.3gp";

/** Called when the activity is first created. */
@Override
public void onCreate(Bundle savedInstanceState) {
super.onCreate(savedInstanceState);
setContentView(R.layout.main);

Button buttonPlayVideo = (Button)findViewById(R.id.playvideoplayer);
Button buttonPauseVideo = (Button)findViewById(R.id.pausevideoplayer);

getWindow().setFormat(PixelFormat.UNKNOWN);
surfaceView = (SurfaceView)findViewById(R.id.surfaceview);
surfaceHolder = surfaceView.getHolder();
surfaceHolder.addCallback(this);
surfaceHolder.setFixedSize(176, 144);
surfaceHolder.setType(SurfaceHolder.SURFACE_TYPE_PUSH_BUFFERS);
mediaPlayer = new MediaPlayer();

buttonPlayVideo.setOnClickListener(new Button.OnClickListener(){

@Override
public void onClick(View v) {
// TODO Auto-generated method stub
pausing = false;

if(mediaPlayer.isPlaying()){
mediaPlayer.reset();
}

mediaPlayer.setAudioStreamType(AudioManager.STREAM_MUSIC);
mediaPlayer.setDisplay(surfaceHolder);

try {
mediaPlayer.setDataSource(stringPath);
mediaPlayer.prepare();
} catch (IllegalArgumentException e) {
// TODO Auto-generated catch block
e.printStackTrace();
} catch (IllegalStateException e) {
// TODO Auto-generated catch block
e.printStackTrace();
} catch (IOException e) {
// TODO Auto-generated catch block
e.printStackTrace();
}

mediaPlayer.start();


}});

buttonPauseVideo.setOnClickListener(new Button.OnClickListener(){

@Override
public void onClick(View v) {
// TODO Auto-generated method stub
if(pausing){
pausing = false;
mediaPlayer.start();
}
else{
pausing = true;
mediaPlayer.pause();
}
}});

}


@Override
public void surfaceChanged(SurfaceHolder holder, int format, int width,
int height) {
// TODO Auto-generated method stub

}

@Override
public void surfaceCreated(SurfaceHolder holder) {
// TODO Auto-generated method stub

}

@Override
public void surfaceDestroyed(SurfaceHolder holder) {
// TODO Auto-generated method stub

}
}


Download the files.

Related Article:
- Implement a SeekBar to control the volume of Video Player


Saturday 27 November 2010

Play foreground and background music using SoundPool and MediaPlayer

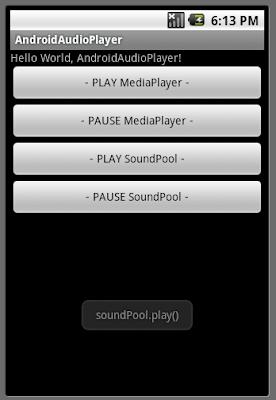
Merge the previous exercises "A simple exercise to play MIDI audio using MediaPlayer" and "Play audio resources using SoundPool", to implement a app to play audio using both MediaPlayer and SoundPool.

Play foreground and background music using SoundPool and MediaPlayer

Copy midi and ogg sound file into res/raw folder.

Modify main.xml to have four buttons to control the playing of the sounds.
<?xml version="1.0" encoding="utf-8"?>
<LinearLayout xmlns:android="http://schemas.android.com/apk/res/android"
android:orientation="vertical"
android:layout_width="fill_parent"
android:layout_height="fill_parent"
>
<TextView
android:layout_width="fill_parent"
android:layout_height="wrap_content"
android:text="@string/hello"
/>
<Button
android:id="@+id/playmediaplayer"
android:layout_width="fill_parent"
android:layout_height="wrap_content"
android:text="- PLAY MediaPlayer -"
/>
<Button
android:id="@+id/pausemediaplayer"
android:layout_width="fill_parent"
android:layout_height="wrap_content"
android:text="- PAUSE MediaPlayer -"
/>
<Button
android:id="@+id/playsoundpool"
android:layout_width="fill_parent"
android:layout_height="wrap_content"
android:text="- PLAY SoundPool -"
/>
<Button
android:id="@+id/pausesoundpool"
android:layout_width="fill_parent"
android:layout_height="wrap_content"
android:text="- PAUSE SoundPool -"
/>
</LinearLayout>


Modify AndroidAudioPlayer.java.
package com.exercise.AndroidAudioPlayer;

import java.util.HashMap;

import android.app.Activity;
import android.content.Context;
import android.media.AudioManager;
import android.media.MediaPlayer;
import android.media.SoundPool;
import android.os.Bundle;
import android.view.View;
import android.widget.Button;
import android.widget.Toast;

public class AndroidAudioPlayer extends Activity {

MediaPlayer mediaPlayer;
SoundPool soundPool;
HashMap<Integer, Integer> soundPoolMap;
int soundID = 1;

/** Called when the activity is first created. */
@Override
public void onCreate(Bundle savedInstanceState) {
super.onCreate(savedInstanceState);
setContentView(R.layout.main);

mediaPlayer = MediaPlayer.create(this, R.raw.midi_sound);
soundPool = new SoundPool(4, AudioManager.STREAM_MUSIC, 100);
soundPoolMap = new HashMap<Integer, Integer>();
//soundPoolMap.put(soundID, soundPool.load(this, R.raw.midi_sound, 1));
soundPoolMap.put(soundID, soundPool.load(this, R.raw.fallbackring, 1));

Button buttonPlayMediaPlayer = (Button)findViewById(R.id.playmediaplayer);
Button buttonPauseMediaPlayer = (Button)findViewById(R.id.pausemediaplayer);
Button buttonPlaySoundPool = (Button)findViewById(R.id.playsoundpool);
Button buttonPauseSoundPool = (Button)findViewById(R.id.pausesoundpool);
buttonPlayMediaPlayer.setOnClickListener(buttonPlayMediaPlayerOnClickListener);
buttonPauseMediaPlayer.setOnClickListener(buttonPauseMediaPlayerOnClickListener);
buttonPlaySoundPool.setOnClickListener(buttonPlaySoundPoolOnClickListener);
buttonPauseSoundPool.setOnClickListener(buttonPauseSoundPoolOnClickListener);
}

Button.OnClickListener buttonPlayMediaPlayerOnClickListener
= new Button.OnClickListener(){
@Override
public void onClick(View v) {
// TODO Auto-generated method stub
if(!mediaPlayer.isPlaying()){
mediaPlayer.start();
Toast.makeText(AndroidAudioPlayer.this,
"soundPool.pause()",
Toast.LENGTH_LONG).show();
}
}
};

Button.OnClickListener buttonPauseMediaPlayerOnClickListener
= new Button.OnClickListener(){
@Override
public void onClick(View v) {
// TODO Auto-generated method stub
if(mediaPlayer.isPlaying()){
mediaPlayer.pause();
Toast.makeText(AndroidAudioPlayer.this,
"soundPool.pause()",
Toast.LENGTH_LONG).show();
}
}
};

Button.OnClickListener buttonPlaySoundPoolOnClickListener
= new Button.OnClickListener(){
@Override
public void onClick(View v) {
// TODO Auto-generated method stub
AudioManager audioManager = (AudioManager)getSystemService(Context.AUDIO_SERVICE);
float curVolume = audioManager.getStreamVolume(AudioManager.STREAM_MUSIC);
float maxVolume = audioManager.getStreamMaxVolume(AudioManager.STREAM_MUSIC);
float leftVolume = curVolume/maxVolume;
float rightVolume = curVolume/maxVolume;
int priority = 1;
int no_loop = 0;
float normal_playback_rate = 1f;
soundPool.play(soundID, leftVolume, rightVolume, priority, no_loop, normal_playback_rate);

Toast.makeText(AndroidAudioPlayer.this,
"soundPool.play()",
Toast.LENGTH_LONG).show();
}
};

Button.OnClickListener buttonPauseSoundPoolOnClickListener
= new Button.OnClickListener(){
@Override
public void onClick(View v) {
// TODO Auto-generated method stub
soundPool.pause(soundID);
Toast.makeText(AndroidAudioPlayer.this,
"soundPool.pause()",
Toast.LENGTH_LONG).show();
}
};

}


Download the files.

Friday 26 November 2010

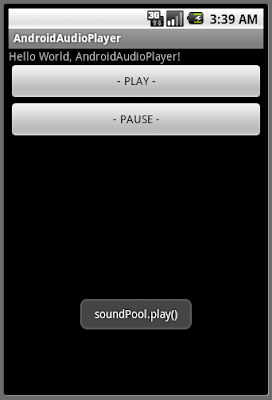
Play audio resources using SoundPool

The SoundPool class manages and plays audio resources for applications.

A SoundPool is a collection of samples that can be loaded into memory from a resource inside the APK or from a file in the file system. The SoundPool library uses the MediaPlayer service to decode the audio into a raw 16-bit PCM mono or stereo stream. This allows applications to ship with compressed streams without having to suffer the CPU load and latency of decompressing during playback.

Play audio resources using SoundPool

Modify the last exercise "play MIDI audio using MediaPlayer" to play a ogg file using SoundPool instead of MediaPlayer.

Copy a ogg sound file into res/raw folder.

Keep using the main.xml file in the last exercise "play MIDI audio using MediaPlayer".

Modify source code, AndroidAudioPlayer.java.
package com.exercise.AndroidAudioPlayer;

import java.util.HashMap;

import android.app.Activity;
import android.content.Context;
import android.media.AudioManager;
import android.media.SoundPool;
import android.os.Bundle;
import android.view.View;
import android.widget.Button;
import android.widget.Toast;

public class AndroidAudioPlayer extends Activity {

SoundPool soundPool;
HashMap<Integer, Integer> soundPoolMap;
int soundID = 1;

/** Called when the activity is first created. */
@Override
public void onCreate(Bundle savedInstanceState) {
super.onCreate(savedInstanceState);
setContentView(R.layout.main);

soundPool = new SoundPool(4, AudioManager.STREAM_MUSIC, 100);
soundPoolMap = new HashMap<Integer, Integer>();
//soundPoolMap.put(soundID, soundPool.load(this, R.raw.midi_sound, 1));
soundPoolMap.put(soundID, soundPool.load(this, R.raw.fallbackring, 1));

Button buttonPlay = (Button)findViewById(R.id.play);
Button buttonPause = (Button)findViewById(R.id.pause);
buttonPlay.setOnClickListener(buttonPlayOnClickListener);
buttonPause.setOnClickListener(buttonPauseOnClickListener);
}

Button.OnClickListener buttonPlayOnClickListener
= new Button.OnClickListener(){
@Override
public void onClick(View v) {
// TODO Auto-generated method stub
AudioManager audioManager = (AudioManager)getSystemService(Context.AUDIO_SERVICE);
float curVolume = audioManager.getStreamVolume(AudioManager.STREAM_MUSIC);
float maxVolume = audioManager.getStreamMaxVolume(AudioManager.STREAM_MUSIC);
float leftVolume = curVolume/maxVolume;
float rightVolume = curVolume/maxVolume;
int priority = 1;
int no_loop = 0;
float normal_playback_rate = 1f;
soundPool.play(soundID, leftVolume, rightVolume, priority, no_loop, normal_playback_rate);

Toast.makeText(AndroidAudioPlayer.this,
"soundPool.play()",
Toast.LENGTH_LONG).show();
}
};

Button.OnClickListener buttonPauseOnClickListener
= new Button.OnClickListener(){
@Override
public void onClick(View v) {
// TODO Auto-generated method stub
soundPool.pause(soundID);
Toast.makeText(AndroidAudioPlayer.this,
"soundPool.pause()",
Toast.LENGTH_LONG).show();
}
};

}


Download the files.

Related article:
- Play foreground and background music using SoundPool and MediaPlayer


Thursday 25 November 2010

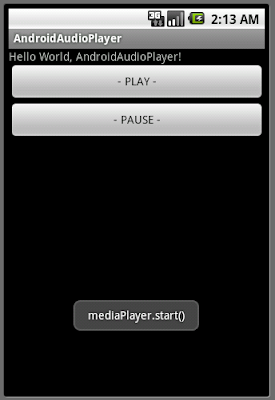
A simple exercise to play MIDI audio using MediaPlayer

MediaPlayer class can be used to control playback of audio/video files and streams.

A simple exercise to play MIDI audio using MediaPlayer

Put a MIDI file into the res/raw folder of your project, where the Eclipse plugin (or aapt) will find it and make it into a resource that can be referenced from your R class. "midi_sound.mid" in my exercise.

Modify main.xml to have two buttons to play and pause.
<?xml version="1.0" encoding="utf-8"?>
<LinearLayout xmlns:android="http://schemas.android.com/apk/res/android"
android:orientation="vertical"
android:layout_width="fill_parent"
android:layout_height="fill_parent"
>
<TextView
android:layout_width="fill_parent"
android:layout_height="wrap_content"
android:text="@string/hello"
/>
<Button
android:id="@+id/play"
android:layout_width="fill_parent"
android:layout_height="wrap_content"
android:text="- PLAY -"
/>
<Button
android:id="@+id/pause"
android:layout_width="fill_parent"
android:layout_height="wrap_content"
android:text="- PAUSE -"
/>
</LinearLayout>


Modify source code, AndroidAudioPlayer.java.
package com.exercise.AndroidAudioPlayer;

import android.app.Activity;
import android.media.MediaPlayer;
import android.os.Bundle;
import android.view.View;
import android.widget.Button;
import android.widget.Toast;

public class AndroidAudioPlayer extends Activity {

MediaPlayer mediaPlayer;

/** Called when the activity is first created. */
@Override
public void onCreate(Bundle savedInstanceState) {
super.onCreate(savedInstanceState);
setContentView(R.layout.main);

mediaPlayer = MediaPlayer.create(this, R.raw.midi_sound);

Button buttonPlay = (Button)findViewById(R.id.play);
Button buttonPause = (Button)findViewById(R.id.pause);
buttonPlay.setOnClickListener(buttonPlayOnClickListener);
buttonPause.setOnClickListener(buttonPauseOnClickListener);
}

Button.OnClickListener buttonPlayOnClickListener
= new Button.OnClickListener(){
@Override
public void onClick(View v) {
// TODO Auto-generated method stub
if(!mediaPlayer.isPlaying()){
mediaPlayer.start();
Toast.makeText(AndroidAudioPlayer.this,
"mediaPlayer.start()",
Toast.LENGTH_LONG).show();
}
}
};

Button.OnClickListener buttonPauseOnClickListener
= new Button.OnClickListener(){
@Override
public void onClick(View v) {
// TODO Auto-generated method stub
if(mediaPlayer.isPlaying()){
mediaPlayer.pause();
Toast.makeText(AndroidAudioPlayer.this,
"mediaPlayer.pause()",
Toast.LENGTH_LONG).show();
}
}
};

}


Download the files.

Related articles:
- Play audio resources using SoundPool
- Play foreground and background music using SoundPool and MediaPlayer
- Play 3gp video file using MediaPlayer

Wednesday 24 November 2010

Android Market introduce Content Rating

Starting in a few weeks, Android Market will be showing content ratings for all applications. This new capability will provide users with additional information to help them select the best applications for them.

Applications will be rated according to four content rating levels: All, Pre-teen, Teen, & Mature.

To prepare for this launch, starting next week, developers submitting new or updated applications will be required to include a rating for all applications and games uploaded onto Android Market. In addition, developers will have the next several weeks to add a rating to their existing applications and games. Once content rating is visible to users, any applications or games that do not include a rating will be treated as �Mature�.

Source: Android Developers Blog: Content Rating for Android Market

Tuesday 23 November 2010

ProgressBar running in AsyncTask

It's a exercise of a Horizontal ProgressBar which running in a background AsyncTask.

ProgressBar running in AsyncTask

Modify main.xml to have a button to start the progress, and the ProgressBar.
<?xml version="1.0" encoding="utf-8"?>
<LinearLayout xmlns:android="http://schemas.android.com/apk/res/android"
android:orientation="vertical"
android:layout_width="fill_parent"
android:layout_height="fill_parent"
>
<TextView
android:layout_width="fill_parent"
android:layout_height="wrap_content"
android:text="@string/hello"
/>
<Button
android:id="@+id/startprogress"
android:layout_width="fill_parent"
android:layout_height="wrap_content"
android:text="Start"
/>
<ProgressBar
android:layout_width="fill_parent"
android:layout_height="wrap_content"
style="?android:attr/progressBarStyleHorizontal"
android:id="@+id/progressbar_Horizontal"
android:max="100"
/>
</LinearLayout>


Modify the java code.
package com.exercise.AndroidAsyncTaskProgressBar;

import android.app.Activity;
import android.os.AsyncTask;
import android.os.Bundle;
import android.os.SystemClock;
import android.view.View;
import android.widget.Button;
import android.widget.ProgressBar;
import android.widget.Toast;

public class AndroidAsyncTaskProgressBar extends Activity {

ProgressBar progressBar;
Button buttonStartProgress;

public class BackgroundAsyncTask extends
AsyncTask<Void, Integer, Void> {

int myProgress;

@Override
protected void onPostExecute(Void result) {
// TODO Auto-generated method stub
Toast.makeText(AndroidAsyncTaskProgressBar.this,
"onPostExecute", Toast.LENGTH_LONG).show();
buttonStartProgress.setClickable(true);
}

@Override
protected void onPreExecute() {
// TODO Auto-generated method stub
Toast.makeText(AndroidAsyncTaskProgressBar.this,
"onPreExecute", Toast.LENGTH_LONG).show();
myProgress = 0;
}

@Override
protected Void doInBackground(Void... params) {
// TODO Auto-generated method stub
while(myProgress<100){
myProgress++;
publishProgress(myProgress);
SystemClock.sleep(100);
}
return null;
}

@Override
protected void onProgressUpdate(Integer... values) {
// TODO Auto-generated method stub
progressBar.setProgress(values[0]);
}

}


/** Called when the activity is first created. */
@Override
public void onCreate(Bundle savedInstanceState) {
super.onCreate(savedInstanceState);
setContentView(R.layout.main);

buttonStartProgress = (Button)findViewById(R.id.startprogress);
progressBar = (ProgressBar)findViewById(R.id.progressbar_Horizontal);
progressBar.setProgress(0);

buttonStartProgress.setOnClickListener(new Button.OnClickListener(){

@Override
public void onClick(View v) {
// TODO Auto-generated method stub
new BackgroundAsyncTask().execute();
buttonStartProgress.setClickable(false);
}});
}
}


Download the files.

Related articles:
- ProgressBar running in Runnable()
- AsyncTask: perform background operations and publish results on the UI thread
- onPostExecute() of AsyncTask

Monday 22 November 2010

iOS 4.2.1 Released

UPDATE: For those of you with Apple TV that were having issues saving 4.2 SHSH, I've fixed that bug with 4.21.01. Enjoy!


UPDATE: Do not update to 4.2.1 for the baseband protection. TinyUmbrella is no longer able to kick you out of recovery for that version. TinyUmbrella still works for prior versions and will be able to restore and kick you out of recovery for those versions but 4.2.1 has a baseband version check that will stop your device from booting if your baseband was not updated.


Apple has released iOS 4.2.1. For your convenience I have linked the individual versions below. Expect TinyUmbrella to be updated tonight for 4.2.1 support. Remember though, there is NO hurry to get your 4.2.1 SHSHs, encourage your friends to save their 4.1 SHSHs while they still can!

AppleTV2 4.2


iPad 4.2.1


iPod 2G 4.2.1 

iPod 3G 4.2.1 

iPod 4G 4.2.1


iPhone 3G 4.2.1 


iPhone 3GS 4.2.1 


iPhone 4 4.2.1

HTML 5 eBook Demo by the Google Chrome Team

Webkit icon
Want to see a good demo of HTML 5? Check out this eBook created by the Google Chrome team. Very slick interface.

Thursday 18 November 2010

Recent changes to Android Market that require developers' attention

First, Google have added support for a recent changes feature, which allows developers to add notes about changes specific to the newest version of application. Developers are able to submit these from the Developer Console, similar to descriptions. In the Market app, these notes will appear under the app description as "Recent changes."

Second, there is now a �draft upload� capability for application updates. This feature enables developers to edit app listing and upload a new version without affecting the version live in Market. The app listing edits will not change the live listing until developer select �Publish.�

Finally, Google are adding support for larger promotional graphics to showcase application. In addition to the currently required app screenshot, developers will be required to upload one �feature� graphic. Supported promotional assets will now include:
- A �feature� graphic, landscape aspect ratio, 1024 x 500 (required).
- A high-res icon, 512 x 512 (required).. The Android icon design guidelines located at http://developer.android.com/guide/practices/ui_guidelines/icon_design.html apply.
- 2 screen shots, 320w x 480h, 480w x 854h, or 480w x 800h, increasing to 8 screen shots in the future (1 required).
- A link for a promotional video hosted on YouTube (optional).

~ from a Mail from Google


Wednesday 17 November 2010

onPostExecute() of AsyncTask

In my old exercise "AsyncTask: perform background operations and publish results on the UI thread", doInBackground() is a infinite loop without return, such that the onPostExecute() method will not be called.

In order to make onPostExecute() taking effect, a button to stop the background task is implemented. When user click on the button, the onPostExecute() will end with and return, and onPostExecute() will be called.


Modify main.xml to add a Stop button.
<?xml version="1.0" encoding="utf-8"?>
<LinearLayout xmlns:android="http://schemas.android.com/apk/res/android"
android:orientation="vertical"
android:layout_width="fill_parent"
android:layout_height="fill_parent"
>
<TextView
android:layout_width="fill_parent"
android:layout_height="wrap_content"
android:text="@string/hello"
/>
<Button
android:id="@+id/stop"
android:layout_width="fill_parent"
android:layout_height="wrap_content"
android:text="Stop"
/>
<TextView
android:id="@+id/mytext"
android:layout_width="fill_parent"
android:layout_height="wrap_content"
android:text="This Text will be Turn ON/OFF triggered by AsyncTask."
/>

</LinearLayout>


Modify AndroidBackgroundAsyncTask.java
package com.exercise.AndroidBackgroundAsyncTask;

import android.app.Activity;
import android.os.AsyncTask;
import android.os.Bundle;
import android.os.SystemClock;
import android.view.View;
import android.widget.Button;
import android.widget.TextView;
import android.widget.Toast;

public class AndroidBackgroundAsyncTask extends Activity {

TextView myText;
boolean stopRun = false;

public class BackgroundAsyncTask extends
AsyncTask<Void, Boolean, Void> {

boolean myTextOn;

@Override
protected Void doInBackground(Void... params) {
// TODO Auto-generated method stub

while(!stopRun)
{
myTextOn = !myTextOn;
publishProgress(myTextOn);
SystemClock.sleep(1000);
}
return null;
}

@Override
protected void onPostExecute(Void result) {
// TODO Auto-generated method stub
Toast.makeText(AndroidBackgroundAsyncTask.this,
"onPostExecute", Toast.LENGTH_LONG).show();
}

@Override
protected void onPreExecute() {
// TODO Auto-generated method stub
myTextOn = true;
Toast.makeText(AndroidBackgroundAsyncTask.this,
"onPreExecute", Toast.LENGTH_LONG).show();
}

@Override
protected void onProgressUpdate(Boolean... values) {
// TODO Auto-generated method stub

if (values[0]){
myText.setVisibility(View.GONE);
}
else{
myText.setVisibility(View.VISIBLE);
}
}


}

/** Called when the activity is first created. */
@Override
public void onCreate(Bundle savedInstanceState) {
super.onCreate(savedInstanceState);
setContentView(R.layout.main);
myText = (TextView)findViewById(R.id.mytext);

Button buttonStop = (Button)findViewById(R.id.stop);
buttonStop.setOnClickListener(new Button.OnClickListener(){

@Override
public void onClick(View v) {
// TODO Auto-generated method stub
stopRun = true;
}});

new BackgroundAsyncTask().execute();
}
}


Download the files.

Related article:
- ProgressBar running in AsyncTask


Tuesday 16 November 2010

Example of using Color Resource

Color XML resource that carries a color value (a hexadecimal color).

The value always begins with a pound (#) character and then followed by the Alpha-Red-Green-Blue information in one of the following formats:

  • #RGB
  • #ARGB
  • #RRGGBB
  • #AARRGGBB


create /res/values/colors.xml to add our Color Resources in XML
<?xml version="1.0" encoding="utf-8"?>
<resources>
<color name="background_color">#f0f0f0</color>
<color name="text_color_red">#ff0000</color>
</resources>


Modify main.xml
<?xml version="1.0" encoding="utf-8"?>
<LinearLayout xmlns:android="http://schemas.android.com/apk/res/android"
android:orientation="vertical"
android:layout_width="fill_parent"
android:layout_height="fill_parent"
android:background="@color/background_color"
>
<TextView
android:id="@+id/text"
android:layout_width="fill_parent"
android:layout_height="wrap_content"
android:text="@string/hello"
/>
</LinearLayout>


Java Code
package com.exercise.AndroidColorResources;

import android.app.Activity;
import android.os.Bundle;
import android.widget.TextView;

public class AndroidColorResources extends Activity {
/** Called when the activity is first created. */
@Override
public void onCreate(Bundle savedInstanceState) {
super.onCreate(savedInstanceState);
setContentView(R.layout.main);

TextView Text = (TextView)findViewById(R.id.text);
Text.setTextColor(getResources().getColor(R.color.text_color_red));
}
}


Download the files.

Monday 15 November 2010

String Resources

A string resource provides text strings for your application with optional text styling and formatting. There are three types of resources that can provide your application with strings:

String
XML resource that provides a single string.
String Array
XML resource that provides an array of strings.
Plurals
XML resource that carries different strings for different pluralizations of the same word or phrase.

All strings are capable of applying some styling markup and formatting arguments. For information about styling and formatting strings, see the section about Formatting and Styling.


Here are some examples of using String Resources-


Modify /res/values/strings.xml to add our String Resources in XML
<?xml version="1.0" encoding="utf-8"?>
<resources>
<string name="hello">Hello World, AndroidStringResources!</string>
<string name="app_name">AndroidStringResources</string>
<string name="string_1">It\'s a exercise about \"String Resources\"!</string>
<string-array name="DayOfWeek">
<item>Sunday</item>
<item>Monday</item>
<item>Tuesday</item>
<item>Wednesday</item>
<item>Thursday</item>
<item>Friday</item>
<item>Saturday</item>
</string-array>
<plurals name="NumberOfMan">
<item quantity="one">man</item>
<item quantity="other">men</item>
</plurals>
</resources>


Modify main.xml
<?xml version="1.0" encoding="utf-8"?>
<LinearLayout xmlns:android="http://schemas.android.com/apk/res/android"
android:orientation="vertical"
android:layout_width="fill_parent"
android:layout_height="fill_parent"
>
<TextView
android:layout_width="fill_parent"
android:layout_height="wrap_content"
android:text="@string/hello"
/>
<TextView
android:layout_width="fill_parent"
android:layout_height="wrap_content"
android:text="@string/string_1"
/>
<TextView
android:id="@+id/numberofman"
android:layout_width="fill_parent"
android:layout_height="wrap_content"
/>
<Spinner
android:id="@+id/spinner"
android:layout_width="fill_parent"
android:layout_height="wrap_content"
/>
</LinearLayout>


Java code
package com.exercise.AndroidStringResources;

import android.app.Activity;
import android.os.Bundle;
import android.widget.ArrayAdapter;
import android.widget.Spinner;
import android.widget.TextView;

public class AndroidStringResources extends Activity {
/** Called when the activity is first created. */
@Override
public void onCreate(Bundle savedInstanceState) {
super.onCreate(savedInstanceState);
setContentView(R.layout.main);

Spinner spinnerDayOfWeek = (Spinner)findViewById(R.id.spinner);
String[] dayOfWeek = getResources().getStringArray(R.array.DayOfWeek);
ArrayAdapter<String> adapter
= new ArrayAdapter<String>(this,
android.R.layout.simple_spinner_item, dayOfWeek);
adapter.setDropDownViewResource(android.R.layout.simple_spinner_dropdown_item);
spinnerDayOfWeek.setAdapter(adapter);

TextView textviewNumberOfMan = (TextView)findViewById(R.id.numberofman);
int numberOfMan = 2;
String stringNumberOfMan
= getResources().getQuantityString(R.plurals.NumberOfMan, numberOfMan);
textviewNumberOfMan.setText("It's " + String.valueOf(numberOfMan) + " "
+ stringNumberOfMan + " here.");
}
}


Download the files.

Sunday 14 November 2010

Favorite Windows Software

I have finished my Windows 7 Favorite software post. Now with with icons!!! :) See previous post.

Saturday 13 November 2010

Must Have Software for a New Windows 7 System

Well, I have been setting another new Windows 7 Home 64 bit machine. So this is my updated list of must have software. Most are free and open source.


Browsers

I run multiple browsers almost all the time. Firefox as a development and default browser. Chrome or Safari for web surfing, and SeaMonkey for those multiple profile sort of situations.


  • Firefox - Best overall browser and best for development.


  • Chrome - Fast browser from Google. Minimalist interface.


  • Safari - Default browser for a Mac. Small and fast like Chrome.


  • SeaMonkey - Based on the original Netscape browser. Supports multiple profiles.  Can run 2 or 3 browsers, each with its own set of bookmarks.


Internet

Internet utililies and cloud applications.


  • Drop Box - A disk drive stored in the cloud. Provides access to a disk from Windows, Mac, iPhone, iPad, Linux, you name it. A must if you want to move files between different platforms and devices.

  • Filezilla - A secure FTP client for Windows. A must for transferring files to and from a Unix system. FTP and SFTP is supported. Lots of features.

  • Pidgin - Open source chat client for Windows. Used to be know as GAIM.

  • Putty - Windows SSH and Telnet client. A must if you do any Linux or Unix work.

  • Skype - Free Internet phone service and chat. You can group chat with up to 5 people

  • Thunderbird - Mozilla's awesome e-mail client.


Development

  • ActivePerl- Perl for Windows.

  • Cygwin - Want a Bash shell on Windows? Want some of your favorite Unix utilities?  Then Cygwin is for you.

  • Jedit - A really flexible programming editor written in Java.


  • Java - Install the 32 bit and 64 bit versions for 64 bit Windows. Just the 32 bit for 32 bit.

  • Komodo Edit - A cross platform open source programming editor. Lots of features for free. A commercial paid full featured IDE is also available.

  • Notepad++ - It is always a good idea to have a good native programming text editor around. For those times when you need a quick tweak or just want to view something. For Windows, Notepad++ is the best option out there.


  • NetBeans - A great Open Source Java IDE.


  • SQLite - File based SQL database.


  • Silk Svn Subversion Client - Windows 7 64 bit command line version.


Office

  • Open Office - Open source office suite.


  • Paint.net - Open source graphics program.  A basic photo app without all the features or price of Photoshop.


  • SVG Anti-Virus - Great free or paid anti-virus you can buy and install online.


Tuesday 9 November 2010

Free iPad Ajax Drawing App from 37 Signals

iPhone iPad picture37 Signals has created a cool Ajax drawing app for the iPad called Chalk. I haven't tried it out yet, but it looks cool.


Notice that you can create pretty cool stuff without the hassles of the App Store.

SensorSimulator: simulate sensor on Android emulator.

The OpenIntents SensorSimulator lets you simulate sensor data with the mouse in real time. It currently supports accelerometer, compass, orientation, and temperature sensors, where the behavior can be customized through various settings.

http://code.google.com/p/openintents/wiki/SensorSimulator

SensorSimulator


Monday 8 November 2010

4.2b3 Support

I've updated TinyUmbrella to work with 4.2b3 for all relevant devices. Clicking Save SHSH will grab 4.2b3 now for your device. Also added a few bug fixes etc.

Unless I've stated otherwise, I have not verified iTunes 10.1 support. So upgrade at your own risk/peril.

AndroidManifest.xml for Motorola's QVGA-based CHARM and FLIPOUT

Did you know that Motorola has announced several QVGA-based mass market devices? The Motorola CHARM and FLIPOUT, announced in the last few months, are bringing the Android experience to a new set of consumers.

Unfortunately, based on settings in the Android app manifest, not all of the existing applications in Android Market are available to these devices.

There are a few common reasons why your application may not show up in Android Market on CHARM or FLIPOUT:

1. These are QVGA devices which means the <supports-screens> tag in the AndroidManifest.xml file must include smallScreens="true" for your application to appear in Android Market.

2. The 3-megapixel camera has a fixed focus and no flash. If your application requests the CAMERA permission with <uses-permission android:name="CAMERA" />, you must also include a <uses-feature> tag with android.hardware.camera. Otherwise, Android assumes your application uses all camera features, including autofocus and flash and will filter your application from these devices.

Source & more...: MOTODEV Discussion Boards - Ensure your app reaches all Android consumers - learn how to support QVGA devices


Pro Android 3: The most updated Book for Android cover "Gingerbread"


Description

Android is hot�Android device sales are increasing and even challenging those of the ubiquitous iPhone. If you're a developer interested taking advantage of this expanding market and creating sophisticated apps using the latest Android SDK, then this is the book for you.

Pro Android 3
shows you how to build real-world and fun mobile applications using the new Android SDK, codename "Gingerbread." This book covers everything from the fundamentals of building apps for embedded devices to advanced concepts such as custom 3D components and multi-tasking.

This book offers hand-on tutorials and advice, so you�ll quickly be able to build mobile applications ranging from games to Google apps, including add-ons to Google Docs. You�ll be able to extend and run the new Google Chrome APIs on Droid, Nexus One, X10, and the dozens of other Android-based smartphones.

  • Discover the design and architecture of the Android SDK, and how to build mobile applications using the Android SDK.
  • Explore and use the Android APIs, including those for media and Wi-Fi.
  • Learn what�s new with Gingerbread: improved UI across all Android platforms, integration with WebM, the latest Flash integration techniques, and more

Friday 5 November 2010

iOS 4.2 is coming...

A couple new features and a few bugfixes coming for 4.1.13. (The device list will scroll finally). With 4.2 looming, make sure you and your friends have their 4.1 SHSH saved. Running TinyUmbrella with the default options for your device will ensure Cydia and you have your SHSHs saved.

Thursday 4 November 2010

startActivity() with action Intent.ACTION_VIEW

When call startActivity() with action Intent.ACTION_VIEW, the system will start an activity to display the data to the user. ACTION_VIEW is the most common action performed on data -- it is the generic action you can use on a piece of data to get the most reasonable thing to occur.


In the exercise, Uri.parse() is used to creates a Uri which parses the URI string entered in the EditText. The text entered in the EditText should be an RFC 2396-compliant string.

Try the exercise with:
geo:37.422, -122.084
http://www.google.com

main.xml
<?xml version="1.0" encoding="utf-8"?&t;
<LinearLayout xmlns:android="http://schemas.android.com/apk/res/android"
android:orientation="vertical"
android:layout_width="fill_parent"
android:layout_height="fill_parent"
&t;
<TextView
android:layout_width="fill_parent"
android:layout_height="wrap_content"
android:text="@string/hello"
/&t;
<EditText
android:id="@+id/inputuri"
android:layout_width="fill_parent"
android:layout_height="wrap_content"
/&t;
<Button
android:id="@+id/startintent"
android:layout_width="fill_parent"
android:layout_height="wrap_content"
android:text="startActivity with ACTION_VIEW"
/&t;
</LinearLayout&t;


Android_ACTION_VIEW.java
package com.Android_ACTION_VIEW;

import android.app.Activity;
import android.content.Intent;
import android.net.Uri;
import android.os.Bundle;
import android.view.View;
import android.widget.Button;
import android.widget.EditText;

public class Android_ACTION_VIEW extends Activity {
/** Called when the activity is first created. */
@Override
public void onCreate(Bundle savedInstanceState) {
super.onCreate(savedInstanceState);
setContentView(R.layout.main);

final EditText inputUri = (EditText)findViewById(R.id.inputuri);
Button buttonStartIntent = (Button)findViewById(R.id.startintent);

buttonStartIntent.setOnClickListener(new Button.OnClickListener(){

@Override
public void onClick(View arg0) {
// TODO Auto-generated method stub
String uriString = inputUri.getText().toString();
Uri intentUri = Uri.parse(uriString);

Intent intent = new Intent();
intent.setAction(Intent.ACTION_VIEW);
intent.setData(intentUri);

startActivity(intent);

}});

}
}


Download the files.

Monday 1 November 2010

Perform stress-test on your applications using Monkey, a UI/Application Exerciser.

The Monkey is a program that runs on your emulator or device and generates pseudo-random streams of user events such as clicks, touches, or gestures, as well as a number of system-level events. You can use the Monkey to stress-test applications that you are developing, in a random yet repeatable manner.

The simplest way to use the monkey is with the following command, which will launch your application and send 500 pseudo-random events to it.

$ adb shell monkey -v -p your.package.name 500

For more information about command options for Monkey, see the complete UI/Application Exerciser Monkey documentation page.