Monday 30 April 2012

Get color on a specified location from ImageView's background bitmap


Modify from the last exercise "Detect touched position on a ImageView"; get color from the background bitmap on the touched location. The TextView's text color will be changed according to the background color on the touched position.


Modify the custom ImageView, TouchView.java, to add the method getColor() to get color on a specified location and pass to the updateMsg() method of main activity. Notice that we have to convert the x,y from position on View to x, y on bitmap before getPixel() call.
package com.exercise.AndroidDetechTouch;

import android.content.Context;
import android.graphics.Bitmap;
import android.graphics.drawable.BitmapDrawable;
import android.util.AttributeSet;
import android.view.MotionEvent;
import android.widget.ImageView;

public class TouchView extends ImageView {

Bitmap bitmap;
double bmWidth, bmHeight;

public TouchView(Context context) {
super(context);
// TODO Auto-generated constructor stub
init();
}

public TouchView(Context context, AttributeSet attrs) {
super(context, attrs);
// TODO Auto-generated constructor stub
init();
}

public TouchView(Context context, AttributeSet attrs, int defStyle) {
super(context, attrs, defStyle);
// TODO Auto-generated constructor stub
init();
}

private void init(){

bitmap = ((BitmapDrawable)getBackground()).getBitmap();
bmWidth = (double)bitmap.getWidth();
bmHeight = (double)bitmap.getHeight();
}

@Override
protected void onMeasure(int widthMeasureSpec, int heightMeasureSpec) {
// TODO Auto-generated method stub
setMeasuredDimension(MeasureSpec.getSize(widthMeasureSpec),
MeasureSpec.getSize(heightMeasureSpec));
}

@Override
public boolean onTouchEvent(MotionEvent event) {
// TODO Auto-generated method stub


switch(event.getAction()){
case MotionEvent.ACTION_DOWN:
case MotionEvent.ACTION_MOVE:
float x = event.getX();
float y = event.getY();

int color = getColor(x, y);
((AndroidDetechTouchActivity)getContext()).updateMsg("Touched@" + x + " : " + y, color);

break;
case MotionEvent.ACTION_UP:
((AndroidDetechTouchActivity)getContext()).updateMsg("", 0);
break;
}

return true;
}

private int getColor(float x, float y){

if ( x < 0 || y < 0 || x > (float)getWidth() || y > (float)getHeight()){
return 0; //Invalid, return 0
}else{
//Convert touched x, y on View to on Bitmap
int xBm = (int)(x * (bmWidth / (double)getWidth()));
int yBm = (int)(y * (bmHeight / (double)getHeight()));

return bitmap.getPixel(xBm, yBm);
}

}

}


Modify updateMsg() method of main activity, AndroidDetechTouchActivity.java, to include color and update TextView's TextColor.
package com.exercise.AndroidDetechTouch;

import android.app.Activity;
import android.os.Bundle;
import android.widget.TextView;

public class AndroidDetechTouchActivity extends Activity {

TextView msg;
TouchView touchView;

/** Called when the activity is first created. */
@Override
public void onCreate(Bundle savedInstanceState) {
super.onCreate(savedInstanceState);
setContentView(R.layout.main);
msg = (TextView)findViewById(R.id.msg);
touchView = (TouchView)findViewById(R.id.touchview);

}

public void updateMsg(String tMsg, int color){
msg.setTextColor(color);
msg.setText(tMsg);
}

}


Keep using main.xml from the last exercise.

Download the files.

Next: - Display text on a specified location in a custom View

Keyboard Shortcuts and Menu for Ubuntu Unity 11.10 and 12.04

Linux Logo I installed Ubuntu 12.04 this weekend. The Unity interface is not my favorite, but I guess we are pretty much stuck with it. Anyway, I found a couple things that make using it easier.


First, it took me a long time, but I found them. Here are the keyboard shortcuts for the Unity UI and the launcher.

https://help.ubuntu.com/11.10/ubuntu-help/shell-keyboard-shortcuts.html

These seem to be the most relevant shortcuts for controlling the UI.


I was also wishing I could get the menu back. Turns out you can with Classic Menu Indicator. Check out the details here: http://www.noobslab.com/2011/07/classic-menu-indicator-on-ubuntu-1104.html


I know they need to try to push the UI forward, but why do you have to take the menu away. It takes almost no screen real estate. These UI experiments, and that's what they are, should not be forced on us. Instead, it should be very easy for me to switch between the new interface and the old one. Both Windows and OS X do this, why can't Ubuntu?

Sunday 29 April 2012

Where is JDK 7 after Mac OS X Install?


Problem: I just installed JDK 7 on Mac OS X, but it seemed like nothing happened. What do I do, where is it installed?


Solution: Everything is explained in the ReadMe. Unfortunately, I missed the link on the last screen of the installer. So here is the link in case you missed it:

JDK 7 Mac OS X ReadMe


Basically, use the Java Preferences application in the /Applications/Utilities directory to choose which version of Java to use. Then open a Terminal window and you will see the JDK you selected is being used.

Detect touched position on a ImageView


A custom ImageView is implemented, with onTouchEvent() method overrided. When user touched on the ImageView, the touch position will be passed to main activity and displayed on a TextView.


Implement the custom ImageView, TouchView.java.
package com.exercise.AndroidDetechTouch;

import android.content.Context;
import android.util.AttributeSet;
import android.view.MotionEvent;
import android.widget.ImageView;

public class TouchView extends ImageView {

public TouchView(Context context) {
super(context);
// TODO Auto-generated constructor stub
}

public TouchView(Context context, AttributeSet attrs) {
super(context, attrs);
// TODO Auto-generated constructor stub
}

public TouchView(Context context, AttributeSet attrs, int defStyle) {
super(context, attrs, defStyle);
// TODO Auto-generated constructor stub
}

@Override
protected void onMeasure(int widthMeasureSpec, int heightMeasureSpec) {
// TODO Auto-generated method stub
setMeasuredDimension(MeasureSpec.getSize(widthMeasureSpec),
MeasureSpec.getSize(heightMeasureSpec));
}

@Override
public boolean onTouchEvent(MotionEvent event) {
// TODO Auto-generated method stub


switch(event.getAction()){
case MotionEvent.ACTION_DOWN:
case MotionEvent.ACTION_MOVE:
float x = event.getX();
float y = event.getY();
((AndroidDetechTouchActivity)getContext()).updateMsg("Touched@" + x + " : " + y);
break;
case MotionEvent.ACTION_UP:
((AndroidDetechTouchActivity)getContext()).updateMsg("");
break;
}

return true;
}

}


Modify the main activity to add updateMsg() method. It will be called from custom ImageView.
package com.exercise.AndroidDetechTouch;

import android.app.Activity;
import android.os.Bundle;
import android.widget.TextView;

public class AndroidDetechTouchActivity extends Activity {

TextView msg;
TouchView touchView;

/** Called when the activity is first created. */
@Override
public void onCreate(Bundle savedInstanceState) {
super.onCreate(savedInstanceState);
setContentView(R.layout.main);
msg = (TextView)findViewById(R.id.msg);
touchView = (TouchView)findViewById(R.id.touchview);

}

public void updateMsg(String tMsg){
msg.setText(tMsg);
}

}


main.xml, to add the custom ImageView and a TextView overlapped.
<?xml version="1.0" encoding="utf-8"?>
<LinearLayout xmlns:android="http://schemas.android.com/apk/res/android"
android:layout_width="fill_parent"
android:layout_height="fill_parent"
android:orientation="vertical" >

<TextView
android:layout_width="fill_parent"
android:layout_height="wrap_content"
android:text="@string/hello" />
<FrameLayout
android:layout_width="fill_parent"
android:layout_height="fill_parent"
>
<LinearLayout
android:layout_width="fill_parent"
android:layout_height="fill_parent"
android:orientation="vertical">
<TextView
android:id="@+id/msg"
android:layout_width="fill_parent"
android:layout_height="wrap_content"
/>
</LinearLayout>
<com.exercise.AndroidDetechTouch.TouchView
android:id="@+id/touchview"
android:layout_width="fill_parent"
android:layout_height="fill_parent"
android:background="@drawable/ic_launcher"
/>
</FrameLayout>
</LinearLayout>


Download the files.

Next: - Get pixel color on a specified location from ImageView's background bitmap

StrictMode.setThreadPolicy and StrictMode.ThreadPolicy.Builder


It was described in last exercise "android.os.NetworkOnMainThreadException"; if you access Network (or Disk read/write) in UI thread, with minSdkVersion targeting the Honeycomb or higher, exception will be thrown. And the solution of using AsyncTask was provided in the exercise.

Here is another un-recommended approach: change StrictMode Policy.

StrictMode is a developer tool which detects things you might be doing by accident and brings them to your attention so you can fix them. StrictMode is most commonly used to catch accidental disk or network access on the application's main thread, UI thread.

Using StrictMode.ThreadPolicy.Builder, you can create your own StrictMode.ThreadPolicy, to permit or apply penalty to detected problems:
  • penaltyDeath(): Crash the whole process on violation.
  • penaltyDeathOnNetwork(): Crash the whole process on any network usage.
  • penaltyDialog(): Show an annoying dialog to the developer on detected violations, rate-limited to be only a little annoying.
  • penaltyDropBox(): Enable detected violations log a stacktrace and timing data to the DropBox on policy violation.
  • penaltyFlashScreen(): Flash the screen during a violation.
  • penaltyLog(): Log detected violations to the system log.

It's a example to change thread policy for Network operation, show an annoying dialog, and permit.


package com.exercise.AndroidInternetTxt;

import java.io.BufferedReader;
import java.io.IOException;
import java.io.InputStreamReader;
import java.net.MalformedURLException;
import java.net.URL;
import android.app.Activity;
import android.os.Bundle;
import android.os.StrictMode;
import android.widget.TextView;

public class AndroidInternetTxt extends Activity {

TextView textMsg, textPrompt;
final String textSource = "http://sites.google.com/site/androidersite/text.txt";


/** Called when the activity is first created. */
@Override
public void onCreate(Bundle savedInstanceState) {
super.onCreate(savedInstanceState);
setContentView(R.layout.main);
textPrompt = (TextView)findViewById(R.id.textprompt);
textMsg = (TextView)findViewById(R.id.textmsg);

textPrompt.setText("Wait...");

StrictMode.setThreadPolicy(new StrictMode.ThreadPolicy.Builder()
.detectNetwork() // or .detectAll() for all detectable problems
.penaltyDialog() //show a dialog
//.permitNetwork() //permit Network access
.build());

URL textUrl;

try {
textUrl = new URL(textSource);

BufferedReader bufferReader
= new BufferedReader(new InputStreamReader(textUrl.openStream()));

String StringBuffer;
String stringText = "";
while ((StringBuffer = bufferReader.readLine()) != null) {
stringText += StringBuffer;
}
bufferReader.close();

textMsg.setText(stringText);
} catch (MalformedURLException e) {
// TODO Auto-generated catch block
e.printStackTrace();
textMsg.setText(e.toString());
} catch (IOException e) {
// TODO Auto-generated catch block
e.printStackTrace();
textMsg.setText(e.toString());
}

textPrompt.setText("Finished!");
}

}


Download the files.

Saturday 28 April 2012

Beginning Android ADK with Arduino


Whether you're new to Arduino and Android development, or you've tinkered a bit with either one, this is the book for you. Android has always been a natural fit with Arduino projects, but now that Google has released the Android Open Accessory Development Kit (the Android ADK), combining Android with Arduino to create custom gadgets has become even easier.
Beginning Android ADK with Arduino shows how the ADK works and how it can be used with a variety of Arduino boards to create a variety of fun projects that showcase the abilities of the ADK.

Mario B�hmer will walk you through several projects, including making sounds, driving motors, and creating alarm systems, all while explaining how to use the ADK and how standard Arduino boards may differ from Google-branded Arduinos. You aren't tied to specific hardware with this book; use what you have, and this book will show you how.

What you�ll learn

  • How different boards work with the ADK
  • How to create your first sketch and project
  • How to work with light and sound
  • How to work with servos and DC motors
  • How to work with photoresistors and thermistors to sense the environment
  • How to make your own capacitive touch game show buzzer
  • How to create your own camera-enabled alarm system

Who this book is for

This book is for beginning Arduino and Android enthusiasts, or Arduino developers who want to try out the new Android ADK.

Table of Contents

  1. Introduction
  2. Andriod and Arduino: Getting to Know Each Other
  3. Outputs
  4. Inputs
  5. Sounds
  6. Light Intensity Sensing
  7. Temperature Sensing
  8. A Sense of Touch
  9. Making Things Move
  10. Alarm System


android.os.NetworkOnMainThreadException

Refer to my old exercise "Read Text file from internet, using Java code": it a simple exercise to read something from internet. It can be download here in project form.

It work as expected, to display the text file from internet, for android:minSdkVersion="9" or older. But fail with android:minSdkVersion="10" or higher. It's a strange and interesting issue for me.

OK for android:minSdkVersion='9' or older


Fail for android:minSdkVersion='10' or higher


After investigated into the logcat, I found that it's Caused by: android.os.NetworkOnMainThreadException!

android.os.NetworkOnMainThreadException is a exception that is thrown when an application attempts to perform a networking operation on its main thread.


This is only thrown for applications targeting the Honeycomb SDK or higher (actually it fail in my exercise with API level 10). Applications targeting earlier SDK versions are allowed to do networking on their main event loop threads, but it's heavily discouraged.

The solution is to move the internet accessing code to a background thread, AsyncTask in my exercise.

package com.exercise.AndroidInternetTxt;

import java.io.BufferedReader;
import java.io.IOException;
import java.io.InputStream;
import java.io.InputStreamReader;
import java.net.MalformedURLException;
import java.net.URL;
import java.net.URLEncoder;

import android.app.Activity;
import android.os.AsyncTask;
import android.os.Bundle;
import android.widget.TextView;

public class AndroidInternetTxt extends Activity {

TextView textMsg, textPrompt;
final String textSource = "http://sites.google.com/site/androidersite/text.txt";


/** Called when the activity is first created. */
@Override
public void onCreate(Bundle savedInstanceState) {
super.onCreate(savedInstanceState);
setContentView(R.layout.main);
textPrompt = (TextView)findViewById(R.id.textprompt);
textMsg = (TextView)findViewById(R.id.textmsg);

textPrompt.setText("Wait...");

new MyTask().execute();

/*
URL textUrl;

try {
textUrl = new URL(textSource);

BufferedReader bufferReader
= new BufferedReader(new InputStreamReader(textUrl.openStream()));

String StringBuffer;
String stringText = "";
while ((StringBuffer = bufferReader.readLine()) != null) {
stringText += StringBuffer;
}
bufferReader.close();

textMsg.setText(stringText);
} catch (MalformedURLException e) {
// TODO Auto-generated catch block
e.printStackTrace();
textMsg.setText(e.toString());
} catch (IOException e) {
// TODO Auto-generated catch block
e.printStackTrace();
textMsg.setText(e.toString());
}

textPrompt.setText("Finished!");
*/
}

private class MyTask extends AsyncTask<Void, Void, Void>{

String textResult;

@Override
protected Void doInBackground(Void... params) {

URL textUrl;

try {
textUrl = new URL(textSource);

BufferedReader bufferReader
= new BufferedReader(new InputStreamReader(textUrl.openStream()));

String StringBuffer;
String stringText = "";
while ((StringBuffer = bufferReader.readLine()) != null) {
stringText += StringBuffer;
}
bufferReader.close();

textResult = stringText;
} catch (MalformedURLException e) {
// TODO Auto-generated catch block
e.printStackTrace();
textResult = e.toString();
} catch (IOException e) {
// TODO Auto-generated catch block
e.printStackTrace();
textResult = e.toString();
}

return null;

}

@Override
protected void onPostExecute(Void result) {

textMsg.setText(textResult);
textPrompt.setText("Finished!");

super.onPostExecute(result);
}

}
}


Download the files.

Another un-recommended approach: StrictMode.setThreadPolicy and StrictMode.ThreadPolicy.Builder

Friday 27 April 2012

JDK 7 for Mac OS X is out!

Duke WavingJDK 7 for Mac OS X is out! Yes finally JDK 7 is available for Mac OS X and it includes JavaFX 2.1. A new version of NetBeans (7.1.2) was also released.

Henrick Stahl has the details on the JDK 7 release.

Touch to select focus and metering area

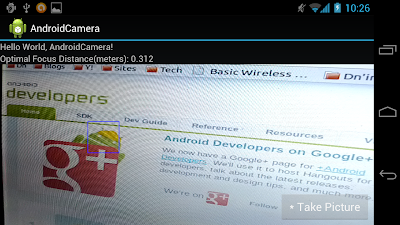
Further work on last exercise "Gets the distances from the camera to the focus point - getFocusDistances()" (and the post "Set Camera.Parameters"), It's modified to implement touching to select focus and metering area.

Touch to select focus and metering area


Modify from the exercise "Gets the distances from the camera to the focus point - getFocusDistances()". In this exercise, a new class CameraSurfaceView.java (extends SurfaceView) is implemented to replace the SurfaceView. And override the onTouchEvent(MotionEvent event) method to get user touch position, and area. The touched area will be passed to main activity, AndroidCamera.java, via touchFocus() method.

package com.exercise.AndroidCamera;

import android.content.Context;
import android.graphics.Rect;
import android.util.AttributeSet;
import android.view.MotionEvent;
import android.view.SurfaceView;

public class CameraSurfaceView extends SurfaceView {

public CameraSurfaceView(Context context) {
super(context);
// TODO Auto-generated constructor stub
}

public CameraSurfaceView(Context context, AttributeSet attrs) {
super(context, attrs);
// TODO Auto-generated constructor stub
}

public CameraSurfaceView(Context context, AttributeSet attrs, int defStyle) {
super(context, attrs, defStyle);
// TODO Auto-generated constructor stub
}

@Override
protected void onMeasure(int widthMeasureSpec, int heightMeasureSpec) {
// TODO Auto-generated method stub
setMeasuredDimension(
MeasureSpec.getSize(widthMeasureSpec),
MeasureSpec.getSize(heightMeasureSpec));
}

@Override
public boolean onTouchEvent(MotionEvent event) {

if(event.getAction() == MotionEvent.ACTION_DOWN){
float x = event.getX();
float y = event.getY();
float touchMajor = event.getTouchMajor();
float touchMinor = event.getTouchMinor();

Rect touchRect = new Rect(
(int)(x - touchMajor/2),
(int)(y - touchMinor/2),
(int)(x + touchMajor/2),
(int)(y + touchMinor/2));

((AndroidCamera)getContext()).touchFocus(touchRect);
}


return true;
}

}

Modify main.xml to place CameraSurfaceView, instead of Surfaceview.

<?xml version="1.0" encoding="utf-8"?>
<LinearLayout xmlns:android="http://schemas.android.com/apk/res/android"
android:layout_width="fill_parent"
android:layout_height="fill_parent"
android:orientation="vertical" >

<TextView
android:layout_width="fill_parent"
android:layout_height="wrap_content"
android:text="@string/hello" />
<TextView
android:id="@+id/prompt"
android:layout_width="fill_parent"
android:layout_height="wrap_content"/>
<com.exercise.AndroidCamera.CameraSurfaceView
android:id="@+id/camerapreview"
android:layout_width="fill_parent"
android:layout_height="wrap_content" />

</LinearLayout>

Modify the main Java code, To handle touchFocus() method. And also remove the original layoutBackground OnClickListener().

package com.exercise.AndroidCamera;

import java.io.FileNotFoundException;
import java.io.IOException;
import java.io.OutputStream;
import java.util.ArrayList;
import java.util.List;
import java.util.concurrent.Executors;
import java.util.concurrent.ScheduledExecutorService;
import java.util.concurrent.TimeUnit;

import android.app.Activity;
import android.content.ContentValues;
import android.content.Context;
import android.content.pm.ActivityInfo;
import android.graphics.Canvas;
import android.graphics.Color;
import android.graphics.Paint;
import android.graphics.PixelFormat;
import android.graphics.Rect;
import android.hardware.Camera;
import android.hardware.Camera.AutoFocusCallback;
import android.hardware.Camera.Face;
import android.hardware.Camera.FaceDetectionListener;
import android.hardware.Camera.Parameters;
import android.hardware.Camera.PictureCallback;
import android.hardware.Camera.ShutterCallback;
import android.net.Uri;
import android.os.Bundle;
import android.provider.MediaStore.Images.Media;
import android.view.LayoutInflater;
import android.view.SurfaceHolder;
import android.view.View;
import android.view.ViewGroup.LayoutParams;
import android.widget.Button;
import android.widget.TextView;

public class AndroidCamera extends Activity implements SurfaceHolder.Callback{

Camera camera;
CameraSurfaceView cameraSurfaceView;
SurfaceHolder surfaceHolder;
boolean previewing = false;
LayoutInflater controlInflater = null;

Button buttonTakePicture;
TextView prompt;

DrawingView drawingView;
Face[] detectedFaces;

final int RESULT_SAVEIMAGE = 0;

private ScheduledExecutorService myScheduledExecutorService;

/** Called when the activity is first created. */
@Override
public void onCreate(Bundle savedInstanceState) {
super.onCreate(savedInstanceState);
setContentView(R.layout.main);
setRequestedOrientation(ActivityInfo.SCREEN_ORIENTATION_LANDSCAPE);

getWindow().setFormat(PixelFormat.UNKNOWN);
cameraSurfaceView = (CameraSurfaceView)findViewById(R.id.camerapreview);
surfaceHolder = cameraSurfaceView.getHolder();
surfaceHolder.addCallback(this);
surfaceHolder.setType(SurfaceHolder.SURFACE_TYPE_PUSH_BUFFERS);

drawingView = new DrawingView(this);
LayoutParams layoutParamsDrawing
= new LayoutParams(LayoutParams.FILL_PARENT,
LayoutParams.FILL_PARENT);
this.addContentView(drawingView, layoutParamsDrawing);

controlInflater = LayoutInflater.from(getBaseContext());
View viewControl = controlInflater.inflate(R.layout.control, null);
LayoutParams layoutParamsControl
= new LayoutParams(LayoutParams.FILL_PARENT,
LayoutParams.FILL_PARENT);
this.addContentView(viewControl, layoutParamsControl);

buttonTakePicture = (Button)findViewById(R.id.takepicture);
buttonTakePicture.setOnClickListener(new Button.OnClickListener(){

@Override
public void onClick(View arg0) {
// TODO Auto-generated method stub
camera.takePicture(myShutterCallback,
myPictureCallback_RAW, myPictureCallback_JPG);
}});

/*
LinearLayout layoutBackground = (LinearLayout)findViewById(R.id.background);
layoutBackground.setOnClickListener(new LinearLayout.OnClickListener(){

@Override
public void onClick(View arg0) {
// TODO Auto-generated method stub

buttonTakePicture.setEnabled(false);
camera.autoFocus(myAutoFocusCallback);
}});
*/

prompt = (TextView)findViewById(R.id.prompt);
}

public void touchFocus(final Rect tfocusRect){

buttonTakePicture.setEnabled(false);

camera.stopFaceDetection();

//Convert from View's width and height to +/- 1000
final Rect targetFocusRect = new Rect(
tfocusRect.left * 2000/drawingView.getWidth() - 1000,
tfocusRect.top * 2000/drawingView.getHeight() - 1000,
tfocusRect.right * 2000/drawingView.getWidth() - 1000,
tfocusRect.bottom * 2000/drawingView.getHeight() - 1000);

final List<Camera.Area> focusList = new ArrayList<Camera.Area>();
Camera.Area focusArea = new Camera.Area(targetFocusRect, 1000);
focusList.add(focusArea);

Parameters para = camera.getParameters();
para.setFocusAreas(focusList);
para.setMeteringAreas(focusList);
camera.setParameters(para);

camera.autoFocus(myAutoFocusCallback);

drawingView.setHaveTouch(true, tfocusRect);
drawingView.invalidate();
}

FaceDetectionListener faceDetectionListener
= new FaceDetectionListener(){

@Override
public void onFaceDetection(Face[] faces, Camera tcamera) {

if (faces.length == 0){
//prompt.setText(" No Face Detected! ");
drawingView.setHaveFace(false);
}else{
//prompt.setText(String.valueOf(faces.length) + " Face Detected :) ");
drawingView.setHaveFace(true);
detectedFaces = faces;

//Set the FocusAreas using the first detected face
List<Camera.Area> focusList = new ArrayList<Camera.Area>();
Camera.Area firstFace = new Camera.Area(faces[0].rect, 1000);
focusList.add(firstFace);

Parameters para = camera.getParameters();

if(para.getMaxNumFocusAreas()>0){
para.setFocusAreas(focusList);
}

if(para.getMaxNumMeteringAreas()>0){
para.setMeteringAreas(focusList);
}

camera.setParameters(para);

buttonTakePicture.setEnabled(false);

//Stop further Face Detection
camera.stopFaceDetection();

buttonTakePicture.setEnabled(false);

/*
* Allways throw java.lang.RuntimeException: autoFocus failed
* if I call autoFocus(myAutoFocusCallback) here!
*
camera.autoFocus(myAutoFocusCallback);
*/

//Delay call autoFocus(myAutoFocusCallback)
myScheduledExecutorService = Executors.newScheduledThreadPool(1);
myScheduledExecutorService.schedule(new Runnable(){
public void run() {
camera.autoFocus(myAutoFocusCallback);
}
}, 500, TimeUnit.MILLISECONDS);

}

drawingView.invalidate();

}};

AutoFocusCallback myAutoFocusCallback = new AutoFocusCallback(){

@Override
public void onAutoFocus(boolean arg0, Camera arg1) {
// TODO Auto-generated method stub
if (arg0){
buttonTakePicture.setEnabled(true);
camera.cancelAutoFocus();
}

float focusDistances[] = new float[3];
arg1.getParameters().getFocusDistances(focusDistances);
prompt.setText("Optimal Focus Distance(meters): "
+ focusDistances[Camera.Parameters.FOCUS_DISTANCE_OPTIMAL_INDEX]);

}};

ShutterCallback myShutterCallback = new ShutterCallback(){

@Override
public void onShutter() {
// TODO Auto-generated method stub

}};

PictureCallback myPictureCallback_RAW = new PictureCallback(){

@Override
public void onPictureTaken(byte[] arg0, Camera arg1) {
// TODO Auto-generated method stub

}};

PictureCallback myPictureCallback_JPG = new PictureCallback(){

@Override
public void onPictureTaken(byte[] arg0, Camera arg1) {
// TODO Auto-generated method stub
/*Bitmap bitmapPicture
= BitmapFactory.decodeByteArray(arg0, 0, arg0.length); */

Uri uriTarget = getContentResolver().insert(Media.EXTERNAL_CONTENT_URI, new ContentValues());

OutputStream imageFileOS;
try {
imageFileOS = getContentResolver().openOutputStream(uriTarget);
imageFileOS.write(arg0);
imageFileOS.flush();
imageFileOS.close();

prompt.setText("Image saved: " + uriTarget.toString());

} catch (FileNotFoundException e) {
// TODO Auto-generated catch block
e.printStackTrace();
} catch (IOException e) {
// TODO Auto-generated catch block
e.printStackTrace();
}

camera.startPreview();
camera.startFaceDetection();
}};

@Override
public void surfaceChanged(SurfaceHolder holder, int format, int width,
int height) {
// TODO Auto-generated method stub
if(previewing){
camera.stopFaceDetection();
camera.stopPreview();
previewing = false;
}

if (camera != null){
try {
camera.setPreviewDisplay(surfaceHolder);
camera.startPreview();

prompt.setText(String.valueOf(
"Max Face: " + camera.getParameters().getMaxNumDetectedFaces()));
camera.startFaceDetection();
previewing = true;
} catch (IOException e) {
// TODO Auto-generated catch block
e.printStackTrace();
}
}
}

@Override
public void surfaceCreated(SurfaceHolder holder) {
// TODO Auto-generated method stub
camera = Camera.open();
camera.setFaceDetectionListener(faceDetectionListener);
}

@Override
public void surfaceDestroyed(SurfaceHolder holder) {
// TODO Auto-generated method stub
camera.stopFaceDetection();
camera.stopPreview();
camera.release();
camera = null;
previewing = false;
}

private class DrawingView extends View{

boolean haveFace;
Paint drawingPaint;

boolean haveTouch;
Rect touchArea;

public DrawingView(Context context) {
super(context);
haveFace = false;
drawingPaint = new Paint();
drawingPaint.setColor(Color.GREEN);
drawingPaint.setStyle(Paint.Style.STROKE);
drawingPaint.setStrokeWidth(2);

haveTouch = false;
}

public void setHaveFace(boolean h){
haveFace = h;
}

public void setHaveTouch(boolean t, Rect tArea){
haveTouch = t;
touchArea = tArea;
}

@Override
protected void onDraw(Canvas canvas) {
// TODO Auto-generated method stub
if(haveFace){

// Camera driver coordinates range from (-1000, -1000) to (1000, 1000).
// UI coordinates range from (0, 0) to (width, height).

int vWidth = getWidth();
int vHeight = getHeight();

for(int i=0; i<detectedFaces.length; i++){

if(i == 0){
drawingPaint.setColor(Color.GREEN);
}else{
drawingPaint.setColor(Color.RED);
}

int l = detectedFaces[i].rect.left;
int t = detectedFaces[i].rect.top;
int r = detectedFaces[i].rect.right;
int b = detectedFaces[i].rect.bottom;
int left = (l+1000) * vWidth/2000;
int top = (t+1000) * vHeight/2000;
int right = (r+1000) * vWidth/2000;
int bottom = (b+1000) * vHeight/2000;
canvas.drawRect(
left, top, right, bottom,
drawingPaint);
}
}else{
canvas.drawColor(Color.TRANSPARENT);
}

if(haveTouch){
drawingPaint.setColor(Color.BLUE);
canvas.drawRect(
touchArea.left, touchArea.top, touchArea.right, touchArea.bottom,
drawingPaint);
}
}

}
}


Download the files.

Thursday 26 April 2012

Set Camera.Parameters

In the exercise "Android 4 Face Detection: setFocusAreas() using face detected faces", I set focus area using the code:

camera.getParameters().setFocusAreas(focusList);
camera.getParameters().setMeteringAreas(focusList);

It's in-correct!

It should be modified as:

Parameters para = camera.getParameters(); 
para.setFocusAreas(focusList); 
camera.setParameters(para);

and

Parameters para = camera.getParameters(); 
para.setMeteringAreas(focusList); 
camera.setParameters(para);

Wednesday 25 April 2012

Want to Develop a Blogger Gadget?

Google LogoHave you ever considered developing your own gadget for Google Blogger? Well there is a developer guide for that. Get the details here.


Gadgets for Blogger Dev Guide

Asus U56E-RAL9 Laptop Review, Specs and Price

new Asus U56E-RAL9
Asus one of the well-known notebook maker has announced the launch of its new laptops namely, Asus U56E-RAL9. The U56E-RAL9 comes with a 2.5GHz Intel Core i5-2450M dual core processor with support Intel�s Turbo Enhance Technology 2.0 maximizes speed of processor up to 3.1GHZ for multitasking applications, Mobile Intel HM65 Express for chipset and coupled with 8GB DDR3 RAM to enhance multitasking capabilities. Packed with a 750GB Serial ATA Hard Disk Drive for internal storage, comes with Card reader slot which support Multiformat files, such as Memory Stick, Secure Digital, MultiMediaCard Plus, MultiMediaCard and xD-Picture Card formats.

Is also U56E-RAL9 integrated with Intel HD graphcis card to enhance graphics performance and offer 15.6-inch Widescreen LED-backlit display with support 720p video playback, 16:9 aspect ratio and has a 1,366 by 768 pixel resolution display, also equipped Kensington Lock, Audio Connections, headphone out, 0.3 Megapixel webcamera with integrated digital microphone for face to face vidoe chats with your friends and family, Laptop this also equipped two USB 2.0 ports, one USB 3.0 port for faster transfer speed, 10/100/1000 Mbps Fast Ethernet LAN with RJ 45 connector and high-speed wireless LAN 802.11 b/g/n for internet connections. The details related to the specs of the device are discussed below.Asus U56E-RAL9

Asus U56E-RAL9 15.6" Laptop Specification :
  • Intel Core i5-2450M processor: 3MB L3 cache and 2.5GHz processor speed with Turbo Boost up to 3.1GHz.
  • Software package included: Adobe Reader, Power2Go v5 and more. Microsoft Office 2010 also included (product key card required for activation; sold separately).
  • ENERGY STAR qualified
  • 8GB DDR3 memory
  • Multiformat DVD�RW/CD-RW drive with double-layer support
  • 15.6" LED-backlit widescreen display
  • Intel Wireless Display
  • 750GB hard drive (5400 rpm)
  • UMA graphics: For lush images. HDMI output for connection to an HDTV.
  • Built-in 0.3MP webcam
  • Multiformat media reader: Supports Secure Digital, MultiMediaCard, MultiMediaCard Plus, Memory Stick and xD-Picture Card formats.
  • 1 USB 3.0 port and 2 USB 2.0 ports
  • Built-in high-speed wireless LAN (802.11n)
  • Built-in 10/100/1000 Mbps Fast Ethernet LAN
  • Weighs 5.5 lbs. and measures just 1.1" thin
  • Extended battery life
  • Microsoft Windows 7 Home Premium Edition 64-bit operating system preinstalled

Price About : $499.99

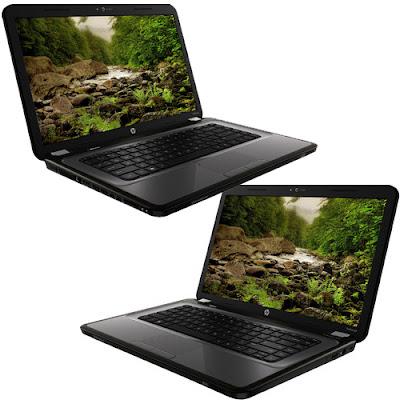
HP Pavilion G6-1313ax 15.6" Laptop Review, Specs and Price

HP Pavilion G6-1313ax 15.6
Hewlett-Packard one of the well-known notebook maker has announced the launch of its new laptops namely, HP Pavilion G6-1313ax. The Pavilion G6-1313ax which has powered by features a 15.6-inch HD BrightView LED-backlit display paired with AMD Radeon HD 6520G plus 7450M Dual graphics processor, and powered by AMD Quad-Core 2.4 GHz/1.5 GHz A6-3420M processor and runs on Windows 7 Home Basic 64-bit operating system, and comes with 4GB DDR3 memory that can expandable up to 8GB DDR3 memory, Furthermore the notebook also comes equipped with all other connectivity options and features. For more details go through the below mentioned points.new HP Pavilion G6-1313ax 15.6
HP Pavilion G6-1313ax 15.6" Laptop Spesification :
  • Display : 15.6-inch HD BrightView LED-backlit display (resolution of 1366 x 768 pixels)
  • Processor: AMD Quad Core A6
  • Graphic memory: 1 GB, Graphic Processor: AMD ATI Radeon HD 6520G
  • Chipset: AMD A60M FCH
  • RAM memory: 4 GB DDR3, Expandable Memory: Up to 8 GB
  • Harddrive: 500 GB,
  • Camera: 0.3 Megapixel
  • Optical Drive: SuperMulti DVD R/RW with Double Layer Support
  • Wireless LAN: IEEE 802.11 b/g/n,
  • Audio and Speakers: Digital Microphone,Altec Lansing Speakers,
  • USB Port: 3 x USB 2.0, Mic In: Yes, RJ45 LAN: Yes, HDMI Port: Yes, VGA Port: Yes, Multi Card Slot: Yes
  • Operating System: Windows 7 Home Basic
  • Battery: 90 W AC Adapter, Battery Backup: Up to 3 hours
  • Weight: 2.3 kg,
  • Dimension: 374 x 245 x 36.3 mm

This new 15.6-inch notebook from Hewlett-Packard is currently available to purchase at a price tag of about Rs. 30,500/- (approximately).

Asus U32U-ES21 Laptop Review, Specs and Price

new  Asus U32U-ES21 Laptop
Asus one of the leading consumer electronics has recently launched a new laptop namely, Asus U32U-ES21. The U32U-ES21 which has powered by features with screen 13.3-inch LED resolution of 1366 x 768 pixels. It runs on Windows 7 Home Premium (64-bit) Operating System and is powered by an AMD E450 (1.65Ghz) Processor, and comes with ATI Mobility Radeon HD 6320G Graphics, and 4GB DDR3 SDRAM, also with two SODIMM Sockets (up to 8GB). with a 0.3 megapixel webcam which has been provided to facilitate you for video calling, and also equipped Altec Lansing speakers, 3-in-1 card reader (SD, MMC, MS) and offers the connectivity options of Wireless 802.11 b/g/n (@ 2.4GHz) along with LAN 10/100/1000 Mbps Ethernet. The various expansion ports which have been provided are such as one Mic-in, one Headphone-out, one VGA port/Mini D-Sub 15-pin for external monitor, one RJ-45 port, three USB 2.0 ports, one Bluetooth 3.0 and one HDMI port. The details related to the specs of the device are discussed below. Asus U32U-ES21 Laptop
Asus U32U-ES21 Laptop Specification :
  • AMD E Series Dual Core E 450 Processor 1.65GHz
  • 4GB DIMM RAM
  • 320GB 5400RPM Hard Drive
  • 13.3-Inch Screen
  • Windows 7 Home Premium 64-bit

Price Range : $449.99 [on amazon]

Gets the distances from the camera to the focus point - getFocusDistances()


The method getFocusDistances(float[] output) of android.hardware.Camera.Parameters gets the distances from the camera to where an object appears to be in focus. The object is sharpest at the optimal focus distance. The depth of field is the far focus distance minus near focus distance. ~ Since: API Level 9.


Modify AndroidCamera.java from last exercise "java.lang.RuntimeException: autoFocus failed", call getFocusDistances() in onAutoFocus() of myAutoFocusCallback, when focused.


package com.exercise.AndroidCamera;

import java.io.FileNotFoundException;
import java.io.IOException;
import java.io.OutputStream;
import java.util.ArrayList;
import java.util.List;
import java.util.concurrent.Executors;
import java.util.concurrent.ScheduledExecutorService;
import java.util.concurrent.TimeUnit;

import android.app.Activity;
import android.content.ContentValues;
import android.content.Context;
import android.content.pm.ActivityInfo;
import android.graphics.Canvas;
import android.graphics.Color;
import android.graphics.Paint;
import android.graphics.PixelFormat;
import android.hardware.Camera;
import android.hardware.Camera.AutoFocusCallback;
import android.hardware.Camera.Face;
import android.hardware.Camera.FaceDetectionListener;
import android.hardware.Camera.Parameters;
import android.hardware.Camera.PictureCallback;
import android.hardware.Camera.ShutterCallback;
import android.net.Uri;
import android.os.Bundle;
import android.provider.MediaStore.Images.Media;
import android.view.LayoutInflater;
import android.view.SurfaceHolder;
import android.view.SurfaceView;
import android.view.View;
import android.view.ViewGroup.LayoutParams;
import android.widget.Button;
import android.widget.LinearLayout;
import android.widget.TextView;

public class AndroidCamera extends Activity implements SurfaceHolder.Callback{

Camera camera;
SurfaceView surfaceView;
SurfaceHolder surfaceHolder;
boolean previewing = false;
LayoutInflater controlInflater = null;

Button buttonTakePicture;
TextView prompt;

DrawingView drawingView;
Face[] detectedFaces;

final int RESULT_SAVEIMAGE = 0;

private ScheduledExecutorService myScheduledExecutorService;

/** Called when the activity is first created. */
@Override
public void onCreate(Bundle savedInstanceState) {
super.onCreate(savedInstanceState);
setContentView(R.layout.main);
setRequestedOrientation(ActivityInfo.SCREEN_ORIENTATION_LANDSCAPE);

getWindow().setFormat(PixelFormat.UNKNOWN);
surfaceView = (SurfaceView)findViewById(R.id.camerapreview);
surfaceHolder = surfaceView.getHolder();
surfaceHolder.addCallback(this);
surfaceHolder.setType(SurfaceHolder.SURFACE_TYPE_PUSH_BUFFERS);

drawingView = new DrawingView(this);
LayoutParams layoutParamsDrawing
= new LayoutParams(LayoutParams.FILL_PARENT,
LayoutParams.FILL_PARENT);
this.addContentView(drawingView, layoutParamsDrawing);

controlInflater = LayoutInflater.from(getBaseContext());
View viewControl = controlInflater.inflate(R.layout.control, null);
LayoutParams layoutParamsControl
= new LayoutParams(LayoutParams.FILL_PARENT,
LayoutParams.FILL_PARENT);
this.addContentView(viewControl, layoutParamsControl);

buttonTakePicture = (Button)findViewById(R.id.takepicture);
buttonTakePicture.setOnClickListener(new Button.OnClickListener(){

@Override
public void onClick(View arg0) {
// TODO Auto-generated method stub
camera.takePicture(myShutterCallback,
myPictureCallback_RAW, myPictureCallback_JPG);
}});

LinearLayout layoutBackground = (LinearLayout)findViewById(R.id.background);
layoutBackground.setOnClickListener(new LinearLayout.OnClickListener(){

@Override
public void onClick(View arg0) {
// TODO Auto-generated method stub

buttonTakePicture.setEnabled(false);
camera.autoFocus(myAutoFocusCallback);
}});

prompt = (TextView)findViewById(R.id.prompt);
}

FaceDetectionListener faceDetectionListener
= new FaceDetectionListener(){

@Override
public void onFaceDetection(Face[] faces, Camera tcamera) {

if (faces.length == 0){
//prompt.setText(" No Face Detected! ");
drawingView.setHaveFace(false);
}else{
//prompt.setText(String.valueOf(faces.length) + " Face Detected :) ");
drawingView.setHaveFace(true);
detectedFaces = faces;

//Set the FocusAreas using the first detected face
List<Camera.Area> focusList = new ArrayList<Camera.Area>();
Camera.Area firstFace = new Camera.Area(faces[0].rect, 1000);
focusList.add(firstFace);

if(camera.getParameters().getMaxNumFocusAreas()>0){
camera.getParameters().setFocusAreas(focusList);
}

if(camera.getParameters().getMaxNumMeteringAreas()>0){
camera.getParameters().setMeteringAreas(focusList);
}

buttonTakePicture.setEnabled(false);
//camera.getParameters().setFocusMode(Camera.Parameters.FOCUS_MODE_CONTINUOUS_PICTURE);

//Stop further Face Detection
camera.stopFaceDetection();

buttonTakePicture.setEnabled(false);

/*
* Allways throw java.lang.RuntimeException: autoFocus failed
* if I call autoFocus(myAutoFocusCallback) here!
*
camera.autoFocus(myAutoFocusCallback);
*/

//Delay call autoFocus(myAutoFocusCallback)
myScheduledExecutorService = Executors.newScheduledThreadPool(1);
myScheduledExecutorService.schedule(new Runnable(){
public void run() {
camera.autoFocus(myAutoFocusCallback);
}
}, 500, TimeUnit.MILLISECONDS);

}

drawingView.invalidate();

}};

AutoFocusCallback myAutoFocusCallback = new AutoFocusCallback(){

@Override
public void onAutoFocus(boolean arg0, Camera arg1) {
// TODO Auto-generated method stub
if (arg0){
buttonTakePicture.setEnabled(true);
camera.cancelAutoFocus();
}

float focusDistances[] = new float[3];
arg1.getParameters().getFocusDistances(focusDistances);
prompt.setText("Optimal Focus Distance(meters): "
+ focusDistances[Camera.Parameters.FOCUS_DISTANCE_OPTIMAL_INDEX]);

}};

ShutterCallback myShutterCallback = new ShutterCallback(){

@Override
public void onShutter() {
// TODO Auto-generated method stub

}};

PictureCallback myPictureCallback_RAW = new PictureCallback(){

@Override
public void onPictureTaken(byte[] arg0, Camera arg1) {
// TODO Auto-generated method stub

}};

PictureCallback myPictureCallback_JPG = new PictureCallback(){

@Override
public void onPictureTaken(byte[] arg0, Camera arg1) {
// TODO Auto-generated method stub
/*Bitmap bitmapPicture
= BitmapFactory.decodeByteArray(arg0, 0, arg0.length); */

Uri uriTarget = getContentResolver().insert(Media.EXTERNAL_CONTENT_URI, new ContentValues());

OutputStream imageFileOS;
try {
imageFileOS = getContentResolver().openOutputStream(uriTarget);
imageFileOS.write(arg0);
imageFileOS.flush();
imageFileOS.close();

prompt.setText("Image saved: " + uriTarget.toString());

} catch (FileNotFoundException e) {
// TODO Auto-generated catch block
e.printStackTrace();
} catch (IOException e) {
// TODO Auto-generated catch block
e.printStackTrace();
}

camera.startPreview();
camera.startFaceDetection();
}};

@Override
public void surfaceChanged(SurfaceHolder holder, int format, int width,
int height) {
// TODO Auto-generated method stub
if(previewing){
camera.stopFaceDetection();
camera.stopPreview();
previewing = false;
}

if (camera != null){
try {
camera.setPreviewDisplay(surfaceHolder);
camera.startPreview();

prompt.setText(String.valueOf(
"Max Face: " + camera.getParameters().getMaxNumDetectedFaces()));
camera.startFaceDetection();
previewing = true;
} catch (IOException e) {
// TODO Auto-generated catch block
e.printStackTrace();
}
}
}

@Override
public void surfaceCreated(SurfaceHolder holder) {
// TODO Auto-generated method stub
camera = Camera.open();
camera.setFaceDetectionListener(faceDetectionListener);
}

@Override
public void surfaceDestroyed(SurfaceHolder holder) {
// TODO Auto-generated method stub
camera.stopFaceDetection();
camera.stopPreview();
camera.release();
camera = null;
previewing = false;
}

private class DrawingView extends View{

boolean haveFace;
Paint drawingPaint;

public DrawingView(Context context) {
super(context);
haveFace = false;
drawingPaint = new Paint();
drawingPaint.setColor(Color.GREEN);
drawingPaint.setStyle(Paint.Style.STROKE);
drawingPaint.setStrokeWidth(2);
}

public void setHaveFace(boolean h){
haveFace = h;
}

@Override
protected void onDraw(Canvas canvas) {
// TODO Auto-generated method stub
if(haveFace){

// Camera driver coordinates range from (-1000, -1000) to (1000, 1000).
// UI coordinates range from (0, 0) to (width, height).

int vWidth = getWidth();
int vHeight = getHeight();

for(int i=0; i<detectedFaces.length; i++){

if(i == 0){
drawingPaint.setColor(Color.GREEN);
}else{
drawingPaint.setColor(Color.RED);
}

int l = detectedFaces[i].rect.left;
int t = detectedFaces[i].rect.top;
int r = detectedFaces[i].rect.right;
int b = detectedFaces[i].rect.bottom;
int left = (l+1000) * vWidth/2000;
int top = (t+1000) * vHeight/2000;
int right = (r+1000) * vWidth/2000;
int bottom = (b+1000) * vHeight/2000;
canvas.drawRect(
left, top, right, bottom,
drawingPaint);
}
}else{
canvas.drawColor(Color.TRANSPARENT);
}
}

}
}


Download the files.

Note:
- Set Camera.Parameters

Related:
- Touch to select focus and metering area


Tuesday 24 April 2012

Sky Drive and Google Drive take on DropBox

Google LogoBig news in the cloud computing world. Yesterday Microsoft announced new updates to its Sky Drive and today Google announced Google Drive. Both of these products are direct competitors to Dropbox which is one of my favorite Internet products.


How the Products Work

Installing the software sets up a special folder on your hard disk. Any files copied to this folder are synced to the Internet. So I have an online backup, big deal. Right? But what happens when I install the same software on my iPhone, my iPad, my second laptop? Suddenly all my devices are automatically synchronized with all my data. Powerful stuff.


What do SkyDrive and Google Drive do better than DropBox?

Well first, both services offer a lot more disk space than Dropbox. For $120/yr, Dropbox gives you 50gb of disk space. Google and Microsoft are offering 100gb for around $50/yr. That is quite a discount.


Google Drive offers Google Docs integration. You can edit Word and Excel files on the web and then have them synced to your devices. In addition, Google Drive looks to have some very interesting photo and video sharing features that seem to be unique.


SkyDrive offers Microsoft Office integration with their online office offering.


What don't SkyDrive and Google Drive Offer?

First off, Dropbox offers support on pretty much all mobile devices (iOS, Android) and operating systems (Windows, OS X, Linux). The new contenders do not. Issues include:

  • Neither new product supports Linux

  • Google supports Android but not iOS, though it is coming soon

  • SkyDrive supports iOS and Windows Phone but not Android

  • Google docs can only be edited from the Web. You can't edit them from your local copies. In fact, you only get links to your docs and no local copies.

  • Sharing features for SkyDrive do not work on the Mac OS X version


Bottom Line

These moves are gonna shake things up both for the cloud drive market and for the online backup market. Dropbox is still way easier to use and is much slicker than its two rivals. I would expect a price cut or a storage increase very quickly from Dropbox.


Apple has everything in place to be a competitor in this space. However, if they stay isolated in their ecosystem, they surrender this market to their competitors.


In the end, this means more options and better deals for us end users. Hooray for that!


Reviews and General Posts

The Verge: Hands On

Google Drive FAQ


Cloud Drives Compared

Here are the articles comparing cloud drive features.

PCWorld: Google Drive vs the Rest

Laptop Mag: Cloud drives compared

The Verge: All the Cloud Drives Compared

Engadget: Google Drive vs the Rest


Google Terms Controversy

Late in the day there was some controversy about Google Terms of service. My take is it was much ado about nothing. Once your read Google Terms of Service everything looks ok. But if you want to make up your own mind check out these links.

ZDNet: How far do Googles terms of service go?

CNET: Who owns your files?

Google Terms of Service


Ever want to follow someone's Twitter feed via RSS? Here's how:


Use the following URL and replace xxxxx with the Twitter username you wish to get the RSS feed for:

http://api.twitter.com/1/statuses/user_timeline.rss?screen_name=xxxxx (Where xxxxx is the username.)


For complete details on the subject, check out this story on SEO Alien.

java.lang.RuntimeException: autoFocus failed


Refer to the last exercise "Android 4 Face Detection: setFocusAreas() using face detected faces", it will throw java.lang.RuntimeException: autoFocus failed almost everytime in onFaceDetection() when camera.autoFocus(myAutoFocusCallback) is called after face detected, and setFocusAreas() called.

I delay calling camera.autoFocus(myAutoFocusCallback) for 500ms (using ScheduledExecutorService), it seem that the problem solved.


package com.exercise.AndroidCamera;

import java.io.FileNotFoundException;
import java.io.IOException;
import java.io.OutputStream;
import java.util.ArrayList;
import java.util.List;
import java.util.concurrent.Executors;
import java.util.concurrent.ScheduledExecutorService;
import java.util.concurrent.TimeUnit;

import android.app.Activity;
import android.content.ContentValues;
import android.content.Context;
import android.content.pm.ActivityInfo;
import android.graphics.Canvas;
import android.graphics.Color;
import android.graphics.Paint;
import android.graphics.PixelFormat;
import android.hardware.Camera;
import android.hardware.Camera.AutoFocusCallback;
import android.hardware.Camera.Face;
import android.hardware.Camera.FaceDetectionListener;
import android.hardware.Camera.Parameters;
import android.hardware.Camera.PictureCallback;
import android.hardware.Camera.ShutterCallback;
import android.net.Uri;
import android.os.Bundle;
import android.provider.MediaStore.Images.Media;
import android.view.LayoutInflater;
import android.view.SurfaceHolder;
import android.view.SurfaceView;
import android.view.View;
import android.view.ViewGroup.LayoutParams;
import android.widget.Button;
import android.widget.LinearLayout;
import android.widget.TextView;

public class AndroidCamera extends Activity implements SurfaceHolder.Callback{

Camera camera;
SurfaceView surfaceView;
SurfaceHolder surfaceHolder;
boolean previewing = false;
LayoutInflater controlInflater = null;

Button buttonTakePicture;
TextView prompt;

DrawingView drawingView;
Face[] detectedFaces;

final int RESULT_SAVEIMAGE = 0;

private ScheduledExecutorService myScheduledExecutorService;

/** Called when the activity is first created. */
@Override
public void onCreate(Bundle savedInstanceState) {
super.onCreate(savedInstanceState);
setContentView(R.layout.main);
setRequestedOrientation(ActivityInfo.SCREEN_ORIENTATION_LANDSCAPE);

getWindow().setFormat(PixelFormat.UNKNOWN);
surfaceView = (SurfaceView)findViewById(R.id.camerapreview);
surfaceHolder = surfaceView.getHolder();
surfaceHolder.addCallback(this);
surfaceHolder.setType(SurfaceHolder.SURFACE_TYPE_PUSH_BUFFERS);

drawingView = new DrawingView(this);
LayoutParams layoutParamsDrawing
= new LayoutParams(LayoutParams.FILL_PARENT,
LayoutParams.FILL_PARENT);
this.addContentView(drawingView, layoutParamsDrawing);

controlInflater = LayoutInflater.from(getBaseContext());
View viewControl = controlInflater.inflate(R.layout.control, null);
LayoutParams layoutParamsControl
= new LayoutParams(LayoutParams.FILL_PARENT,
LayoutParams.FILL_PARENT);
this.addContentView(viewControl, layoutParamsControl);

buttonTakePicture = (Button)findViewById(R.id.takepicture);
buttonTakePicture.setOnClickListener(new Button.OnClickListener(){

@Override
public void onClick(View arg0) {
// TODO Auto-generated method stub
camera.takePicture(myShutterCallback,
myPictureCallback_RAW, myPictureCallback_JPG);
}});

LinearLayout layoutBackground = (LinearLayout)findViewById(R.id.background);
layoutBackground.setOnClickListener(new LinearLayout.OnClickListener(){

@Override
public void onClick(View arg0) {
// TODO Auto-generated method stub

buttonTakePicture.setEnabled(false);
camera.autoFocus(myAutoFocusCallback);
}});

prompt = (TextView)findViewById(R.id.prompt);
}

FaceDetectionListener faceDetectionListener
= new FaceDetectionListener(){

@Override
public void onFaceDetection(Face[] faces, Camera tcamera) {

if (faces.length == 0){
prompt.setText(" No Face Detected! ");
drawingView.setHaveFace(false);
}else{
prompt.setText(String.valueOf(faces.length) + " Face Detected :) ");
drawingView.setHaveFace(true);
detectedFaces = faces;

//Set the FocusAreas using the first detected face
List<Camera.Area> focusList = new ArrayList<Camera.Area>();
Camera.Area firstFace = new Camera.Area(faces[0].rect, 1000);
focusList.add(firstFace);

if(camera.getParameters().getMaxNumFocusAreas()>0){
camera.getParameters().setFocusAreas(focusList);
}

if(camera.getParameters().getMaxNumMeteringAreas()>0){
camera.getParameters().setMeteringAreas(focusList);
}

buttonTakePicture.setEnabled(false);
//camera.getParameters().setFocusMode(Camera.Parameters.FOCUS_MODE_CONTINUOUS_PICTURE);

//Stop further Face Detection
camera.stopFaceDetection();

buttonTakePicture.setEnabled(false);

/*
* Allways throw java.lang.RuntimeException: autoFocus failed
* if I call autoFocus(myAutoFocusCallback) here!
*
camera.autoFocus(myAutoFocusCallback);
*/

//Delay call autoFocus(myAutoFocusCallback)
myScheduledExecutorService = Executors.newScheduledThreadPool(1);
myScheduledExecutorService.schedule(new Runnable(){
public void run() {
camera.autoFocus(myAutoFocusCallback);
}
}, 500, TimeUnit.MILLISECONDS);

}

drawingView.invalidate();

}};

AutoFocusCallback myAutoFocusCallback = new AutoFocusCallback(){

@Override
public void onAutoFocus(boolean arg0, Camera arg1) {
// TODO Auto-generated method stub
if (arg0){
buttonTakePicture.setEnabled(true);
camera.cancelAutoFocus();
}

}};

ShutterCallback myShutterCallback = new ShutterCallback(){

@Override
public void onShutter() {
// TODO Auto-generated method stub

}};

PictureCallback myPictureCallback_RAW = new PictureCallback(){

@Override
public void onPictureTaken(byte[] arg0, Camera arg1) {
// TODO Auto-generated method stub

}};

PictureCallback myPictureCallback_JPG = new PictureCallback(){

@Override
public void onPictureTaken(byte[] arg0, Camera arg1) {
// TODO Auto-generated method stub
/*Bitmap bitmapPicture
= BitmapFactory.decodeByteArray(arg0, 0, arg0.length); */

Uri uriTarget = getContentResolver().insert(Media.EXTERNAL_CONTENT_URI, new ContentValues());

OutputStream imageFileOS;
try {
imageFileOS = getContentResolver().openOutputStream(uriTarget);
imageFileOS.write(arg0);
imageFileOS.flush();
imageFileOS.close();

prompt.setText("Image saved: " + uriTarget.toString());

} catch (FileNotFoundException e) {
// TODO Auto-generated catch block
e.printStackTrace();
} catch (IOException e) {
// TODO Auto-generated catch block
e.printStackTrace();
}

camera.startPreview();
camera.startFaceDetection();
}};

@Override
public void surfaceChanged(SurfaceHolder holder, int format, int width,
int height) {
// TODO Auto-generated method stub
if(previewing){
camera.stopFaceDetection();
camera.stopPreview();
previewing = false;
}

if (camera != null){
try {
camera.setPreviewDisplay(surfaceHolder);
camera.startPreview();

prompt.setText(String.valueOf(
"Max Face: " + camera.getParameters().getMaxNumDetectedFaces()));
camera.startFaceDetection();
previewing = true;
} catch (IOException e) {
// TODO Auto-generated catch block
e.printStackTrace();
}
}
}

@Override
public void surfaceCreated(SurfaceHolder holder) {
// TODO Auto-generated method stub
camera = Camera.open();
camera.setFaceDetectionListener(faceDetectionListener);
}

@Override
public void surfaceDestroyed(SurfaceHolder holder) {
// TODO Auto-generated method stub
camera.stopFaceDetection();
camera.stopPreview();
camera.release();
camera = null;
previewing = false;
}

private class DrawingView extends View{

boolean haveFace;
Paint drawingPaint;

public DrawingView(Context context) {
super(context);
haveFace = false;
drawingPaint = new Paint();
drawingPaint.setColor(Color.GREEN);
drawingPaint.setStyle(Paint.Style.STROKE);
drawingPaint.setStrokeWidth(2);
}

public void setHaveFace(boolean h){
haveFace = h;
}

@Override
protected void onDraw(Canvas canvas) {
// TODO Auto-generated method stub
if(haveFace){

// Camera driver coordinates range from (-1000, -1000) to (1000, 1000).
// UI coordinates range from (0, 0) to (width, height).

int vWidth = getWidth();
int vHeight = getHeight();

for(int i=0; i<detectedFaces.length; i++){

if(i == 0){
drawingPaint.setColor(Color.GREEN);
}else{
drawingPaint.setColor(Color.RED);
}

int l = detectedFaces[i].rect.left;
int t = detectedFaces[i].rect.top;
int r = detectedFaces[i].rect.right;
int b = detectedFaces[i].rect.bottom;
int left = (l+1000) * vWidth/2000;
int top = (t+1000) * vHeight/2000;
int right = (r+1000) * vWidth/2000;
int bottom = (b+1000) * vHeight/2000;
canvas.drawRect(
left, top, right, bottom,
drawingPaint);
}
}else{
canvas.drawColor(Color.TRANSPARENT);
}
}

}
}


Download the files.

Next: - Gets the distances from the camera to the focus point - getFocusDistances()

Posting Links through Twitter

Internet IconI have been working heads down for the last few months and have been neglecting my blog a bit. So I just realized, Google Reader is no longer auto posting links of interest to the blog.


How I Find Stories

I find stories of interest using Reeder on the iPad using the "Star" feature of Google Reader to feed those stories via RSS to my blog. Apparently Google has dropped the RSS feed for starred stories, so a new method is required to record stories of interest.


Twitter linked to Facebook

Since I can link my Twitter posts to my blog and then to Facebook, I am going to go that route. So now, any stories of interest will be posted on Twitter which will show up here on the blog and in my Facebook wall. And of course, I will be posting links to these posts. So Hopefully this will work better.


Linking your Twitter Account to Facebook

Monday 23 April 2012

Android 4 Face Detection: setFocusAreas() using face detected faces


Last exercise "Android 4 Face Detection: Display detected face area" we can get the detected face areas in onFaceDetection() of FaceDetectionListener. We can create a List of Camera.Area from the detected faces of Face[], to assign the area for focusing.


note:
Before using this API or setFocusAreas(List), apps should call getMaxNumFocusAreas() to know the maximum number of focus areas first. If the value is 0, focus area is not supported.


Each focus area is a rectangle with specified weight. The direction is relative to the sensor orientation, that is, what the sensor sees. The direction is not affected by the rotation or mirroring of setDisplayOrientation(int). Coordinates of the rectangle range from -1000 to 1000. (-1000, -1000) is the upper left point. (1000, 1000) is the lower right point. The width and height of focus areas cannot be 0 or negative.


The weight must range from 1 to 1000. The weight should be interpreted as a per-pixel weight - all pixels in the area have the specified weight. This means a small area with the same weight as a larger area will have less influence on the focusing than the larger area. Focus areas can partially overlap and the driver will add the weights in the overlap region. ~ Reference: http://developer.android.com/reference/android/hardware/Camera.Parameters.html#getFocusAreas().

Modify the main code in last exercise:

package com.exercise.AndroidCamera;

import java.io.FileNotFoundException;
import java.io.IOException;
import java.io.OutputStream;
import java.util.ArrayList;
import java.util.List;

import android.app.Activity;
import android.content.ContentValues;
import android.content.Context;
import android.content.pm.ActivityInfo;
import android.graphics.Canvas;
import android.graphics.Color;
import android.graphics.Paint;
import android.graphics.PixelFormat;
import android.hardware.Camera;
import android.hardware.Camera.AutoFocusCallback;
import android.hardware.Camera.Face;
import android.hardware.Camera.FaceDetectionListener;
import android.hardware.Camera.Parameters;
import android.hardware.Camera.PictureCallback;
import android.hardware.Camera.ShutterCallback;
import android.net.Uri;
import android.os.Bundle;
import android.provider.MediaStore.Images.Media;
import android.view.LayoutInflater;
import android.view.SurfaceHolder;
import android.view.SurfaceView;
import android.view.View;
import android.view.ViewGroup.LayoutParams;
import android.widget.Button;
import android.widget.LinearLayout;
import android.widget.TextView;

public class AndroidCamera extends Activity implements SurfaceHolder.Callback{

Camera camera;
SurfaceView surfaceView;
SurfaceHolder surfaceHolder;
boolean previewing = false;
LayoutInflater controlInflater = null;

Button buttonTakePicture;
TextView prompt;

DrawingView drawingView;
Face[] detectedFaces;

final int RESULT_SAVEIMAGE = 0;

/** Called when the activity is first created. */
@Override
public void onCreate(Bundle savedInstanceState) {
super.onCreate(savedInstanceState);
setContentView(R.layout.main);
setRequestedOrientation(ActivityInfo.SCREEN_ORIENTATION_LANDSCAPE);

getWindow().setFormat(PixelFormat.UNKNOWN);
surfaceView = (SurfaceView)findViewById(R.id.camerapreview);
surfaceHolder = surfaceView.getHolder();
surfaceHolder.addCallback(this);
surfaceHolder.setType(SurfaceHolder.SURFACE_TYPE_PUSH_BUFFERS);

drawingView = new DrawingView(this);
LayoutParams layoutParamsDrawing
= new LayoutParams(LayoutParams.FILL_PARENT,
LayoutParams.FILL_PARENT);
this.addContentView(drawingView, layoutParamsDrawing);

controlInflater = LayoutInflater.from(getBaseContext());
View viewControl = controlInflater.inflate(R.layout.control, null);
LayoutParams layoutParamsControl
= new LayoutParams(LayoutParams.FILL_PARENT,
LayoutParams.FILL_PARENT);
this.addContentView(viewControl, layoutParamsControl);

buttonTakePicture = (Button)findViewById(R.id.takepicture);
buttonTakePicture.setOnClickListener(new Button.OnClickListener(){

@Override
public void onClick(View arg0) {
// TODO Auto-generated method stub
camera.takePicture(myShutterCallback,
myPictureCallback_RAW, myPictureCallback_JPG);
}});

LinearLayout layoutBackground = (LinearLayout)findViewById(R.id.background);
layoutBackground.setOnClickListener(new LinearLayout.OnClickListener(){

@Override
public void onClick(View arg0) {
// TODO Auto-generated method stub

buttonTakePicture.setEnabled(false);
camera.autoFocus(myAutoFocusCallback);
}});

prompt = (TextView)findViewById(R.id.prompt);
}

FaceDetectionListener faceDetectionListener
= new FaceDetectionListener(){

@Override
public void onFaceDetection(Face[] faces, Camera camera) {

if (faces.length == 0){
prompt.setText(" No Face Detected! ");
drawingView.setHaveFace(false);
}else{
prompt.setText(String.valueOf(faces.length) + " Face Detected :) ");
drawingView.setHaveFace(true);
detectedFaces = faces;

/*
int maxNumFocusAreas = camera.getParameters().getMaxNumFocusAreas();
int maxNumMeteringAreas = camera.getParameters().getMaxNumMeteringAreas();
prompt.setText(String.valueOf(faces.length) + " Face Detected :) "
+ " maxNumFocusAreas=" + maxNumFocusAreas
+ " maxNumMeteringAreas=" + maxNumMeteringAreas
);
*/

//Set the FocusAreas using the first detected face
List<Camera.Area> focusList = new ArrayList<Camera.Area>();
Camera.Area firstFace = new Camera.Area(faces[0].rect, 1000);
focusList.add(firstFace);

if(camera.getParameters().getMaxNumFocusAreas()>0){
camera.getParameters().setFocusAreas(focusList);
}

if(camera.getParameters().getMaxNumMeteringAreas()>0){
camera.getParameters().setMeteringAreas(focusList);
}

buttonTakePicture.setEnabled(false);
//camera.getParameters().setFocusMode(Camera.Parameters.FOCUS_MODE_CONTINUOUS_PICTURE);

//Stop further Face Detection
camera.stopFaceDetection();

buttonTakePicture.setEnabled(false);
camera.autoFocus(myAutoFocusCallback);

}

drawingView.invalidate();

}};

AutoFocusCallback myAutoFocusCallback = new AutoFocusCallback(){

@Override
public void onAutoFocus(boolean arg0, Camera arg1) {
// TODO Auto-generated method stub
buttonTakePicture.setEnabled(true);
camera.cancelAutoFocus();

}};

ShutterCallback myShutterCallback = new ShutterCallback(){

@Override
public void onShutter() {
// TODO Auto-generated method stub

}};

PictureCallback myPictureCallback_RAW = new PictureCallback(){

@Override
public void onPictureTaken(byte[] arg0, Camera arg1) {
// TODO Auto-generated method stub

}};

PictureCallback myPictureCallback_JPG = new PictureCallback(){

@Override
public void onPictureTaken(byte[] arg0, Camera arg1) {
// TODO Auto-generated method stub
/*Bitmap bitmapPicture
= BitmapFactory.decodeByteArray(arg0, 0, arg0.length); */

Uri uriTarget = getContentResolver().insert(Media.EXTERNAL_CONTENT_URI, new ContentValues());

OutputStream imageFileOS;
try {
imageFileOS = getContentResolver().openOutputStream(uriTarget);
imageFileOS.write(arg0);
imageFileOS.flush();
imageFileOS.close();

prompt.setText("Image saved: " + uriTarget.toString());

} catch (FileNotFoundException e) {
// TODO Auto-generated catch block
e.printStackTrace();
} catch (IOException e) {
// TODO Auto-generated catch block
e.printStackTrace();
}

camera.startPreview();
camera.startFaceDetection();
}};

@Override
public void surfaceChanged(SurfaceHolder holder, int format, int width,
int height) {
// TODO Auto-generated method stub
if(previewing){
camera.stopFaceDetection();
camera.stopPreview();
previewing = false;
}

if (camera != null){
try {
camera.setPreviewDisplay(surfaceHolder);
camera.startPreview();

prompt.setText(String.valueOf(
"Max Face: " + camera.getParameters().getMaxNumDetectedFaces()));
camera.startFaceDetection();
previewing = true;
} catch (IOException e) {
// TODO Auto-generated catch block
e.printStackTrace();
}
}
}

@Override
public void surfaceCreated(SurfaceHolder holder) {
// TODO Auto-generated method stub
camera = Camera.open();
camera.setFaceDetectionListener(faceDetectionListener);
}

@Override
public void surfaceDestroyed(SurfaceHolder holder) {
// TODO Auto-generated method stub
camera.stopFaceDetection();
camera.stopPreview();
camera.release();
camera = null;
previewing = false;
}

private class DrawingView extends View{

boolean haveFace;
Paint drawingPaint;

public DrawingView(Context context) {
super(context);
haveFace = false;
drawingPaint = new Paint();
drawingPaint.setColor(Color.GREEN);
drawingPaint.setStyle(Paint.Style.STROKE);
drawingPaint.setStrokeWidth(2);
}

public void setHaveFace(boolean h){
haveFace = h;
}

@Override
protected void onDraw(Canvas canvas) {
// TODO Auto-generated method stub
if(haveFace){

// Camera driver coordinates range from (-1000, -1000) to (1000, 1000).
// UI coordinates range from (0, 0) to (width, height).

int vWidth = getWidth();
int vHeight = getHeight();

for(int i=0; i<detectedFaces.length; i++){

if(i == 0){
drawingPaint.setColor(Color.GREEN);
}else{
drawingPaint.setColor(Color.RED);
}

int l = detectedFaces[i].rect.left;
int t = detectedFaces[i].rect.top;
int r = detectedFaces[i].rect.right;
int b = detectedFaces[i].rect.bottom;
int left = (l+1000) * vWidth/2000;
int top = (t+1000) * vHeight/2000;
int right = (r+1000) * vWidth/2000;
int bottom = (b+1000) * vHeight/2000;
canvas.drawRect(
left, top, right, bottom,
drawingPaint);
}
}else{
canvas.drawColor(Color.TRANSPARENT);
}
}

}
}

Important Note!

Please note that it's a simple exercise to try the face detection function for Android 4, not a completed application. I test it in Galaxy Nexus, it throw error of java.lang.RuntimeException: autoFocus failed sometimes. May be because of cannot focus. ~ Solved, refer the next post: java.lang.RuntimeException: autoFocus failed.

It is another bug here. The code of setFocusAreas() and setMeteringAreas() is in-correct! Please refer to the post Set Camera.Parameters.

Download the files.