Tuesday 29 November 2011

JavaFX apps will not run from a Browser on Windows 7 64 bit

Duke Waving

Problem: After installing Java 6 or Java 7 and the Java FX Runtime on Windows 7 64 bit, you can not launch JavaFX applications from your browser. Any attempt to launch an application results in a request from the browser to install Java. Which is silly because it is already installed. Or is it?


Solution: Most web browsers are actually 32 bit applications. Consequently, you must install the 32 bit version of the Java Runtime Edition (JRE) and the 32 bit version of the JavaFX runtime. The first will install the needed Java plugin for your browsers. The second makes JavaFX available for 32 bit apps. After the install, restart your browser and voila, everything should work fine.

Monday 28 November 2011

JQuery Click Event Example

JQuery LogoOver the break I created a simple example of how to use the JQuery click event.

See the code here.

Cyber Monday

Today is Cyber Monday and a bunch of online retailers are offering great deals. Here are some links to some of our partners.


Barnes and Nobles

Barnes&Noble.com


Best Buy


Sunday 27 November 2011

Implement Pinch Zoom in OnTouchListener

Modify the last exercise of "Implement OnTouchListener to handle multi-touch event" to implement our own pinch detection.

Implement Pinch Zoom in OnTouchListener

package com.exercise.AndroidTouchPinchZoom;

import android.app.Activity;
import android.graphics.Bitmap;
import android.graphics.BitmapFactory;
import android.os.Bundle;
import android.util.FloatMath;
import android.view.MotionEvent;
import android.view.View;
import android.view.View.OnTouchListener;
import android.widget.ImageView;
import android.widget.TextView;

public class AndroidTouchPinchZoomActivity extends Activity {

TextView myTouchEvent;
ImageView myImageView;
Bitmap bitmap;
int bmpWidth, bmpHeight;

//Touch event related variables
int touchState;
final int IDLE = 0;
final int TOUCH = 1;
final int PINCH = 2;
float dist0, distCurrent;

/** Called when the activity is first created. */
@Override
public void onCreate(Bundle savedInstanceState) {
super.onCreate(savedInstanceState);
setContentView(R.layout.main);
myTouchEvent = (TextView)findViewById(R.id.touchevent);
myImageView = (ImageView)findViewById(R.id.imageview);

bitmap = BitmapFactory.decodeResource(getResources(), R.drawable.ic_launcher);
bmpWidth = bitmap.getWidth();
bmpHeight = bitmap.getHeight();

distCurrent = 1; //Dummy default distance
dist0 = 1; //Dummy default distance
drawMatrix();

myImageView.setOnTouchListener(MyOnTouchListener);
touchState = IDLE;
}

private void drawMatrix(){
float curScale = distCurrent/dist0;
if (curScale < 0.1){
curScale = 0.1f;
}

Bitmap resizedBitmap;
int newHeight = (int) (bmpHeight * curScale);
int newWidth = (int) (bmpWidth * curScale);
resizedBitmap = Bitmap.createScaledBitmap(bitmap, newWidth, newHeight, false);
myImageView.setImageBitmap(resizedBitmap);
}

OnTouchListener MyOnTouchListener
= new OnTouchListener(){

@Override
public boolean onTouch(View view, MotionEvent event) {
// TODO Auto-generated method stub

float distx, disty;

switch(event.getAction() & MotionEvent.ACTION_MASK){
case MotionEvent.ACTION_DOWN:
//A pressed gesture has started, the motion contains the initial starting location.
myTouchEvent.setText("ACTION_DOWN");
touchState = TOUCH;
break;
case MotionEvent.ACTION_POINTER_DOWN:
//A non-primary pointer has gone down.
myTouchEvent.setText("ACTION_POINTER_DOWN");
touchState = PINCH;

//Get the distance when the second pointer touch
distx = event.getX(0) - event.getX(1);
disty = event.getY(0) - event.getY(1);
dist0 = FloatMath.sqrt(distx * distx + disty * disty);

break;
case MotionEvent.ACTION_MOVE:
//A change has happened during a press gesture (between ACTION_DOWN and ACTION_UP).
myTouchEvent.setText("ACTION_MOVE");

if(touchState == PINCH){
//Get the current distance
distx = event.getX(0) - event.getX(1);
disty = event.getY(0) - event.getY(1);
distCurrent = FloatMath.sqrt(distx * distx + disty * disty);

drawMatrix();
}

break;
case MotionEvent.ACTION_UP:
//A pressed gesture has finished.
myTouchEvent.setText("ACTION_UP");
touchState = IDLE;
break;
case MotionEvent.ACTION_POINTER_UP:
//A non-primary pointer has gone up.
myTouchEvent.setText("ACTION_POINTER_UP");
touchState = TOUCH;
break;
}

return true;
}

};
}


<?xml version="1.0" encoding="utf-8"?>
<LinearLayout xmlns:android="http://schemas.android.com/apk/res/android"
android:layout_width="fill_parent"
android:layout_height="fill_parent"
android:orientation="vertical" >

<TextView
android:layout_width="fill_parent"
android:layout_height="wrap_content"
android:text="@string/hello" />
<TextView
android:id="@+id/touchevent"
android:layout_width="fill_parent"
android:layout_height="wrap_content" />
<ImageView
android:id="@+id/imageview"
android:layout_gravity="center"
android:layout_width="fill_parent"
android:layout_height="fill_parent"
android:scaleType="center" />

</LinearLayout>


Download the files.


Related article:
- Scale bitmap according to ScaleGestureDetector


Saturday 26 November 2011

Implement OnTouchListener to handle multi-touch event

In this exercise, we will implement our OnTouchListener to handle the following MotionEvent:
ACTION_DOWN: A pressed gesture has started, the motion contains the initial starting location.
ACTION_POINTER_DOWN: A non-primary pointer has gone down.
ACTION_MOVE: A change has happened during a press gesture (between ACTION_DOWN and ACTION_UP).
ACTION_UP: A pressed gesture has finished.
ACTION_POINTER_UP: A non-primary pointer has gone up.

It will be used to implement our pinch zoom in coming exercise.

Implement OnTouchListener to handle multi-touch event

package com.exercise.AndroidTouchPinchZoom;

import android.app.Activity;
import android.graphics.Bitmap;
import android.graphics.BitmapFactory;
import android.os.Bundle;
import android.view.MotionEvent;
import android.view.View;
import android.view.View.OnTouchListener;
import android.widget.ImageView;
import android.widget.TextView;

public class AndroidTouchPinchZoomActivity extends Activity {

TextView myTouchEvent;
ImageView myImageView;
Bitmap bitmap;

/** Called when the activity is first created. */
@Override
public void onCreate(Bundle savedInstanceState) {
super.onCreate(savedInstanceState);
setContentView(R.layout.main);
myTouchEvent = (TextView)findViewById(R.id.touchevent);
myImageView = (ImageView)findViewById(R.id.imageview);

bitmap = BitmapFactory.decodeResource(getResources(), R.drawable.ic_launcher);
myImageView.setImageBitmap(bitmap);

myImageView.setOnTouchListener(MyOnTouchListener);
}

OnTouchListener MyOnTouchListener
= new OnTouchListener(){

@Override
public boolean onTouch(View view, MotionEvent event) {
// TODO Auto-generated method stub

switch(event.getAction() & MotionEvent.ACTION_MASK){
case MotionEvent.ACTION_DOWN:
//A pressed gesture has started, the motion contains the initial starting location.
myTouchEvent.setText("ACTION_DOWN");
break;
case MotionEvent.ACTION_POINTER_DOWN:
//A non-primary pointer has gone down.
myTouchEvent.setText("ACTION_POINTER_DOWN");
break;
case MotionEvent.ACTION_MOVE:
//A change has happened during a press gesture (between ACTION_DOWN and ACTION_UP).
myTouchEvent.setText("ACTION_MOVE");
break;
case MotionEvent.ACTION_UP:
//A pressed gesture has finished.
myTouchEvent.setText("ACTION_UP");
break;
case MotionEvent.ACTION_POINTER_UP:
//A non-primary pointer has gone up.
myTouchEvent.setText("ACTION_POINTER_UP");
break;
}

return true;
}

};
}


<?xml version="1.0" encoding="utf-8"?>
<LinearLayout xmlns:android="http://schemas.android.com/apk/res/android"
android:layout_width="fill_parent"
android:layout_height="fill_parent"
android:orientation="vertical" >

<TextView
android:layout_width="fill_parent"
android:layout_height="wrap_content"
android:text="@string/hello" />
<TextView
android:id="@+id/touchevent"
android:layout_width="fill_parent"
android:layout_height="wrap_content" />
<ImageView
android:id="@+id/imageview"
android:layout_gravity="center"
android:layout_width="fill_parent"
android:layout_height="fill_parent"
android:scaleType="center" />

</LinearLayout>


Download the files.

Thursday 24 November 2011

Scale bitmap according to ScaleGestureDetector

In the last exercise, "Detect pinch zoom using ScaleGestureDetector" was shown. it's modified to scale a bitmap accordingly. (It's for demonstration only, may be not practical in real use.

Scale bitmap according to ScaleGestureDetector

package com.exercise.AndroidPinchZoom;

import android.app.Activity;
import android.graphics.Bitmap;
import android.graphics.BitmapFactory;
import android.os.Bundle;
import android.view.MotionEvent;
import android.view.ScaleGestureDetector;
import android.view.ScaleGestureDetector.SimpleOnScaleGestureListener;
import android.widget.ImageView;
import android.widget.TextView;

public class AndroidPinchZoomActivity extends Activity {

TextView scaleGesture;
ImageView myImageView;
float curScale = 1F;
Bitmap bitmap;
int bmpWidth, bmpHeight;

ScaleGestureDetector scaleGestureDetector;

/** Called when the activity is first created. */
@Override
public void onCreate(Bundle savedInstanceState) {
super.onCreate(savedInstanceState);
setContentView(R.layout.main);
scaleGesture = (TextView)findViewById(R.id.ScaleGesture);
myImageView = (ImageView)findViewById(R.id.imageview);

bitmap = BitmapFactory.decodeResource(getResources(), R.drawable.ic_launcher);
bmpWidth = bitmap.getWidth();
bmpHeight = bitmap.getHeight();
drawMatrix();

scaleGestureDetector = new ScaleGestureDetector(this, new simpleOnScaleGestureListener());
}

private void drawMatrix(){

curScale = ((curScale - 1) * 10) + 1;
if (curScale < 0.1){
curScale = 0.1f;
}

Bitmap resizedBitmap;
int newHeight = (int) (bmpHeight * curScale);
int newWidth = (int) (bmpWidth * curScale);
resizedBitmap = Bitmap.createScaledBitmap(bitmap, newWidth, newHeight, false);
myImageView.setImageBitmap(resizedBitmap);
}

@Override
public boolean onTouchEvent(MotionEvent event) {
// TODO Auto-generated method stub
scaleGestureDetector.onTouchEvent(event);
return true;
}

public class simpleOnScaleGestureListener extends SimpleOnScaleGestureListener {

@Override
public boolean onScale(ScaleGestureDetector detector) {
// TODO Auto-generated method stub
curScale = detector.getScaleFactor();
scaleGesture.setText(String.valueOf(curScale));
drawMatrix();
return true;
}

@Override
public boolean onScaleBegin(ScaleGestureDetector detector) {
// TODO Auto-generated method stub
return true;
}

@Override
public void onScaleEnd(ScaleGestureDetector detector) {
// TODO Auto-generated method stub
super.onScaleEnd(detector);
}

}
}


<?xml version="1.0" encoding="utf-8"?>
<LinearLayout xmlns:android="http://schemas.android.com/apk/res/android"
android:layout_width="fill_parent"
android:layout_height="fill_parent"
android:orientation="vertical" >

<TextView
android:layout_width="fill_parent"
android:layout_height="wrap_content"
android:text="@string/hello" />
<TextView
android:id="@+id/ScaleGesture"
android:layout_width="fill_parent"
android:layout_height="wrap_content"/>
<ImageView
android:id="@+id/imageview"
android:layout_gravity="center"
android:layout_width="fill_parent"
android:layout_height="fill_parent"
android:scaleType="center" />
</LinearLayout>


Download the files.

Related article:
- Implement Pinch Zoom in OnTouchListener


Wednesday 23 November 2011

Set Up Apache Web Server on OS X Lion

OS X picture

This post documents the steps for setting up Apache on OS X Lion. Now the way I setup the server is a little different, but I will try to explain why.


  1. Start Apache Web Server
    1. Choose System Preferences in the Dock.

    2. Under Internet and Wireles and choose Sharing.

    3. Check Web Sharing.

    Apache should start up. If it does not, see the Troubleshooting section.


  2. Uncheck Web Sharing. This stops the Apache server. The server should be stopped so changes can be made to the directory structure.

  3. Set up the Apache home directory.

    The Apache home directory is located at /Library/WebServer/Documents. Of course you can set up your website and do your development there. However, if you perform an ls -l on the directory you will see the permissions set to 755 with user of root and a group of wheel. So effectively, you have no access to the directory. So you can either make files as root, or add yourself to the wheel group. Neither is very convenient, so this is the approach I take.

    1. Open a terminal window

    2. Switch to the root user: sudo bash

    3. In your home directory, create a directory to hold your web pages (e.g., www). Note that the permissions will be set to 775 with a user of root and a group of staff. Since you are a member of the staff group by default, you have read and execute rights to the directory.

    4. Add write permissions to the directory: chmod 775 www. Now this directory can be edited by both the web server and by you. Now we can have the web server point at this directory as its document directory.

    5. Change to web server directory: cd /Library/WebServer

    6. Rename the Documents directory: mv Documents Documents.bk

    7. Link to the directory our created: ln -s ~/www Documents

    8. Type exit to exit from your root shell.


  4. Now enable PHP

    1. Open a terminal window

    2. Switch to the root user: sudo bash

    3. Change to the configuration directory: cd /etc/apache2

    4. Change the permissions so you can edit the configuration directory: chmod 744 httpd.conf

    5. Edit the file with your editor of choice. vi httpd.conf. Note: If you do not know how to use vi, learning it is highly recommended as it is almost always available on Unix based systems.

    6. Uncomment this line: LoadModule php5_module libexec/apache2/libphp5.so


  5. Restart the Web Server

This should setup the server to work with PHP and allows you to easily edit and manipulate files.

Troubleshooting Tips

Problem: Apache will not start after upgrading from OS X Snow Leopard to Lion

Solution: The first thing to do is find out what error messages are being generated by Apache when it starts. This can be found in the Console application found in the Applications > Utilities > Console. This should list the error messages generated. In my case, the errors were related to directives in the Apache configuration file located at /etc/apache2/httpd.conf. Just commenting out the specific lines indicated in the console solved the startup problems for me.

Detect pinch zoom using ScaleGestureDetector

For Android 2.2 (Froyo) android.view.ScaleGestureDetector was added for processing the most commonly requested two-finger gesture: pinch zooming.

Detect pinch zoom using ScaleGestureDetector

package com.exercise.AndroidScaleGestureDetector;

import android.app.Activity;
import android.os.Bundle;
import android.view.MotionEvent;
import android.view.ScaleGestureDetector;
import android.view.ScaleGestureDetector.SimpleOnScaleGestureListener;
import android.view.View;
import android.widget.TextView;

public class AndroidScaleGestureDetectorActivity extends Activity {

TextView scaleGesture;
ScaleGestureDetector scaleGestureDetector;

/** Called when the activity is first created. */
@Override
public void onCreate(Bundle savedInstanceState) {
super.onCreate(savedInstanceState);
setContentView(R.layout.main);
scaleGesture = (TextView)findViewById(R.id.ScaleGesture);

scaleGestureDetector = new ScaleGestureDetector(this, new simpleOnScaleGestureListener());
}

@Override
public boolean onTouchEvent(MotionEvent event) {
// TODO Auto-generated method stub
scaleGestureDetector.onTouchEvent(event);
return true;
}

public class simpleOnScaleGestureListener extends
SimpleOnScaleGestureListener {

@Override
public boolean onScale(ScaleGestureDetector detector) {
// TODO Auto-generated method stub
scaleGesture.setText(String.valueOf(detector.getScaleFactor()));
return true;
}

@Override
public boolean onScaleBegin(ScaleGestureDetector detector) {
// TODO Auto-generated method stub
scaleGesture.setVisibility(View.VISIBLE);
return true;
}

@Override
public void onScaleEnd(ScaleGestureDetector detector) {
// TODO Auto-generated method stub
scaleGesture.setVisibility(View.INVISIBLE);
}

}
}


<?xml version="1.0" encoding="utf-8"?>
<LinearLayout xmlns:android="http://schemas.android.com/apk/res/android"
android:layout_width="fill_parent"
android:layout_height="fill_parent"
android:orientation="vertical" >

<TextView
android:layout_width="fill_parent"
android:layout_height="wrap_content"
android:text="@string/hello" />
<TextView
android:id="@+id/ScaleGesture"
android:layout_width="fill_parent"
android:layout_height="wrap_content" />

</LinearLayout>


Download the files.

next:
- Scale bitmap according to ScaleGestureDetector


Tuesday 22 November 2011

Beginning Building Mobile Application Development in the Cloud


Learn to build mobile apps on the major cloud platforms

Serving as a practical guide for building mobile apps and cloud services, this book is essential reading for web developers eager to create cross-platform applications for mobile devices that are supported by the power of cloud-based services such as Amazon Web Services. Author Richard Rodger walks you through building your first app with HTML5, setting it up in the cloud, and working with cloud databases. Packed with examples that show you how to build complete apps, this book elevates your already-existing skills while also acting as a stepping stone for making the leap into mobile and cloud development.

Beginning Mobile Application Development in the Cloud:

  • Demonstrates how to get the right look and feel for your mobile apps

  • Highlights ways to enhance the user experience

  • Addresses app caching, touch events, and data storage

  • Details ways to create hybrid apps that run natively

  • Looks at how best to use JSON, REST, Oauth, jQuery, AJAX, and more

  • Shares insight as to how the Apple App Store and the Android Marketplace work

  • Offers advice for marketing, advertising, and selling your apps


Saturday 19 November 2011

Dolphin Browser for iPad and iPhone

iPhone iPad pictureThanks to this story by Ina Fried, I gave the Dolphin browser a try this week. It was a pleasant surprise to see how well this free browser works. It is especially useful on the iPhone with its gestures and tabbed interface. This features are golden on a device with such limited real estate.


Definitely worth a look. Check it out here.

Toshiba Satellite L745 S4310 Laptop Review, Specs and Price

new Toshiba Satellite L745-S4310
Toshiba one of the well-known laptop maker has announced the launch of its new laptop namely, Toshiba Satellite L745-S4310. The Satellite L745-S4310 comes with Intel Core i3-2330M processor, which runs on Genuine Windows 7 Home Premium (64-bit), with 4GB DDR3 1333MHz memory use a Intel Integrated Graphics and Hard Drive 500GB HDD (5400rpm). This laptop also provide features a DVD-SuperMulti drive (+/-R double layer), Wi-Fi� Wireless networking (802.11b/g/n), Bluetooth� V3.0 + HS, Premium US keyboard (Black), Touch pad pointing device with multi touch control, Li-Ion (48Wh, 6-Cell), 1-USB (2.0) port with Sleep and Charge, 2-USB (2.0) ports. The details related to the specs of the device are discussed below.best Toshiba Satellite L745-S4310 Toshiba Satellite L745-S4310 Toshiba Satellite L745-S4310 Laptops Specification :

  • Processor : Intel� Core� i3-2330M processor
  • Operating System : Genuine Windows 7 Home Premium (64-bit)*
  • Graphics Engine : Mobile Intel� HD Graphics
  • Graphics Memory : 64MB-1696MB dynamically allocated shared graphics memory
  • Memory : 4GB DDR3 1333MHz memory
  • Hard Drive : 500GB HDD (5400rpm)
  • Optical Drive : DVD-SuperMulti drive (+/-R double layer)
  • Display Size : 14.0" widescreen
  • Display Type : HD TruBrite� LED Backlit display
  • Display Resolution : Supports 720p content, 1366x768 (HD), 16:9 aspect ratio
  • Audio : Microphone jack (mono), MaxxAudio� LE, Standard stereo speakers, Headphone jack (stereo)
  • Webcam : Webcam and microphone built into LCD bezel
  • Wireless LAN : Wi-Fi� Wireless networking (802.11b/g/n)
  • Bluetooth : Bluetooth� V3.0 + HS
  • Modem : No Modem port
  • LAN : 10/100 Ethernet LAN
  • AC Adapter : 65W (19V 3.42A) Auto-sensing, 100-240V / 50-60Hz input
  • Battery : Li-Ion (48Wh, 6-Cell)
  • Battery Life : Up to 5.85 hours
  • PC Express Slot : No PC Express Slot
  • SmartCard Reader : No SmartCard Reader slot
  • Media : Memory Card Reader
  • USB Ports : 2-USB (2.0) ports, 1-USB (2.0) port with Sleep and Charge*
  • HDMI : HDMI output port
  • Inputs and Controls : Touch pad pointing device with multi touch control, Premium US keyboard (Black)
  • Weight : Starting at 4.98 lbs.
  • Color : Fusion� Finish in Matrix Graphite
Price : $679.99

Thursday 17 November 2011

Detect swipe using SimpleOnGestureListener

Last exercise demonstrate how to "Using GestureDetector with SimpleOnGestureListener". In this exercise, we modify the SimpleOnGestureListener to detect swipe by overriding onFling() method.

Detect swipe using SimpleOnGestureListener

package com.exercise.AndroidSimpleGesture;

import android.app.Activity;
import android.os.Bundle;
import android.view.GestureDetector;
import android.view.GestureDetector.SimpleOnGestureListener;
import android.view.MotionEvent;
import android.widget.TextView;

public class AndroidSimpleGestureActivity extends Activity {

TextView gestureEvent;

/** Called when the activity is first created. */
@Override
public void onCreate(Bundle savedInstanceState) {
super.onCreate(savedInstanceState);
setContentView(R.layout.main);
gestureEvent = (TextView)findViewById(R.id.GestureEvent);
}

@Override
public boolean onTouchEvent(MotionEvent event) {
// TODO Auto-generated method stub
return gestureDetector.onTouchEvent(event);
}

SimpleOnGestureListener simpleOnGestureListener
= new SimpleOnGestureListener(){


@Override
public boolean onFling(MotionEvent e1, MotionEvent e2, float velocityX,
float velocityY) {
String swipe = "";
float sensitvity = 50;

// TODO Auto-generated method stub
if((e1.getX() - e2.getX()) > sensitvity){
swipe += "Swipe Left\n";
}else if((e2.getX() - e1.getX()) > sensitvity){
swipe += "Swipe Right\n";
}else{
swipe += "\n";
}

if((e1.getY() - e2.getY()) > sensitvity){
swipe += "Swipe Up\n";
}else if((e2.getY() - e1.getY()) > sensitvity){
swipe += "Swipe Down\n";
}else{
swipe += "\n";
}

gestureEvent.setText(swipe);

return super.onFling(e1, e2, velocityX, velocityY);
}
};

GestureDetector gestureDetector
= new GestureDetector(simpleOnGestureListener);
}


Download the files.

Toshiba Portege Z830-S8302 Laptop Review, Specs and Price

Toshiba Portege Z830-S8302
Toshiba one of the well-known laptop maker has announced the launch of its new laptop namely, Toshiba Portege Z830-S8302. The Portege Z830-S8302 comes with Intel Core i7 Processor,Genuine Windows� 7 Professional 64-bit/32-bit,6GB DDR3 memory,128GB solid state drive,1366x768 native screen resolution,LED backlit keyboard,Bluetooth�,802.11agn wireless (Wi-Di capable),HDMI output,Integrated webcam,Starting at 2.47 lbs. etc. The details related to the specs of the device are discussed below.

    Toshiba Portege Z830-S8302 Laptop Review

    new Toshiba Portege Z830-S8302 Laptop Review

Toshiba Portege Z830-S8302 Entertainment Laptops Specification :

    Toshiba Portege Z830-S8302

    best Toshiba Portege Z830-S8302


Performance
  • Processor : Intel� Core� i7-2677M processor
  • Operating System : Genuine Windows� 7 Professional 64-bit, SP1
  • Genuine Windows� 7 Professional 32-bit, SP1
  • Graphics Engine : Mobile Intel� HD Graphics
  • Graphics Memory : 64MB-1696MB dynamically allocated shared graphics emory
Memory and Storage
  • Memory : 6GB DDR3 1333MHz memory
  • Hard Drive : 128GB Solid State Drive (Serial ATA, SSD)*
  • Optical Drive : Sold Separately: Toshiba USB Portable DVD SuperMulti Drive
Audio and Video
  • Display Size : 13.3" widescreen
  • Display Type : HD TFT LED Backlit display with Intel� Wireless Display Technology
  • Display Resolution : 1366x768 (HD), 16:9 aspect ratio, Supports 720p content
  • Audio : Waves MaxxAudio� 3, Standard stereo speakers, Microphone jack (mono), Headphone jack (stereo)
Communication
  • Webcam : 1.3 MP Webcam and microphone
  • Wireless LAN : Intel� Centrino� Advanced-N 6230 (802.11a/g/n + WiDi Capable)
  • Bluetooth : Bluetooth� V3.0 + EDR
  • Modem : No Modem port
  • LAN : Intel� 82579LM Gigabit Network Connection
Power
  • AC Adapter : 45W (19V 2.37A) Auto-sensing, 100-240V / 50-60Hz input
  • Battery : Li-Ion (47Wh, 8-Cell)
  • Battery Life : Up to 8.28 hours
Expansion
  • PC Express Slot : No PC Express Slot
  • SmartCard Reader : No SmartCard Reader slot
  • Media : Memory Card Reader
  • USB Ports : 1-USB (2.0) port, 1-USB (3.0) port*, 1-USB (2.0) port with Sleep and Charge
  • HDMI : HDMI� output port
Physical Description
  • Inputs and Controls :
  • TOSHIBA eco utility� (Energy-saving mode), Premium Spill-resistant Raised Tile Backlit Keyboard (black), Touch pad pointing device with multi touch control, Touch pad on/off, Presentation Button
  • Weight : Starting at 2.47 lbs.
  • Color : Ultimate Silver
Price about : $1,429.00

Using GestureDetector with SimpleOnGestureListener

GestureDetector.SimpleOnGestureListener is a convenience class to extend when you only want to listen for a subset of all the gestures.

Using GestureDetector with SimpleOnGestureListener

package com.exercise.AndroidSimpleGesture;

import android.app.Activity;
import android.os.Bundle;
import android.view.GestureDetector;
import android.view.GestureDetector.SimpleOnGestureListener;
import android.view.MotionEvent;
import android.widget.TextView;

public class AndroidSimpleGestureActivity extends Activity {

TextView gestureEvent;

/** Called when the activity is first created. */
@Override
public void onCreate(Bundle savedInstanceState) {
super.onCreate(savedInstanceState);
setContentView(R.layout.main);
gestureEvent = (TextView)findViewById(R.id.GestureEvent);
}

@Override
public boolean onTouchEvent(MotionEvent event) {
// TODO Auto-generated method stub
return gestureDetector.onTouchEvent(event);
}

SimpleOnGestureListener simpleOnGestureListener
= new SimpleOnGestureListener(){

@Override
public boolean onDoubleTap(MotionEvent e) {
// TODO Auto-generated method stub
gestureEvent.setText("onDoubleTap: \n" + e.toString());
return super.onDoubleTap(e);
}

@Override
public boolean onFling(MotionEvent e1, MotionEvent e2, float velocityX,
float velocityY) {
// TODO Auto-generated method stub
gestureEvent.setText("onFling: \n" + e1.toString() + "\n" + e2.toString() +"\n"
+ "velocityX= " + String.valueOf(velocityX) + "\n"
+ "velocityY= " + String.valueOf(velocityY) + "\n");
return super.onFling(e1, e2, velocityX, velocityY);
}

@Override
public void onLongPress(MotionEvent e) {
// TODO Auto-generated method stub
gestureEvent.setText("onLongPress: \n" + e.toString());
super.onLongPress(e);
}

@Override
public boolean onSingleTapConfirmed(MotionEvent e) {
// TODO Auto-generated method stub
gestureEvent.setText("onSingleTapConfirmed: \n" + e.toString());
return super.onSingleTapConfirmed(e);
}

};

GestureDetector gestureDetector
= new GestureDetector(simpleOnGestureListener);
}


<?xml version="1.0" encoding="utf-8"?>
<LinearLayout xmlns:android="http://schemas.android.com/apk/res/android"
android:layout_width="fill_parent"
android:layout_height="fill_parent"
android:orientation="vertical" >

<TextView
android:layout_width="fill_parent"
android:layout_height="wrap_content"
android:text="@string/hello" />

<TextView
android:id="@+id/GestureEvent"
android:layout_width="fill_parent"
android:layout_height="wrap_content" />

</LinearLayout>


Download the files.

next:
- Detect swipe using SimpleOnGestureListener


Wednesday 16 November 2011

App Inventor for Android: Build Your Own Apps - No Experience Required!


Create Android mobile apps, no programming required!

Even with limited programming experience, you can easily learn to create apps for the Android platform with this complete guide to App Inventor for Android. App Inventor for Android is a visual language that relies on simple programming blocks that users can drag and drop to create apps. This handy book gives you a series of fully worked-out apps, complete with their programming blocks, which you can customize for your own use or use as a starting point for creating the next killer app. And it's all without writing a single line of code. Don't miss the book's special section on Apps Inventor Design Patterns, which explains computer terms in simple terms and is an invaluable basic reference.

  • Teaches programmers and non-programmers alike how to use App Inventor for Android to create Android apps
  • Provides a series of fully worked-out apps that you can customize, download, and use on your Android phone or use as a starting point for building the next great app
  • Includes a valuable reference section on App Inventor Design Patterns and general computer science concepts
  • Shows you how to create apps that take advantage of the Android smartphone?s handy features, such as GPS, messaging, contacts, and more

With App Inventor for Android and this complete guide, you'll soon be creating apps that incorporate all of the Android smartphone's fun features, such as the accelerometer, GPS, messaging, and more.


Tuesday 15 November 2011

Tentative iOS 5.0.1 Support

Even though there is still no working solution for restoring 5.x on iPhone 4S I have released a 5.01.00 so you can at least save 5.0.1 SHSH. I have added tentative support for at least saving 5.0.1 SHSHs for iPhone 4S but as of now we are unable to use them fully.

As soon as more information is available I will update.

Monday 14 November 2011

Microsoft not Apple Killing Flash

Microsoft Logo

Harry McCracken at Technologizer makes a good point about who is really killing flash. A commenter on on this story by Erica Ogg points out that Microsoft will not support Flash in its Windows 8 metro browser (Internet Explorer 10).


A quick Google search confirmed this:

Microsoft revealed this week that Internet Explorer 10 Metro will not support browser based plug-ins.


�For the web to move forward and for consumers to get the most out of touch-first browsing, the Metro style browser in Windows 8 is as HTML5-only as possible, and plug-in free,� revealed Internet Explorer chief Dean Hachamovitch, in a blog post earlier this week. Microsoft is removing the ability to use plug-ins on the Metro style IE version of Windows 8 to improve security, reliability and battery life for end users. �Plug-ins were important early on in the web�s history,� admits Hachamovitch. �The web has come a long way since then with HTML5.�
Full Story Here


Although I do find it hard to believe there will be no plug-in or add on capability in Internet Explorer. It looks like Flash really is gonna be dead soon. The times are changing fast.

Saturday 12 November 2011

NDK updated for Android 4.0

Google released an updated version of the Android NDK, now in revision 7. The updated NDK lets developers who are using native code get started with the new native APIs available in Android 4.0.

details: Updated NDK for Android 4.0

Friday 11 November 2011

How do I update my iPhone/iPad to iOS 5 without Syncing?

The 5.0.1 iOS update to fix some issues with battery life is out. Did you know you no longer have to sync with iTunes to do the update? Neither did I. In fact, it looks like the updates are just patches now (only 44meg). This is a huge improvement over having to download the entire OS image every time.


To update your device do the following:

  1. Click Settings

  2. Click General

  3. Click Software Update

That's it. Your download should begin right away. It is probably a good idea to have your device plugged in while the update takes place.

HP Pavilion DV7 6101sa Entertaiment Laptop Review, Spec and Price

best HP Pavilion DV7-6101sa
Hewlett Packard one of the well-known Notebooks maker has announced the launch of its new laptops namely, HP Pavilion DV7 6101sa. The Pavilion DV7 6101sa equipped design of stunning with clean and tough aluminium construction despite the affordable price of this laptop. this Laptops comes with a screen display size of 17.3 inches with a screen resolution of 1600*900 pixels that enhances the users with better viewing experience. It also comes with 720p of high definition video recording technology. HDMI ports are also used to enhance the users with better graphics. The graphics processor used is AMD Radeon HD 6515G2. The laptop also provides 512 MB of Graphics memory. The total storage capacity in this laptop is a whopping 1,000 GB. The laptop is also comprised of an internal DVD re-writer. It also consists of a 3.5 mm audio jack as well as a multi-format memory card reader. The Beats audio speakers provide superior sound quality with exceptional sound and bass effects in this laptop.latest HP Pavilion DV7-6101sa
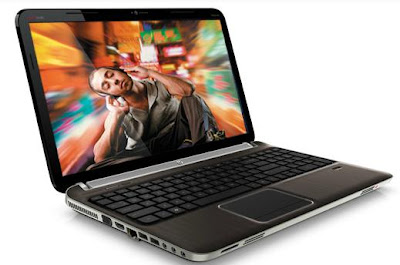
The HP Pavilion DV7-6101sa also makes use of Windows Home Premium 64-bit operating system. The laptop comes with 4 USB ports that provide the users with better USB connectivity. Bluetooth connectivity is also present in this device. The laptop also comes with 802.11n Wi-Fi connectivity. The memory cards that are supported in this laptop are SDXC and MMC. Other connectivity enhancements that are present in this laptop are mini jack audio output as well as mini jack microphone input. The software included in this laptop is Microsoft Office 2010 Starter Edition. The laptop arrives with a warranty period of one year. For more details go through the below mentioned points.HP Pavilion DV7-6101saHP Pavilion DV7-6101sa Laptops Specification :
  • Operating System : Windows 7 Home Premium Edition 64-bit
  • Display Screen : 17.3" (HP BrightView, LED High Definition 1600x900 Resolution)
  • Processor : AMD A4-3310MX Dual Core (2.1GHz, 2MB Cache, Up to 2.5GHz in Boost Mode)
  • Memory : RAM 6GB (DDR3)
  • Hard Drive : 1000GB (2 x 500GB HDD)
  • Optical Drive : DVD Rewriter (Records DVDs 8x & CDs 24x & Dual Layer Super Multi)
  • Graphics : Dedicated (AMD Radeon HD 6515G2 Dual GPU with 512MB Dedicated Memory)
  • Wireless LAN : Wireless (802.11b/g/n Wireless)
  • Network Card : 10/100/1000 Gigabit Fast Ethernet
  • Integrated Webcam : Integrated Webcam with Microphone
  • Card Reader : 2-in-1 card reader ( SD, MMC )
  • Speakers : Integrated Beats Sound System with Integrated Subwoofer
  • Interfaces :
  • - 1 x VGA
    - 1 x HDM
    - 2 x headphone-out
    - 1 x microphone-in
    - 2 x USB 2.0
    - 2 x USB 3.0
    - 1 x RJ45
  • Warranty : 2 Month Warranty (Also use for Consumer Compaq's)
  • Dimensions : (W) 41.6 cm x (D) 27.5 cm x (H) 3.6 cm
  • Battery : Life 3-4 Hours (up to 4 hours with power management)
  • Weight : 3-4 Kg (This Model 3.01 Kg)
Price Range : �529.97 or Rs 43,500.

Wednesday 9 November 2011

Ding dong Flash is Dead?

Well maybe not dead. But mortally wounded. Today Adobe announced the are no longer going to develop a Flash Player for mobile devices. Steve Shankland at CNET has the story.


Flash: Crippled but alive...for now


Although Steve Jobs is no longer with us, his will is done. He stated early on that Flash wasn't a good fit for mobile devices and Apple would focus on HTML5. As of today, Adobe agrees with him. But don't make too big a deal out of this, Adobe will still support mobile apps using their Air platform. In addition, the story points out that most of us are still using PCs rather than iPhones or iPads.


Finally, in the end, Adobe is a tools vendor. Whether their tools target Flash or HTML5, they make money either way.

Tuesday 8 November 2011

Cancel ProgressDialog

In the exercise "Display a indeterminate progress bar on title bar", the ProgressDialog will be dismissed by BackgroundThread after a certain time. How can user stop the waiting and force the BackgroundThread stop? we can set the ProgressDialog cancelable by calling progressDialog.setCancelable(true).

Cancel ProgressDialog

It's modified to be cancelable, such that user can cancel the waiting by BACK key. And a OnCancelListener is implemented to stop BackgroundThread. Also, a OnDismissListener is implemented. OnCancelListener will be called only when the dialog is canceled, if you needs to know when it is dismissed in general, use OnDismissListener.

package com.exercise.AndroidProgressDialog;

import android.app.Activity;
import android.app.ProgressDialog;
import android.content.DialogInterface;
import android.content.DialogInterface.OnCancelListener;
import android.content.DialogInterface.OnDismissListener;
import android.os.Bundle;
import android.os.Handler;
import android.os.Message;
import android.view.Window;
import android.widget.Toast;

public class AndroidProgressDialogActivity extends Activity {

ProgressDialog progressDialog;
BackgroundThread backgroundThread;

/** Called when the activity is first created. */
@Override
public void onCreate(Bundle savedInstanceState) {
super.onCreate(savedInstanceState);

requestWindowFeature(Window.FEATURE_INDETERMINATE_PROGRESS);
setContentView(R.layout.main);

setProgressBarIndeterminateVisibility(true);

progressDialog = ProgressDialog.show(AndroidProgressDialogActivity.this,
"ProgressDialog", "Wait!");

backgroundThread = new BackgroundThread();
backgroundThread.setRunning(true);
backgroundThread.start();

progressDialog.setCancelable(true);

progressDialog.setOnCancelListener(new OnCancelListener(){

public void onCancel(DialogInterface dialog) {
// TODO Auto-generated method stub
backgroundThread.setRunning(false);
Toast.makeText(AndroidProgressDialogActivity.this,
"ProgressDialog Cancelled!",
Toast.LENGTH_LONG).show();
}});

progressDialog.setOnDismissListener(new OnDismissListener(){

public void onDismiss(DialogInterface dialog) {
// TODO Auto-generated method stub
Toast.makeText(AndroidProgressDialogActivity.this,
"ProgressDialog Dismissed!",
Toast.LENGTH_LONG).show();
}});
}


public class BackgroundThread extends Thread{
volatile boolean running = false;
int cnt;

void setRunning(boolean b){
running = b;
cnt = 10;
}

@Override
public void run() {
// TODO Auto-generated method stub
while(running){
try {
sleep(1000);
if(cnt-- == 0){
running = false;
}
} catch (InterruptedException e) {
// TODO Auto-generated catch block
e.printStackTrace();
}
}
handler.sendMessage(handler.obtainMessage());
}
}

Handler handler = new Handler(){

@Override
public void handleMessage(Message msg) {
// TODO Auto-generated method stub

setProgressBarIndeterminateVisibility(false);
progressDialog.dismiss();

boolean retry = true;
while(retry){
try {
backgroundThread.join();
retry = false;
} catch (InterruptedException e) {
// TODO Auto-generated catch block
e.printStackTrace();
}
}

Toast.makeText(AndroidProgressDialogActivity.this,
"dismissed", Toast.LENGTH_LONG).show();
}

};
}

Dell Inspiron 15N 2657OBK Cheap Laptop Review, Specs and Price

Dell Inspiron 15N-2657OBK image
Dell one of the well-known laptops maker has announced the launch of its new laptop with price affordable namely, Dell Inspiron 15N-2657OBK. The Inspiron 15N-2657OBK comes with 15.6-inch LED high definition display with a resolution of 1366 x 768 pixels. The Dell 15N-2657OBK Inspiron sports 2.53GHz Intel Core i3-380M dual-core processor chip that features a 3MB cache and 2.53GHz clock speed (this is just a first generation core i3 processor), a 500GB SATA hard disk drive, an Intel HD graphics card and a 4GB DDR3 RAM.bes Dell Inspiron 15N-2657OBKThis Inspiron 15N-2657OBK provide DVD�RW/CD-RW drive, 0.3 megapixel webcam, 3 USB port, HDMI, 3-in-1 card reader and Dell Wireless 1502 that supports 802.11n. This notebook also is powered by a 6-cell battery and pre-installed with Windows 7 Home Premium 64-bit OS. The details related to the specs of the device are discussed below.latest Dell Inspiron 15N-2657OBK
Dell Inspiron 15N-2657OBK Laptops Specification :
  • 15.6-inch LED high-definition display
  • Powered by a 2.53GHz Intel Core i3-380M processor, 3MB cache
  • 4GB DDR3 memory, expandable up to 8GB
  • 500GB Serial ATA hard drive (5400 rpm)
  • Intel HD graphics
  • Multiformat DVD�RW/CD-RW drive with double-layer support
  • Built-in 0.3 megapixel webcam
  • 3-in-1 media reader
  • Three high-speed USB 2.0 ports
  • Built-in Dell Wireless 1502 WLAN (802.11n)
  • Built-in 100/1000 Gigabit Ethernet LAN
  • With TrueLife technology and 720p resolution
  • Microsoft Windows 7 Home Premium 64-bit operating system

Price Range : $399.99

HP Pavilion dv6 6b00 Amazing Laptops Review, Specs and Price

best hp pavilion dv6 6b00 image
Hewett Packard one of the well-known laptops maker has announced the launch of its new laptop namely, HP Pavilion dv6 6b00. The Pavilion dv6 6b00 which powered by AMD Radeon HD 6770M with 2 GB GDDR5 dedicated memory for video. AMD Radeon HD 6770M with 2 GB GDDR5 is the latest and fastest graphics boost available on a notebook. This notebook is also powered by HP TrueVision HD Webcam which makes you look good in any light condition. It also supports USB 3.0 which will make your transfer of files really fast.new hp pavilion dv6 6b00This notebook runs on Windows 7 Home Premium 64 bit or Windows 7 Professional 64-bit and an option among Intel� Core� i7-2760QM or Intel Core i5-2430M or Intel Core i3-2350M processor to give you powers that you desired. HP Pavilion dv6-6b00 also sports 15.6-inch 1366 x 768 LCD display, a physical memory of up to 8GB DDR3 RAM, a storage of up to 1TB hard drive or 160GB SSD, a DVD Super Multi Drive or Blu-ray Disc Drive, WiFi, Bluetooth 3.0 and a 6 or 9-cell battery. The details related to the specs of the device are discussed below.

HP Pavilion dv6-6b00 15.6 Inch Laptops Specification :
  • Display : 15.6" Full HD Anti-glare LED Display (1920 x 1080)
  • Processors : 2.4 GHz Intel� Core� i7-2760QM
  • Chipset : Intel HM65 Express
  • Hard drive : 1 TB SATA (5400 rpm)
  • Optical drive : Blu-ray �R/RW with SuperMulti DVD�R/RW Double Layer
  • Graphics : AMD Radeon HD 6770M (2 GB GDDR5 dedicated)
  • Ports :
  • - 1 VGA
    - 1 RJ45
    - 1 HDMI
    - 1 microphone-in
    - 2 headphone-out
    - 2 USB 2.0
    - 2 USB 3.0
  • Slots : Multi-Format Digital Media Card Reader for Secure Digital cards, Multimedia cards
  • Webcam : HP TrueVision HD Webcam with Integrated Digital Microphone (High Definition low-light)
  • Audio features : Internal Speakers and Audio playback with Beats Audio
  • Networking : Integrated 10/100/1000 Gigabit Ethernet LAN
  • Wireless : 802.11 b/g/n Bluetooth
  • Dimensions (W x D x H) : 37.8 x 24.68 x 3.52 cm
  • Weight : Starting at 2.63 kg
  • Warranty : 1 year, parts and labour
This HP Pavilion dv6-6b00 will begin delivery at the begining of December for a starting selling price of 43,050 Yen or around $550.

Monday 7 November 2011

More on onSaveInstanceState() and onRestoreInstanceState()

In the article onSaveInstanceState() and onRestoreInstanceState() described how to save and restore state in onSaveInstanceState() and onRestoreInstanceState() methods. It's another exercise, we can know more of life cycle of a activity about onSaveInstanceState() and onRestoreInstanceState().

onSaveInstanceState() and onRestoreInstanceState()

package com.exercise.AndroidSaveState;

import android.app.Activity;
import android.os.Bundle;
import android.widget.TextView;

public class AndroidSaveStateActivity extends Activity {

TextView textOnPause;
TextView textOnResume;
TextView textOnRestoreInstanceState;
TextView textOnSaveInstanceState;

int cntOnPause;
int cntOnResume;
int cntOnRestoreInstanceState;
int cntOnSaveInstanceState;

/** Called when the activity is first created. */
@Override
public void onCreate(Bundle savedInstanceState) {
super.onCreate(savedInstanceState);
setContentView(R.layout.main);

textOnPause = (TextView)findViewById(R.id.onPause);
textOnResume = (TextView)findViewById(R.id.onResume);
textOnRestoreInstanceState = (TextView)findViewById(R.id.onRestoreInstanceState);
textOnSaveInstanceState = (TextView)findViewById(R.id.onSaveInstanceState);

}

@Override
protected void onPause() {
// TODO Auto-generated method stub
cntOnPause++;
super.onPause();
}


@Override
protected void onResume() {
// TODO Auto-generated method stub
super.onResume();

cntOnResume++;
textOnPause.setText("cntOnPause: " + String.valueOf(cntOnPause));
textOnResume.setText("cntOnResume: " + String.valueOf(cntOnResume));
textOnRestoreInstanceState.setText("cntOnRestoreInstanceState: " + String.valueOf(cntOnRestoreInstanceState));
textOnSaveInstanceState.setText("cntOnSaveInstanceState: " + String.valueOf(cntOnSaveInstanceState));
}

@Override
protected void onSaveInstanceState(Bundle outState) {
// TODO Auto-generated method stub
cntOnSaveInstanceState++;
outState.putInt("CNT_OnPause", cntOnPause);
outState.putInt("CNT_OnResume", cntOnResume);
outState.putInt("CNT_OnRestoreInstanceState", cntOnRestoreInstanceState);
outState.putInt("CNT_OnSaveInstanceState", cntOnSaveInstanceState);


super.onSaveInstanceState(outState);
}

@Override
protected void onRestoreInstanceState(Bundle savedInstanceState) {
// TODO Auto-generated method stub

if (savedInstanceState != null){
if(savedInstanceState.containsKey("CNT_OnPause")){
cntOnPause = savedInstanceState.getInt("CNT_OnPause");
}

if(savedInstanceState.containsKey("CNT_OnResume")){
cntOnResume = savedInstanceState.getInt("CNT_OnResume");
}

if(savedInstanceState.containsKey("CNT_OnRestoreInstanceState")){
cntOnRestoreInstanceState = savedInstanceState.getInt("CNT_OnRestoreInstanceState");
}

if(savedInstanceState.containsKey("CNT_OnSaveInstanceState")){
cntOnSaveInstanceState = savedInstanceState.getInt("CNT_OnSaveInstanceState");
}
}
cntOnRestoreInstanceState++;

super.onRestoreInstanceState(savedInstanceState);
}

}


<?xml version="1.0" encoding="utf-8"?>
<LinearLayout xmlns:android="http://schemas.android.com/apk/res/android"
android:layout_width="fill_parent"
android:layout_height="fill_parent"
android:orientation="vertical" >

<TextView
android:layout_width="fill_parent"
android:layout_height="wrap_content"
android:text="@string/hello" />

<TextView
android:id="@+id/onPause"
android:layout_width="fill_parent"
android:layout_height="wrap_content"/>
<TextView
android:id="@+id/onResume"
android:layout_width="fill_parent"
android:layout_height="wrap_content"/>
<TextView
android:id="@+id/onRestoreInstanceState"
android:layout_width="fill_parent"
android:layout_height="wrap_content"/>
<TextView
android:id="@+id/onSaveInstanceState"
android:layout_width="fill_parent"
android:layout_height="wrap_content"/>

</LinearLayout>

Asus U24E 11.6 Inch Notebooks Review, Specs and Price

new Asus U24E 11.6-Inch Notebook
Asus one of the well-known notebooks maker has announced the launch of its new notebooks namely, Asus U24E. This laptop reportedly has a 11.6-inch screen that has a 720p resolution with i5 core processor 2.4 GHz. In addition there is the capacity of the hard drive a lot, which is 750GB. In addition, this laptop also promising battery durability is very good. Batereinya said to be able to survive up to 7 hours. all crammed into a chassis that tips the scales at a mere 1.5kg. Other features, there are also 4GB of RAM, two USB 3.0 ports, Bluetooth 3.0, Wi-Fi and 0.3 MP camera. This New Asus U24E runs on Windows 7 Home Premium 64-bit (SP1) OS. The details related to the specs of the device are discussed below.best Asus U24E 11.6-Inch NotebookAsus U24E 11.6-Inch Notebook Specification :
  • Display : 11.6-inch 1366 x 768 (most likely glossy)
  • Processor : Core i5-2430M processor + Intel HD 3000 gfx
  • Webcam : 0.3 MP VGA
  • Memory : 4GB DDR3 at 1333 MHz
  • Graphic system : 750 GB HDD
  • Operating System : Windows 7 Home Premium 64-bit
  • Ports:
  • -1 x USB2.0,
    -2 x USB3.0,
    -1 x Ethernet,
    -1 x VGA,
    -1 x HDMI,
    -1 x 3.5mm headphone jack
  • Wi-Fi: 802.11 b/g/n
  • Bluetooth: 3.0 + HS
  • Battery: 6 cell, 6.8 hours
  • Dimension : 11.46 (W) x 8.15 (D) x 1.09 (H) inches
  • weight : 1.5 kg / 3.31 pounds
latest Asus U24E 11.6-Inch Notebook The Latest Asus U24E will become available from November 5th for 59,800 Yen (about $763).

Sunday 6 November 2011

HTML5 and LocalStorage

LocalStorage is one of the features of HTML5. It provides a key, value store in your browser. Here are some resources for more information.


Free Tutorials

Found a couple of free tutorials.

HTML5 Offline Application Cache

Dive in Javascript: Simple Address Book App

PaperKilledRock: HTML5 LocalStorage


Library

Of course, with new features like this, new libraries are always welcome. I have not tried this yet, but I intend to.

JStorage


Books

Finally, we have a book by one of the folks working on the spec.


Barnes&Noble.com


Friday 4 November 2011

Gigabyte released P2532F and P2532H Laptops Review 2011

new gigabyte P2532F and P2532H
Gigabyte one of the well-known laptops maker has announced the launch of its two new laptop namely, P2532F and P2532H. The both powered by 15.6-inch laptops which runs on Windows 7 (Home Premium or Professional) and based on Intel's Huron River platform, the P2532F and P2532H. best gigabyte P2532F and P2532HBoth Gigabyte machines comes with feature a an LED-backlit (1920 x 1080) screen, a 2.2 GHz Core i7-2670QM processor, 2/4GB of RAM, up to a 750GB (7200 RPM) hard drive, a Blu-ray combo drive, and Nvidia GeForce graphics (with Optimus support). Moreover, they have a 1.3-megapixel webcam, Gigabit Ethernet, 802.11 b/g/n WiFi, Bluetooth 3.0, a 4-in-1 card reader, two USB 3.0 ports, a HDMI output, and a 6-cell battery. gigabyte P2532F and P2532HThe Gigabyte P2532F comes equipped with a GeForce GT 555M 2GB graphics card while the Gigabyte P2532H makes use of a GeForce GT 550M (2GB).


Price about : [ not available ]