Thursday 31 May 2012

Vibrate with a given pattern

Last exercise demonstrate basic of android.os.Vibrator. The method vibrate (long[] pattern, int repeat) of Vibrator cause vibrate with a given pattern.

Vibrate with a given pattern


package com.exercise.AndroidVibrator;

import android.app.Activity;
import android.os.Bundle;
import android.os.Vibrator;
import android.view.MotionEvent;
import android.view.View;
import android.view.View.OnClickListener;
import android.view.View.OnTouchListener;
import android.widget.Button;

public class AndroidVibratorActivity extends Activity {

Button buttonVibrate1, buttonVibrate2, buttonVibrate3;

Vibrator myVibrator;

/** Called when the activity is first created. */
@Override
public void onCreate(Bundle savedInstanceState) {
super.onCreate(savedInstanceState);
setContentView(R.layout.main);
buttonVibrate1 = (Button)findViewById(R.id.buttonVibrate1);
buttonVibrate2 = (Button)findViewById(R.id.buttonVibrate2);
buttonVibrate3 = (Button)findViewById(R.id.buttonVibrate3);

myVibrator = (Vibrator)getSystemService(AndroidVibratorActivity.VIBRATOR_SERVICE);

buttonVibrate1.setOnClickListener(new OnClickListener(){

@Override
public void onClick(View v) {
// TODO Auto-generated method stub
myVibrator.vibrate(500);
}});

buttonVibrate2.setOnTouchListener(new OnTouchListener(){

@Override
public boolean onTouch(View v, MotionEvent event) {
int action = event.getAction();

if(action == MotionEvent.ACTION_DOWN){
myVibrator.vibrate(1000);
}else if(action == MotionEvent.ACTION_UP){
myVibrator.cancel();
}

return true;
}});

buttonVibrate3.setOnTouchListener(new OnTouchListener(){

@Override
public boolean onTouch(View v, MotionEvent event) {
int action = event.getAction();

if(action == MotionEvent.ACTION_DOWN){

long[] pattern = {
50, //Off before vibration
100, 100, //on-off
100, 1000, //on-off
};

myVibrator.vibrate(pattern, 0); //repeat from pattern[0]
}else if(action == MotionEvent.ACTION_UP){
myVibrator.cancel();
}

return true;
}});

}
}


main.xml
<?xml version="1.0" encoding="utf-8"?>
<LinearLayout xmlns:android="http://schemas.android.com/apk/res/android"
android:layout_width="fill_parent"
android:layout_height="fill_parent"
android:orientation="vertical" >

<TextView
android:layout_width="fill_parent"
android:layout_height="wrap_content"
android:text="@string/hello" />

<Button
android:id="@+id/buttonVibrate1"
android:layout_width="fill_parent"
android:layout_height="wrap_content"
android:text="Vibrate for 500ms" />
<Button
android:id="@+id/buttonVibrate2"
android:layout_width="fill_parent"
android:layout_height="wrap_content"
android:text="Touch to Vibrate (max. 1 sec.)" />
<Button
android:id="@+id/buttonVibrate3"
android:layout_width="fill_parent"
android:layout_height="wrap_content"
android:text="Touch to Vibrate Pattern" />

</LinearLayout>


"android.permission.VIBRATE" is needed.
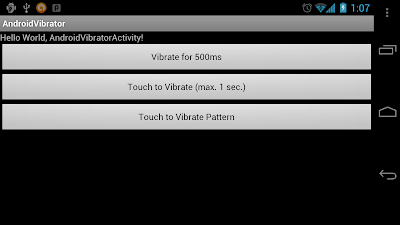

Program Android Vibrator

android.os.Vibrator operates the vibrator on the device.

Program Android Vibrator


Your code call getSystemService(AndroidVibratorActivity.VIBRATOR_SERVICE) to retrieve a Vibrator for interacting with the vibration hardware. In the example, touch on button1 to generate vibration for 500ms. Touch and hold on button2 to generate vibration for max 1 second, or release to stop.

You have to modify AndroidManifest.xml to add permission of "android.permission.VIBRATE".

package com.exercise.AndroidVibrator;

import android.app.Activity;
import android.os.Bundle;
import android.os.Vibrator;
import android.view.MotionEvent;
import android.view.View;
import android.view.View.OnClickListener;
import android.view.View.OnTouchListener;
import android.widget.Button;

public class AndroidVibratorActivity extends Activity {

Button buttonVibrate1, buttonVibrate2;

Vibrator myVibrator;

/** Called when the activity is first created. */
@Override
public void onCreate(Bundle savedInstanceState) {
super.onCreate(savedInstanceState);
setContentView(R.layout.main);
buttonVibrate1 = (Button)findViewById(R.id.buttonVibrate1);
buttonVibrate2 = (Button)findViewById(R.id.buttonVibrate2);

myVibrator = (Vibrator)getSystemService(AndroidVibratorActivity.VIBRATOR_SERVICE);

buttonVibrate1.setOnClickListener(new OnClickListener(){

@Override
public void onClick(View v) {
// TODO Auto-generated method stub
myVibrator.vibrate(500);
}});

buttonVibrate2.setOnTouchListener(new OnTouchListener(){

@Override
public boolean onTouch(View v, MotionEvent event) {
int action = event.getAction();

if(action == MotionEvent.ACTION_DOWN){
myVibrator.vibrate(1000);
}else if(action == MotionEvent.ACTION_UP){
myVibrator.cancel();
}

return true;
}});

}
}


<?xml version="1.0" encoding="utf-8"?>
<LinearLayout xmlns:android="http://schemas.android.com/apk/res/android"
android:layout_width="fill_parent"
android:layout_height="fill_parent"
android:orientation="vertical" >

<TextView
android:layout_width="fill_parent"
android:layout_height="wrap_content"
android:text="@string/hello" />

<Button
android:id="@+id/buttonVibrate1"
android:layout_width="fill_parent"
android:layout_height="wrap_content"
android:text="Vibrate for 500ms" />
<Button
android:id="@+id/buttonVibrate2"
android:layout_width="fill_parent"
android:layout_height="wrap_content"
android:text="Touch to Vibrate (max. 1 sec.)" />

</LinearLayout>


Next:
- Vibrate with a given pattern


Wednesday 30 May 2012

Matte Laptop: Lenovo X1 Carbon

Here is another coming Ultrabook with a Matte display! The Lenovo X1 Carbon is a 14 inch ultralight that weights under 3 lbs.


Looks like a good entrant into the field. I really like Lenovo's and if the next MacBook Pro isn't great, this might be the laptop for me.


More details at:

lenovo.com, Lenovo X1 Carbon

liliputing.com, Lenovo X1 Carbon

Generate Notification using Notification.Builder for Android 3.0

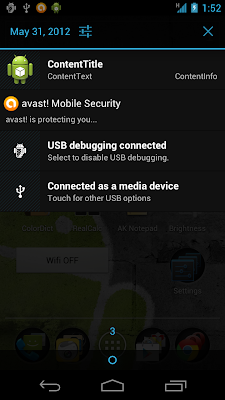
Android 3.0 (API Level 11) introduce Notification.Builder, allows easier control over all the flags, as well as help constructing the typical notification layouts.

It's a example of using Notification.Builder, modified from the previous exercise "schedule a repeating alarm".

Generate Notification using Notification.Builder for Android 3.0


Change the code of AlarmReceiver.java in "schedule a repeating alarm", to generate Notificaton.

package com.exercise.AndroidTime;

import android.app.Notification;
import android.app.NotificationManager;
import android.app.PendingIntent;
import android.content.BroadcastReceiver;
import android.content.Context;
import android.content.Intent;
import android.widget.Toast;

public class AlarmReceiver extends BroadcastReceiver {

@Override
public void onReceive(Context context, Intent arg1) {
Toast.makeText(context, "Alarm received!", Toast.LENGTH_LONG).show();
buildNotification(context);

}

private void buildNotification(Context context){
NotificationManager notificationManager
= (NotificationManager)context.getSystemService(Context.NOTIFICATION_SERVICE);
Notification.Builder builder = new Notification.Builder(context);

Intent intent = new Intent(context, AndroidTimeActivity.class);
PendingIntent pendingIntent
= PendingIntent.getActivity(context, 0, intent, 0);

builder
.setSmallIcon(R.drawable.ic_launcher)
.setContentTitle("ContentTitle")
.setContentText("ContentText")
.setContentInfo("ContentInfo")
.setTicker("Ticker")
.setLights(0xFFFF0000, 500, 500) //setLights (int argb, int onMs, int offMs)
.setContentIntent(pendingIntent)
.setAutoCancel(true);

Notification notification = builder.getNotification();

notificationManager.notify(R.drawable.ic_launcher, notification);
}

}


Please notice that you have to change your project to target API Level 11, in order to use Notification.Builder.

Download the files.


3D rotate for RenderScript - rsMatrixRotate()

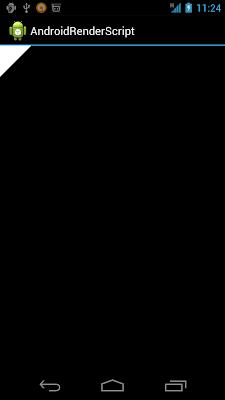
Refer to the RenderScript.rs in the example "Perform transform of Translate and Rotate on RenderScript", the rsMatrixRotate() function define the rotation.
void rsMatrixRotate(rs_matrix4x4 *m, float rot, float x, float y, float z)

rsMatrixRotate() modified


Modify RenderScript.rs of last exercise "Draw circle in Android RenderScript".
//declare RendorScript Version
#pragma version(1)

//declare package
#pragma rs java_package_name(com.exercise.AndroidRenderScript);

//include graphics library
#include "rs_graphics.rsh"

rs_mesh my_rs_mesh;

float rotation;

void init(){
rotation = 0.0f;
}

int root(){
//set background color
rsgClearColor(0.0f, 0.0f, 0.0f, 0.0f);

//Transform something
rs_matrix4x4 matrix;
rsMatrixLoadIdentity(&matrix);
rsMatrixTranslate(&matrix, 100.0f, 100.0f, 0.0f);
rsMatrixRotate(&matrix, rotation++, 1.0f, 1.0f, 1.0f);
rsgProgramVertexLoadModelMatrix(&matrix);

//draw something
rsgDrawMesh(my_rs_mesh);

//repeat 20ms
return 20;
}


Tuesday 29 May 2012

Draw circle in Android RenderScript

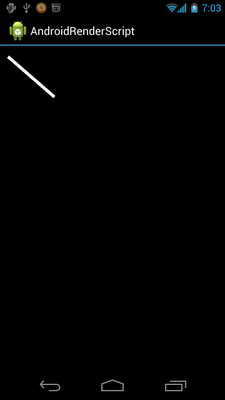
Modify MyRSSurfaceView.java from last exercise "Perform transform of Translate and Rotate on RenderScript", to draw circle by combine a series of Triangle. Refer to the code, the larger the constant number_of_section, the more the shape close to circle.

circle in Android RenderScript


package com.exercise.AndroidRenderScript;

import android.content.Context;
import android.renderscript.Mesh;
import android.renderscript.RSSurfaceView;
import android.renderscript.RenderScriptGL;
import android.renderscript.RenderScriptGL.SurfaceConfig;

public class MyRSSurfaceView extends RSSurfaceView {

private RenderScriptGL renderScriptGL;
private ScriptC_RenderScript myScriptC;

public MyRSSurfaceView(Context context) {
super(context);
// TODO Auto-generated constructor stub
final RenderScriptGL.SurfaceConfig surfaceConfig
= new SurfaceConfig();
renderScriptGL = createRenderScriptGL(surfaceConfig);

myScriptC = new ScriptC_RenderScript(
renderScriptGL, getResources(), R.raw.renderscript);

myScriptC.set_my_rs_mesh(createMesh());

renderScriptGL.bindRootScript(myScriptC);
}

private Mesh createMesh(){

double radius = 100.0;
double angleInDegree, angleInRadian;

final int number_of_section = 18;
double ptX, ptY;

Mesh.TriangleMeshBuilder myMesh
= new Mesh.TriangleMeshBuilder(
renderScriptGL,
2,
Mesh.TriangleMeshBuilder.COLOR);

//index 0
myMesh.addVertex(0, 0);

//index 1
angleInDegree = 0;
angleInRadian = Math.toRadians(angleInDegree);
ptX = radius * Math.cos(angleInRadian);
ptY = radius * Math.sin(angleInRadian);
myMesh.addVertex((float)ptX, (float)ptY);

for(int i=0; i<number_of_section; i++){
angleInDegree += 360/number_of_section;
angleInRadian = Math.toRadians(angleInDegree);
ptX = radius * Math.cos(angleInRadian);
ptY = radius * Math.sin(angleInRadian);
myMesh.addVertex((float)ptX, (float)ptY);

myMesh.addTriangle(0, i+2, i+1);

}

return(myMesh.create(true));
};

}


Download the files.

Draw square in Android RenderScript

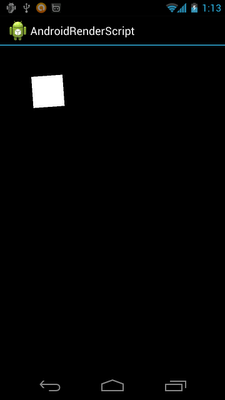
Modify MyRSSurfaceView.java from last exercise "Perform transform of Translate and Rotate on RenderScript", to draw square by combine two Triangle.

package com.exercise.AndroidRenderScript;

import android.content.Context;
import android.renderscript.Mesh;
import android.renderscript.RSSurfaceView;
import android.renderscript.RenderScriptGL;
import android.renderscript.RenderScriptGL.SurfaceConfig;

public class MyRSSurfaceView extends RSSurfaceView {

private RenderScriptGL renderScriptGL;
private ScriptC_RenderScript myScriptC;

public MyRSSurfaceView(Context context) {
super(context);
// TODO Auto-generated constructor stub
final RenderScriptGL.SurfaceConfig surfaceConfig
= new SurfaceConfig();
renderScriptGL = createRenderScriptGL(surfaceConfig);

myScriptC = new ScriptC_RenderScript(
renderScriptGL, getResources(), R.raw.renderscript);

myScriptC.set_my_rs_mesh(createMesh());

renderScriptGL.bindRootScript(myScriptC);
}

private Mesh createMesh(){
Mesh.TriangleMeshBuilder myMesh
= new Mesh.TriangleMeshBuilder(
renderScriptGL,
2,
Mesh.TriangleMeshBuilder.COLOR);
/* 0 2
* +---+
* |\ |
* | \ |
* | \|
* +---+
* 1 3
*/


myMesh.addVertex(0, 0); //- 0
myMesh.addVertex(0, 100); //- 1
myMesh.addVertex(100, 0); //- 2
myMesh.addVertex(100, 100); //- 3

myMesh.addTriangle(0, 1, 3);
myMesh.addTriangle(0, 3, 2);

return(myMesh.create(true));
};

}


Draw square in Android RenderScript


Download the files.

Monday 28 May 2012

Perform transform of Translate and Rotate on RenderScript

Perform transform of Translate and Rotate on RenderScript


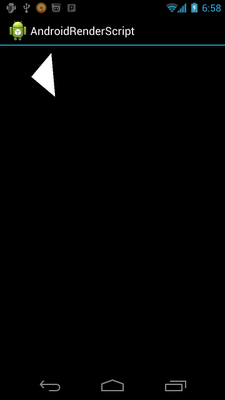
Modify RenderScript.rs of last exercise "Program Renderscript on Android" to perform transform of Translate and Rotate - to rotate the rendered triangle.

RenderScript.rs
//declare RendorScript Version
#pragma version(1)

//declare package
#pragma rs java_package_name(com.exercise.AndroidRenderScript);

//include graphics library
#include "rs_graphics.rsh"

rs_mesh my_rs_mesh;

float rotation;

void init(){
rotation = 0.0f;
}

int root(){
//set background color
rsgClearColor(0.0f, 0.0f, 0.0f, 0.0f);

//Transform something
rs_matrix4x4 matrix;
rsMatrixLoadIdentity(&matrix);
rsMatrixTranslate(&matrix, 100.0f, 100.0f, 0.0f);
rsMatrixRotate(&matrix, rotation++, 0.0f, 0.0f, 1.0f);
rsgProgramVertexLoadModelMatrix(&matrix);

//draw something
rsgDrawMesh(my_rs_mesh);

//repeat 20ms
return 20;
}


Download the files.

Next:
- Draw square in Android RenderScript

Program Renderscript on Android

Renderscript (introduced in Android 3.0) offers a high performance 3D graphics rendering and compute API at the native level that you write in C (C99 standard).

The Renderscript runtime operates at the native level and still needs to communicate with the Android VM, so the way a Renderscript application is setup is different from a pure VM application. An application that uses Renderscript is still a traditional Android application that runs in the VM, but you write Renderscript code for the parts of your program that require it. Using Renderscript can be as simple as offloading a few math calculations or as complicated as rendering an entire 3D game. No matter what you use it for, Renderscript remains platform independent, so you do not have to target multiple architectures (for example, ARM v5, ARM v7, x86).

The Renderscript system adopts a control and slave architecture where the low-level Renderscript runtime code is controlled by the higher level Android system that runs in a virtual machine (VM). The Android VM still retains all control of memory management and binds memory that it allocates to the Renderscript runtime, so the Renderscript code can access it. The Android framework makes asynchronous calls to Renderscript, and the calls are placed in a message queue and processed as soon as possible.


It's a very basic example of Program Renderscript on Android. It simple draw a triangle on RSSurfaceView.

Renderscript on Android


First of all, to use Renderscript, we have to define Renderscript code in .rs(Renderscript) and .rsh(Renderscript header) files in the src/ directory of Android project.

RenderScript.rs
The init() method will be called when it's first time loaded. The root() will be called every time the script run. The return parameter of root() define the repeat interval of the script.
//declare RendorScript Version
#pragma version(1)

//declare package
#pragma rs java_package_name(com.exercise.AndroidRenderScript);

//include graphics library
#include "rs_graphics.rsh"

rs_mesh my_rs_mesh;

void init(){

}

int root(){
//set background color
rsgClearColor(0.0f, 0.0f, 0.0f, 0.0f);

//draw something
rsgDrawMesh(my_rs_mesh);

//repeat 20ms
return 20;
}

Once you save the rs file, the coresponding files ScriptC_RenderScript.java and /res/raw/renderscript.bc will be generated. The file name depends on your rs file


Create MyRSSurfaceView class extends RSSurfaceView.
The class ScriptC_RenderScript and R.raw.renderscript are generated from the rs file.
package com.exercise.AndroidRenderScript;

import android.content.Context;
import android.renderscript.Mesh;
import android.renderscript.RSSurfaceView;
import android.renderscript.RenderScriptGL;
import android.renderscript.RenderScriptGL.SurfaceConfig;

public class MyRSSurfaceView extends RSSurfaceView {

private RenderScriptGL renderScriptGL;
private ScriptC_RenderScript myScriptC;

public MyRSSurfaceView(Context context) {
super(context);
// TODO Auto-generated constructor stub
final RenderScriptGL.SurfaceConfig surfaceConfig
= new SurfaceConfig();
renderScriptGL = createRenderScriptGL(surfaceConfig);

myScriptC = new ScriptC_RenderScript(
renderScriptGL, getResources(), R.raw.renderscript);

//Create something...
Mesh.TriangleMeshBuilder myMesh
= new Mesh.TriangleMeshBuilder(
renderScriptGL,
2,
Mesh.TriangleMeshBuilder.COLOR);
myMesh.addVertex(0, 0);
myMesh.addVertex(0, 100);
myMesh.addVertex(100, 0);
myMesh.addTriangle(0, 1, 2);
Mesh mesh = myMesh.create(true);
myScriptC.set_my_rs_mesh(mesh);
//

renderScriptGL.bindRootScript(myScriptC);
}

}

Finally, modify the main activity to set MyRSSurfaceView as content view.

package com.exercise.AndroidRenderScript;

import android.app.Activity;
import android.os.Bundle;

public class AndroidRenderScriptActivity extends Activity {
/** Called when the activity is first created. */
@Override
public void onCreate(Bundle savedInstanceState) {
super.onCreate(savedInstanceState);
setContentView(new MyRSSurfaceView(this));
}
}


Download the files.


Next:
- Perform transform of Translate and Rotate on RenderScript


Saturday 26 May 2012

Debug Android app on BlueStacks App Player for Windows (beta-1)


With BlueStacks App Player for Windows (beta-1), we can deploy Android app from Eclipse to BlueStacks directly. It's much faster than the Emulator of Android SDK. ~ but nobody will and nobody can confirm the compatibility.

In my own trial, I haven't set anything, it install and run on BlueStacks automatically, no port setting, no extra APK (Launcher Pro or ADW) installed. (Here is a thread explain How to use BlueStack as Android development emulator. Actually I haven't do anything. I list here for your reference in case any problem.)

My platform:
- Host OS: Windows 8 Consumer Preview
- Eclipse Indigo Service Release 2
- ADT 18
- Android SDK Tools 19
- BlueStacks App Player for Windows (beta-1)

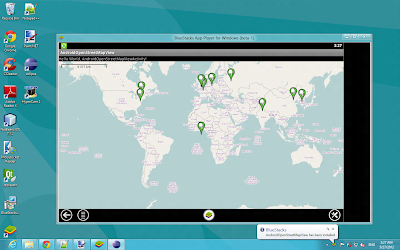
It's my exercise of OpenStreetMap run on BlueStacks App Player for Windows (beta-1).

OpenStreetMap run on BlueStacks

You can see a emulator-5554 is listed in my devices list.


I also describe here how to enable the devices view in Eclipse:
- Click Window -> Show View -> Other...


- Expand Android and select Devices.


BlueStacks beta-1 available to download now, run Android on Windows

BlueStacks Beta Demo

A walk-through of BlueStacks' Android App Player for PC, beta version. Download now at http://BlueStacks.com

Next:
- Debug Android app on BlueStacks App Player for Windows (beta-1)


Friday 25 May 2012

Bookle - An ePub App for Mac OS X

Bookle is an ePub reader for OS X. I have a bunch of technical ebooks from O'Reilly in the epub format DRM free. So to read them I have used Adobe Digital Editions which is free and gets the job done but is a bit clunky.


Bookle is OS X native and seems to do the reading job quite well. So for $10, it it worth a look.

Bookle on Mac App Store

Coda and Diet Coda on Sale Today Only (5/25)

Are you a fan of HTML, CSS, Javascript, and PHP development on the Mac? If so then you are probably a fan of Coda, which is a Web Site development tool for OS X made by Panic Software.


New Version 2

Well the new version 2, is out this week. Panic is offering Coda at 50% off this week only for early purchasers Today, Friday 5/25, is the last day of the deal so if you are interested, head to the Mac app store and get code for $49.


Coda 2


Diet Coda

In addition to Coda 2, Panic is releasing a programming editor for the iPad called Diet Coda. I have always found the idea of programming on iPad type devices intriguing. So for $9.99, definitely give this app a look. It looks like it might make the whole coding thing work on a pad.


Diet Coda for the iPad.


Absinthe 2.0 is out! Go get your device onto 5.1.1*. Save your SHSH! And then jailbreak your device.


Simple as that :)


For simplicity I have the links on the right. Or you can go straight to the team's site: http://www.greenpois0n.com


*= If you depend on software unlock (ultrasn0w), BEWARE - If you restore a stock firmware you will likely lose your unlock!


EDIT: I've updated TU for the iPhone 4 (GSM) 9B208 stealth release from apple.

schedule a repeating alarm

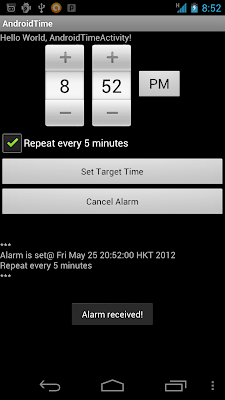
To schedule a repeating alarm, call setRepeating(int type, long triggerAtTime, long interval, PendingIntent operation) method of AlarmManager instead of set(int type, long triggerAtTime, PendingIntent operation).

Schedule a repeating alarm

Modify from last post "Cancel alarm with a matching PendingIntent". (Also change using TimePicker widget instead of TimePickerDialog)

package com.exercise.AndroidTime;

import java.util.Calendar;
import java.util.concurrent.TimeUnit;

import android.app.Activity;
import android.app.AlarmManager;
import android.app.PendingIntent;
import android.content.Context;
import android.content.Intent;
import android.os.Bundle;
import android.view.View;
import android.view.View.OnClickListener;
import android.widget.Button;
import android.widget.CheckBox;
import android.widget.TextView;
import android.widget.TimePicker;

public class AndroidTimeActivity extends Activity {

TimePicker myTimePicker;
Button buttonstartSetDialog;
Button buttonCancelAlarm;
TextView textAlarmPrompt;

TimePicker timePicker;
CheckBox optRepeat;

final static int RQS_1 = 1;

/** Called when the activity is first created. */
@Override
public void onCreate(Bundle savedInstanceState) {
super.onCreate(savedInstanceState);
setContentView(R.layout.main);

timePicker = (TimePicker)findViewById(R.id.picker);
optRepeat = (CheckBox)findViewById(R.id.optrepeat);
textAlarmPrompt = (TextView)findViewById(R.id.alarmprompt);

buttonstartSetDialog = (Button)findViewById(R.id.startSetDialog);
buttonstartSetDialog.setOnClickListener(new OnClickListener(){

@Override
public void onClick(View v) {
Calendar calNow = Calendar.getInstance();
Calendar calSet = (Calendar) calNow.clone();

calSet.set(Calendar.HOUR_OF_DAY, timePicker.getCurrentHour());
calSet.set(Calendar.MINUTE, timePicker.getCurrentMinute());
calSet.set(Calendar.SECOND, 0);
calSet.set(Calendar.MILLISECOND, 0);

if(calSet.compareTo(calNow) <= 0){
//Today Set time passed, count to tomorrow
calSet.add(Calendar.DATE, 1);
}

setAlarm(calSet, optRepeat.isChecked());

}});

buttonCancelAlarm = (Button)findViewById(R.id.cancel);
buttonCancelAlarm.setOnClickListener(new OnClickListener(){

@Override
public void onClick(View arg0) {
cancelAlarm();
}});

}

private void setAlarm(Calendar targetCal, boolean repeat){

Intent intent = new Intent(getBaseContext(), AlarmReceiver.class);
PendingIntent pendingIntent = PendingIntent.getBroadcast(getBaseContext(), RQS_1, intent, 0);
AlarmManager alarmManager = (AlarmManager)getSystemService(Context.ALARM_SERVICE);
alarmManager.set(AlarmManager.RTC_WAKEUP, targetCal.getTimeInMillis(), pendingIntent);

if(repeat){
alarmManager.setRepeating(AlarmManager.RTC_WAKEUP,
targetCal.getTimeInMillis(),
TimeUnit.MINUTES.toMillis(5),
pendingIntent);

textAlarmPrompt.setText(
"\n\n***\n"
+ "Alarm is set@ " + targetCal.getTime() + "\n"
+ "Repeat every 5 minutes\n"
+ "***\n");
}else{
alarmManager.set(AlarmManager.RTC_WAKEUP,
targetCal.getTimeInMillis(),
pendingIntent);

textAlarmPrompt.setText(
"\n\n***\n"
+ "Alarm is set@ " + targetCal.getTime() + "\n"
+ "One shot\n"
+ "***\n");
}

}

private void cancelAlarm(){

textAlarmPrompt.setText(
"\n\n***\n"
+ "Alarm Cancelled! \n"
+ "***\n");

Intent intent = new Intent(getBaseContext(), AlarmReceiver.class);
PendingIntent pendingIntent = PendingIntent.getBroadcast(getBaseContext(), RQS_1, intent, 0);
AlarmManager alarmManager = (AlarmManager)getSystemService(Context.ALARM_SERVICE);
alarmManager.cancel(pendingIntent);

}

}


<?xml version="1.0" encoding="utf-8"?>
<LinearLayout xmlns:android="http://schemas.android.com/apk/res/android"
android:layout_width="fill_parent"
android:layout_height="fill_parent"
android:orientation="vertical" >

<TextView
android:layout_width="fill_parent"
android:layout_height="wrap_content"
android:text="@string/hello" />
<TimePicker
android:id="@+id/picker"
android:layout_width="fill_parent"
android:layout_height="wrap_content" />
<CheckBox
android:id="@+id/optrepeat"
android:layout_width="fill_parent"
android:layout_height="wrap_content"
android:text="Repeat every 5 minutes" />
<Button
android:id="@+id/startSetDialog"
android:layout_width="fill_parent"
android:layout_height="wrap_content"
android:text="Set Target Time"/>
<Button
android:id="@+id/cancel"
android:layout_width="fill_parent"
android:layout_height="wrap_content"
android:text="Cancel Alarm"/>
<TextView
android:id="@+id/alarmprompt"
android:layout_width="fill_parent"
android:layout_height="wrap_content" />
</LinearLayout>


Both AlarmReceiver.java and AndroidManifest.xml keep no change, refer to the exercise "Create alarm set on a specified time, using AlarmManager and BroadcastReceiver."


Download the files.


Next:
- Generate Notification using Notification.Builder for Android 3.0


Thursday 24 May 2012

Cancel alarm with a matching PendingIntent

Call cancel(PendingIntent) method of AlarmManager to remove any alarms with a matching Intent. Any alarm, of any type, whose Intent matches this one (as defined by filterEquals(Intent)), will be canceled.

Cancel alarm with a matching PendingIntent


Work on the former exercise "Create alarm set on a specified time, using AlarmManager and BroadcastReceiver." Modify AndroidTimeActivity.java, the code to cancel alarm is in cancelAlarm().
package com.exercise.AndroidTime;

import java.util.Calendar;

import android.app.Activity;
import android.app.AlarmManager;
import android.app.PendingIntent;
import android.app.TimePickerDialog;
import android.app.TimePickerDialog.OnTimeSetListener;
import android.content.Context;
import android.content.Intent;
import android.os.Bundle;
import android.view.View;
import android.view.View.OnClickListener;
import android.widget.Button;
import android.widget.TextView;
import android.widget.TimePicker;

public class AndroidTimeActivity extends Activity {

TimePicker myTimePicker;
Button buttonstartSetDialog;
Button buttonCancelAlarm;
TextView textAlarmPrompt;

TimePickerDialog timePickerDialog;

final static int RQS_1 = 1;

/** Called when the activity is first created. */
@Override
public void onCreate(Bundle savedInstanceState) {
super.onCreate(savedInstanceState);
setContentView(R.layout.main);

textAlarmPrompt = (TextView)findViewById(R.id.alarmprompt);

buttonstartSetDialog = (Button)findViewById(R.id.startSetDialog);
buttonstartSetDialog.setOnClickListener(new OnClickListener(){

@Override
public void onClick(View v) {
textAlarmPrompt.setText("");
openTimePickerDialog(false);

}});

buttonCancelAlarm = (Button)findViewById(R.id.cancel);
buttonCancelAlarm.setOnClickListener(new OnClickListener(){

@Override
public void onClick(View arg0) {
cancelAlarm();
}});

}

private void openTimePickerDialog(boolean is24r){
Calendar calendar = Calendar.getInstance();

timePickerDialog = new TimePickerDialog(
AndroidTimeActivity.this,
onTimeSetListener,
calendar.get(Calendar.HOUR_OF_DAY),
calendar.get(Calendar.MINUTE),
is24r);
timePickerDialog.setTitle("Set Alarm Time");

timePickerDialog.show();

}

OnTimeSetListener onTimeSetListener
= new OnTimeSetListener(){

@Override
public void onTimeSet(TimePicker view, int hourOfDay, int minute) {

Calendar calNow = Calendar.getInstance();
Calendar calSet = (Calendar) calNow.clone();

calSet.set(Calendar.HOUR_OF_DAY, hourOfDay);
calSet.set(Calendar.MINUTE, minute);
calSet.set(Calendar.SECOND, 0);
calSet.set(Calendar.MILLISECOND, 0);

if(calSet.compareTo(calNow) <= 0){
//Today Set time passed, count to tomorrow
calSet.add(Calendar.DATE, 1);
}

setAlarm(calSet);
}};

private void setAlarm(Calendar targetCal){

textAlarmPrompt.setText(
"\n\n***\n"
+ "Alarm is set@ " + targetCal.getTime() + "\n"
+ "***\n");

Intent intent = new Intent(getBaseContext(), AlarmReceiver.class);
PendingIntent pendingIntent = PendingIntent.getBroadcast(getBaseContext(), RQS_1, intent, 0);
AlarmManager alarmManager = (AlarmManager)getSystemService(Context.ALARM_SERVICE);
alarmManager.set(AlarmManager.RTC_WAKEUP, targetCal.getTimeInMillis(), pendingIntent);

}

private void cancelAlarm(){

textAlarmPrompt.setText(
"\n\n***\n"
+ "Alarm Cancelled! \n"
+ "***\n");

Intent intent = new Intent(getBaseContext(), AlarmReceiver.class);
PendingIntent pendingIntent = PendingIntent.getBroadcast(getBaseContext(), RQS_1, intent, 0);
AlarmManager alarmManager = (AlarmManager)getSystemService(Context.ALARM_SERVICE);
alarmManager.cancel(pendingIntent);

}

}


<?xml version="1.0" encoding="utf-8"?>
<LinearLayout xmlns:android="http://schemas.android.com/apk/res/android"
android:layout_width="fill_parent"
android:layout_height="fill_parent"
android:orientation="vertical" >

<TextView
android:layout_width="fill_parent"
android:layout_height="wrap_content"
android:text="@string/hello" />
<Button
android:id="@+id/startSetDialog"
android:layout_width="fill_parent"
android:layout_height="wrap_content"
android:text="Set Target Time"/>
<Button
android:id="@+id/cancel"
android:layout_width="fill_parent"
android:layout_height="wrap_content"
android:text="Cancel Alarm"/>
<TextView
android:id="@+id/alarmprompt"
android:layout_width="fill_parent"
android:layout_height="wrap_content" />
</LinearLayout>


Both AlarmReceiver.java and AndroidManifest.xml keep no change, refer to the exercise "Create alarm set on a specified time, using AlarmManager and BroadcastReceiver."

Download the files.

Next:
- schedule a repeating alarm


Android 4.0 Mini PC -on-a-stick

MK802 Android 4.0 Mini PC -on-a-stick: This little USB Thumb Drive-Sized Android
Computer featuring Android 4.0 and an AllWinner A10 SoC clocked at 1.5 GHz. It also includes a mini-HDMI jack to output 1080p video to an HDTV, a microSD slot for adding up to 32 GB of storage, a microUSB port for power and a USB 2.0 Host port. It is availiable on Aliexpress for 74 USD with free shipping now.

Huge Anniversary Sale!


Don't miss the last week of AliExpress' Huge Anniversary Sale! Make sure you grab amazing deals of up to 50% off thousands of items, including the hottest fashions and a wide selection of electronics including tablets, cell phones and computers. Plus, save big on bridal & formal dresses, automotive supplies, home & garden, sports equipment and more!

-----------------------------------------------------------------------------
Coupon Code: "AEMAYLHM5"
Description: $5 OFF with $100 Purchase!
Valid from 5/16/12 - 5/31/12, First Come First Served!
------------------------------------------------------------------------------------------------


$5 OFF with $100 Purchase! First-come, First-served. Code: AEMAYLHM5

Wednesday 23 May 2012

How a Smartphone Knows Up from Down (accelerometer)


Professional Android Sensor Programming


Learn to build human-interactive Android apps, starting with device sensors


This book shows Android developers how to exploit the rich set of device sensors�locational, physical (temperature, pressure, light, acceleration, etc.), cameras, microphones, and speech recognition�in order to build fully human-interactive Android applications. Whether providing hands-free directions or checking your blood pressure, Professional Android Sensor Programming shows how to turn possibility into reality.
The authors provide techniques that bridge the gap between accessing sensors and putting them to meaningful use in real-world situations. They not only show you how to use the sensor related APIs effectively, they also describe how to use supporting Android OS components to build complete systems. Along the way, they provide solutions to problems that commonly occur when using Android's sensors, with tested, real-world examples. Ultimately, this invaluable resource provides in-depth, runnable code examples that you can then adapt for your own applications.
  • Shows experienced Android developers how to exploit the rich set of Android smartphone sensors to build human-interactive Android apps
  • Explores Android locational and physical sensors (including temperature, pressure, light, acceleration, etc.), as well as cameras, microphones, and speech recognition
  • Helps programmers use the Android sensor APIs, use Android OS components to build complete systems, and solve common problems
  • Includes detailed, functional code that you can adapt and use for your own applications
  • Shows you how to successfully implement real-world solutions using each class of sensors for determining location, interpreting physical sensors, handling images and audio, and recognizing and acting on speech
Learn how to write programs for this fascinating aspect of mobile app development with Professional Android Sensor Programming.

Professional Android 4 Application Development


Developers, build mobile Android apps using Android 4
The fast-growing popularity of Android smartphones and tablets creates a huge opportunities for developers. If you're an experienced developer, you can start creating robust mobile Android apps right away with this professional guide to Android 4 application development. Written by one of Google's lead Android developer advocates, this practical book walks you through a series of hands-on projects that illustrate the features of the Android SDK. That includes all the new APIs introduced in Android 3 and 4, including building for tablets, using the Action Bar, Wi-Fi Direct, NFC Beam, and more.
  • Shows experienced developers how to create mobile applications for Android smartphones and tablets
  • Revised and expanded to cover all the Android SDK releases including Android 4.0 (Ice Cream Sandwich), including all updated APIs, and the latest changes to the Android platform.
  • Explains new and enhanced features such as drag and drop, fragments, the action bar, enhanced multitouch support, new environmental sensor support, major improvements to the animation framework, and a range of new communications techniques including NFC and Wi-Fi direct.
  • Provides practical guidance on publishing and marketing your applications, best practices for user experience, and more
This book helps you learn to master the design, lifecycle, and UI of an Android app through practical exercises, which you can then use as a basis for developing your own Android apps.

From the Back Cover

Build unique smartphone and tablet applications with Android 4
Written by an Android authority, this up-to-date resource is an ideal guide to building mobile apps using the Android 4 SDK. It provides in-depth coverage, showing experienced Android developers how to take full advantage of new features, while covering the fundamentals that novice developers need to get started. Serving as a hands-on guide to building mobile apps using Android, the book walks you through a series of increasingly sophisticated projects, each introducing a new Android platform feature and highlighting the techniques and best practices that will help you write compelling Android apps.
Professional Android 4 Application Development:
  • Provides an in-depth look at the Android application components and their lifecycles
  • Explores Android UI metaphors, design philosophies, and UI APIs to create compelling user interfaces for phones, tablets, and TVs
  • Introduces techniques for creating map-based applications and using location-based services
  • Looks at how to create background services, Notifications, and Cloud To Device Messaging
  • Demonstrates how to create dynamic and interactive home screen Widgets and Live Wallpaper
  • Explores hardware and communication APIs, including Bluetooth, telephony, WiFi Direct, and NFC Beam
  • Examines the use of the camera and hardware sensors
  • Details the new animation framework and other user experience enhancements, including drag and drop, the Action Bar, and Fragments
  • Includes a new chapter on publishing your apps
  • Introduces the License Verification and In App Billing Services
Programmer ForumsJoin our Programmer to Programmer forums to ask and answer programming questions about this book, join discussions on the hottest topics in the industry, and connect with fellow programmers from around the world.


Code DownloadsTake advantage of free code samples from this book, as well as code samples from hundreds of other books, all ready to use.


Read MoreFind articles, ebooks, sample chapters and tables of contents for hundreds of books, and more reference resources on programming topics that matter to you.


Wrox Professional guides are written by working developers to address everyday needs. They provide examples, practical solutions, and expert education in new technologies, all designed to help programmers do a better job.


wrox.com

Create alarm set on a specified time, using AlarmManager and BroadcastReceiver.


In this exercise, set alarm using AlarmManager to trigger our BroadcastReceiver on a specified time. We will use "TimePickerDialog" to set the target time.

Alarm will be triggered on a specified time


Modify main.xml to add a Button to start the TimePickerDialog to set the alarm time, add a TextView to display the set time.

<?xml version="1.0" encoding="utf-8"?>
<LinearLayout xmlns:android="http://schemas.android.com/apk/res/android"
android:layout_width="fill_parent"
android:layout_height="fill_parent"
android:orientation="vertical" >

<TextView
android:layout_width="fill_parent"
android:layout_height="wrap_content"
android:text="@string/hello" />
<Button
android:id="@+id/startSetDialog"
android:layout_width="fill_parent"
android:layout_height="wrap_content"
android:text="Set Target Time"/>
<TextView
android:id="@+id/alarmprompt"
android:layout_width="fill_parent"
android:layout_height="wrap_content" />
</LinearLayout>

In the main activity, AndroidTimeActivity, the main code to start Alarm is in setAlarm(Calendar targetCal) method. Retrieve AlarmManager by through getSystemService(Context.ALARM_SERVICE). And set our alarm with alarm type(RTC_WAKEUP), trigger time, and pendingIntent. AlarmReceiver is the class of our BroadcastReceiver, it's onReceive() method will be called when alram trigger.

AndroidTimeActivity.java
package com.exercise.AndroidTime;

import java.util.Calendar;

import android.app.Activity;
import android.app.AlarmManager;
import android.app.PendingIntent;
import android.app.TimePickerDialog;
import android.app.TimePickerDialog.OnTimeSetListener;
import android.content.Context;
import android.content.Intent;
import android.os.Bundle;
import android.view.View;
import android.view.View.OnClickListener;
import android.widget.Button;
import android.widget.TextView;
import android.widget.TimePicker;

public class AndroidTimeActivity extends Activity {

TimePicker myTimePicker;
Button buttonstartSetDialog;
TextView textAlarmPrompt;

TimePickerDialog timePickerDialog;

final static int RQS_1 = 1;

/** Called when the activity is first created. */
@Override
public void onCreate(Bundle savedInstanceState) {
super.onCreate(savedInstanceState);
setContentView(R.layout.main);

textAlarmPrompt = (TextView)findViewById(R.id.alarmprompt);

buttonstartSetDialog = (Button)findViewById(R.id.startSetDialog);
buttonstartSetDialog.setOnClickListener(new OnClickListener(){

@Override
public void onClick(View v) {
textAlarmPrompt.setText("");
openTimePickerDialog(false);

}});

}


private void openTimePickerDialog(boolean is24r){
Calendar calendar = Calendar.getInstance();

timePickerDialog = new TimePickerDialog(
AndroidTimeActivity.this,
onTimeSetListener,
calendar.get(Calendar.HOUR_OF_DAY),
calendar.get(Calendar.MINUTE),
is24r);
timePickerDialog.setTitle("Set Alarm Time");

timePickerDialog.show();

}

OnTimeSetListener onTimeSetListener
= new OnTimeSetListener(){

@Override
public void onTimeSet(TimePicker view, int hourOfDay, int minute) {

Calendar calNow = Calendar.getInstance();
Calendar calSet = (Calendar) calNow.clone();

calSet.set(Calendar.HOUR_OF_DAY, hourOfDay);
calSet.set(Calendar.MINUTE, minute);
calSet.set(Calendar.SECOND, 0);
calSet.set(Calendar.MILLISECOND, 0);

if(calSet.compareTo(calNow) <= 0){
//Today Set time passed, count to tomorrow
calSet.add(Calendar.DATE, 1);
}

setAlarm(calSet);
}};

private void setAlarm(Calendar targetCal){

textAlarmPrompt.setText(
"\n\n***\n"
+ "Alarm is set@ " + targetCal.getTime() + "\n"
+ "***\n");

Intent intent = new Intent(getBaseContext(), AlarmReceiver.class);
PendingIntent pendingIntent = PendingIntent.getBroadcast(getBaseContext(), RQS_1, intent, 0);
AlarmManager alarmManager = (AlarmManager)getSystemService(Context.ALARM_SERVICE);
alarmManager.set(AlarmManager.RTC_WAKEUP, targetCal.getTimeInMillis(), pendingIntent);

}

}

AlarmReceiver.java
package com.exercise.AndroidTime;

import android.content.BroadcastReceiver;
import android.content.Context;
import android.content.Intent;
import android.widget.Toast;

public class AlarmReceiver extends BroadcastReceiver {

@Override
public void onReceive(Context arg0, Intent arg1) {
Toast.makeText(arg0, "Alarm received!", Toast.LENGTH_LONG).show();

}

}

Modify AndroidManifest.xml to add receiver ".AlarmReceiver".
<?xml version="1.0" encoding="utf-8"?>
<manifest xmlns:android="http://schemas.android.com/apk/res/android"
package="com.exercise.AndroidTime"
android:versionCode="1"
android:versionName="1.0" >

<uses-sdk android:minSdkVersion="10" />

<application
android:icon="@drawable/ic_launcher"
android:label="@string/app_name" >
<activity
android:name=".AndroidTimeActivity"
android:label="@string/app_name" >
<intent-filter>
<action android:name="android.intent.action.MAIN" />

<category android:name="android.intent.category.LAUNCHER" />
</intent-filter>
</activity>
<receiver android:name=".AlarmReceiver" android:process=":remote" />
</application>

</manifest>


Download the files.

Next:
- Cancel alarm with a matching PendingIntent


NetBeans 7.2 will Add JQuery Support

JQuery LogoHey JQuery fans. Found this story from the h-online. The NetBeans dudes are updating the JavaScript editor for 7.2. As part of that update they are gonna include JQuery support. Sounds cool!

Tuesday 22 May 2012

Star Wars the Old Republic: Thoughts and Patch 1.3

IGN has a story on a new patch 1.3 for Star Wars the Old Republic. So I have been playing the game the last few months and thought I should comment. By the way I started, The Force Journal blog to document tips for those new to the game so check it out if you ever play.


What is Star Wars the Old Republic?

A massively multiplayer online role playing game (MMORPG) similar to World of Warcraft. The main difference, of course, is that this game takes place in the Star Wars universe. Specifically, the game takes place thousands of years before the events of the Star Wars universe when both Sith and Jedi roam the galaxy.


You can play the Sith (Empire) side or the Jedi (Republic) side. You can play as a Jedi Knight, a Sith, a Smuggler (like Han Solo), plus a number of other options.


What's new? What's cool?

  • Each toon you play has its own story line that changes based on your choices. Stories are done using video cut scenes which is pretty cool. Definitely well done and the best part of the game.

  • Each toon gets a series of companions that help you play the game. This makes game play easier. In addition, it makes grouping easier as companions can substitute for real players.

  • You can romance some of your companions. Given the high degree of hotness of the female companions this is quite fun. The romantic action is pretty tame and pretty much G rated, so don't get your hopes up kids.

  • You get your very own Starship to roam around the galaxy in, complete with robot butler.


What's meh?

  • In the game you can choose if you are good or bad. (Yes you can make a good Sith for example). Some of these light/dark side choices are questionable at best. For example, on a Sith toon, my dark side choice was to kill the person. My light side choice? Let the person be tortured to death by my master. Really Bioware?

  • Game graphics are good and bad. When released the hardware requirements were way to high. I only have 1 machine that will run the game. Blizzard figured this out a long time ago. People can not play your game if they can't play your game. Bioware really hurt themselves with this I think. Any game today, should play well on an average laptop because that is what most folks play on.

  • So the scenery and background look spectacular. Which is stupid. I could care less how good the grass and the rocks look. Non-player characters don't look very good and do not behave naturally. In Warcraft, you can see a NPC because the move naturally. In SWTOR, NPCs often don't move at all, which makes them difficult to see.

  • Lots of nonsensical monsters. For example, the rackgouls (sort of zombies, but they aren't undead) have survived without a food source for 300 years. Nice trick.

  • The social/chat system is unchanged or even more primitive than World of Warcraft. Come on people, stuff like this needs to be improved not ignored.

  • Tank/healer/DPS paradigm is unchanged from World of Warcraft. You still need these roles if you want to raid.


What sucks?

  • Playing groups is very buggy, here is why

    • Remember all those cool cut scenes. Well they don't always work if you are grouped. Sometimes you can see another players class quest, sometimes you can't. Very sucky.

    • Getting on another player's ship when they have a class quest on the ship, is impossible. As soon as the cut scene starts, which is usually right away, you get kicked out. Maybe to your ship, maybe to the fleet, maybe to a space station. You just don't know.

    • When asked a light/dark question in a group, only 1 person gets credit for answering. This totally sucks because there are a lot of game mechanics that rely on your light/dark score. So you are penalized for playing in a group.


  • The economy is messed up. Essentially, your toons are bankrupt from level 1 until about level 28. That is over half the game! The cost of training is totally ridiculous.

  • Once you pick a class type, you cannot change it. Totally stupid if you ask me. Respeccing a class is not that difficult, but still is way too costly and difficult.


Summing Up

Overall, it is a very good game. I think the story angle provides a lot fun and playability. Haven't tried PVP or raiding, but I probably don't have time for either.


I wonder about the focus on leveling, stats, and gear. It just makes these games way to complicated. I just want to play the game and work through the story. Having to figure out things like surge rating just wastes my time and I don't have time. to waste.


Get the difference between two Calendar

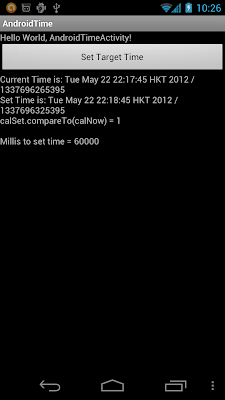
Modify the exercise "android.app.TimePickerDialog", calculate the difference between time and next set time in TimePickerDialog.

Get the difference between two Calendar


package com.exercise.AndroidTime;

import java.util.Calendar;

import android.app.Activity;
import android.app.TimePickerDialog;
import android.app.TimePickerDialog.OnTimeSetListener;
import android.os.Bundle;
import android.view.View;
import android.view.View.OnClickListener;
import android.widget.Button;
import android.widget.TextView;
import android.widget.TimePicker;

public class AndroidTimeActivity extends Activity {

TimePicker myTimePicker;
Button buttonstartSetDialog;
TextView textPrompt;

TimePickerDialog timePickerDialog;

/** Called when the activity is first created. */
@Override
public void onCreate(Bundle savedInstanceState) {
super.onCreate(savedInstanceState);
setContentView(R.layout.main);

textPrompt = (TextView)findViewById(R.id.prompt);

buttonstartSetDialog = (Button)findViewById(R.id.startSetDialog);
buttonstartSetDialog.setOnClickListener(new OnClickListener(){

@Override
public void onClick(View v) {
openTimePickerDialog(false);

}});

}


private void openTimePickerDialog(boolean is24r){
Calendar calendar = Calendar.getInstance();

timePickerDialog = new TimePickerDialog(
AndroidTimeActivity.this,
onTimeSetListener,
calendar.get(Calendar.HOUR_OF_DAY),
calendar.get(Calendar.MINUTE),
is24r);
timePickerDialog.setTitle("TimePickerDialog Title");
timePickerDialog.setMessage("TimePickerDialog Message");

timePickerDialog.show();

}

OnTimeSetListener onTimeSetListener
= new OnTimeSetListener(){

@Override
public void onTimeSet(TimePicker view, int hourOfDay, int minute) {

Calendar calNow = Calendar.getInstance();
Calendar calSet = (Calendar) calNow.clone();

calSet.set(Calendar.HOUR_OF_DAY, hourOfDay);
calSet.set(Calendar.MINUTE, minute);

String stringPrompt = "Current Time is: " + calNow.getTime() + " / " + calNow.getTimeInMillis() + "\n"
+ "Set Time is: " + calSet.getTime() + " / " + calSet.getTimeInMillis() + "\n"
+ "calSet.compareTo(calNow) = " + calSet.compareTo(calNow) + "\n\n";

if(calSet.compareTo(calNow) > 0){
//Today Set time not yet passed
long diff = calSet.getTimeInMillis() - calNow.getTimeInMillis();
stringPrompt += "Millis to set time = " + diff;
}else{
//Today Set time passed, count to tomorrow
calSet.add(Calendar.DATE, 1);
long diff = calSet.getTimeInMillis() - calNow.getTimeInMillis();
stringPrompt += "Millis to tomorrow set time = " + diff;
}

textPrompt.setText(stringPrompt);
}};

}


<?xml version="1.0" encoding="utf-8"?>
<LinearLayout xmlns:android="http://schemas.android.com/apk/res/android"
android:layout_width="fill_parent"
android:layout_height="fill_parent"
android:orientation="vertical" >

<TextView
android:layout_width="fill_parent"
android:layout_height="wrap_content"
android:text="@string/hello" />
<Button
android:id="@+id/startSetDialog"
android:layout_width="fill_parent"
android:layout_height="wrap_content"
android:text="Set Target Time"/>
<TextView
android:id="@+id/prompt"
android:layout_width="fill_parent"
android:layout_height="wrap_content" />
</LinearLayout>


Related:
- java.util.Calendar


java.util.Calendar

java.util.Calendar is an abstract base class for converting between a Date object and a set of integer fields such as YEAR, MONTH, DAY, HOUR, and so on.

Example of usage of Calendar.

Calendar


package com.exercise.AndroidCalendar;

import java.util.Calendar;
import java.util.Locale;

import android.app.Activity;
import android.os.Bundle;
import android.widget.TextView;

public class AndroidCalendarActivity extends Activity {
/** Called when the activity is first created. */
@Override
public void onCreate(Bundle savedInstanceState) {
super.onCreate(savedInstanceState);

TextView prompt = new TextView(this);
setContentView(prompt);
prompt.setText(getCalendarPrompt());
}

private String getCalendarPrompt(){
Calendar rightNow = Calendar.getInstance();

String p = rightNow + "\n\n"
+ rightNow.get(Calendar.YEAR) + "-"
+ rightNow.getDisplayName(Calendar.MONTH, Calendar.SHORT, Locale.US) + "-"
+ rightNow.get(Calendar.DATE) + "\n"
+ "DAY_OF_YEAR: " + rightNow.get(Calendar.DAY_OF_YEAR) + "\n"
+ "DAY_OF_MONTH: " + rightNow.get(Calendar.DAY_OF_MONTH) + "\n"
+ "DAY_OF_WEEK: " + rightNow.get(Calendar.DAY_OF_WEEK) + "\n"
+ "\n"
+ "getTime(): " + rightNow.getTime() + "\n"
+ "getTimeInMillis(): " + rightNow.getTimeInMillis() + "\n"
+ "\n";

return p;
}
}


Related:
- Get the difference between two Calendar


Monday 21 May 2012

An HP Ultrabook with a Matte Finish (June 2012)

I ran across this a couple of weeks back, but I didn't have time to write about it.


HP EliteBook Folio 9470m

The HP EliteBook 9470m will be a 14" 3.5 pound ultrabook coming out in June 2012. Why am I blogging about it? HP announced a number of Ultrabook and Sleekbook notebooks a week or two ago. This machine (if I'm not mistaken) is the only one with a matte display. The base price should be around $1000.


I'm still waiting around to see what we are gonna get from Apple. Their new slim 15' MacBook pros could be interesting. But it is nice to have some alternatives.


Here are a couple of detailed reviews on this machine:


Laptop Review

Lilliputing

The Google I/O Countdown Contest


Android Power is launching a huge giveaway that'll take us all the way up to the big event - Google I/O. You'll have a chance to score awesome Android prizes each week from now through the start of I/O -- and from high-end tablets to standout Android swag, there's plenty of cool stuff just waiting to be won.

Details: The Google I/O Countdown Contest: Win a free Toshiba Excite 10 tablet!


android.app.TimePickerDialog

android.app.TimePickerDialog is dialog that prompts the user for the time of day using a TimePicker.

TimePickerDialog


Note:
  • If the TimePickerDialog closed by "Set" button, OnTimeSetListener and OnDismissListener will be called.
  • If the TimePickerDialog closed by "Cancel" button, only OnDismissListener will be called.
  • If the TimePickerDialog closed by "BACK" system button, OnCancelListener and OnDismissListener will be called.

package com.exercise.AndroidTime;

import java.util.Calendar;

import android.app.Activity;
import android.app.TimePickerDialog;
import android.app.TimePickerDialog.OnTimeSetListener;
import android.content.DialogInterface;
import android.content.DialogInterface.OnCancelListener;
import android.content.DialogInterface.OnDismissListener;
import android.content.DialogInterface.OnShowListener;
import android.os.Bundle;
import android.view.View;
import android.view.View.OnClickListener;
import android.widget.Button;
import android.widget.TextView;
import android.widget.TimePicker;

public class AndroidTimeActivity extends Activity {

TimePicker myTimePicker;
Button buttonStartDialog12, buttonStartDialog24;
TextView info;

TimePickerDialog timePickerDialog;

String dialogMsg;

/** Called when the activity is first created. */
@Override
public void onCreate(Bundle savedInstanceState) {
super.onCreate(savedInstanceState);
setContentView(R.layout.main);

info = (TextView)findViewById(R.id.info);

buttonStartDialog12 = (Button)findViewById(R.id.startDialog12);
buttonStartDialog12.setOnClickListener(new OnClickListener(){

@Override
public void onClick(View v) {
openTimePickerDialog(false);

}});

buttonStartDialog24 = (Button)findViewById(R.id.startDialog24);
buttonStartDialog24.setOnClickListener(new OnClickListener(){

@Override
public void onClick(View v) {
openTimePickerDialog(true);

}});
}


private void openTimePickerDialog(boolean is24r){
Calendar calendar = Calendar.getInstance();
timePickerDialog = new TimePickerDialog(
AndroidTimeActivity.this,
onTimeSetListener,
calendar.get(Calendar.HOUR_OF_DAY),
calendar.get(Calendar.MINUTE),
is24r);
timePickerDialog.setTitle("TimePickerDialog Title");
timePickerDialog.setMessage("TimePickerDialog Message");

timePickerDialog.setOnShowListener(new OnShowListener(){

@Override
public void onShow(DialogInterface arg0) {
dialogMsg = "OnShow\n";
info.setText(dialogMsg);
}});

timePickerDialog.setOnCancelListener(new OnCancelListener(){

@Override
public void onCancel(DialogInterface dialog) {
dialogMsg += "OnCancel\n";
info.setText(dialogMsg);

}});
timePickerDialog.setOnDismissListener(new OnDismissListener(){

@Override
public void onDismiss(DialogInterface arg0) {
dialogMsg += "OnDismiss\n";
info.setText(dialogMsg);
}});

timePickerDialog.show();

}

OnTimeSetListener onTimeSetListener
= new OnTimeSetListener(){

@Override
public void onTimeSet(TimePicker view, int hourOfDay, int minute) {
dialogMsg += "OnTimeSet " + hourOfDay + " : " + minute + "\n";
info.setText(dialogMsg);
}};

}


<?xml version="1.0" encoding="utf-8"?>
<LinearLayout xmlns:android="http://schemas.android.com/apk/res/android"
android:layout_width="fill_parent"
android:layout_height="fill_parent"
android:orientation="vertical" >

<TextView
android:layout_width="fill_parent"
android:layout_height="wrap_content"
android:text="@string/hello" />
<Button
android:id="@+id/startDialog12"
android:layout_width="fill_parent"
android:layout_height="wrap_content"
android:text="Start TimePickerDialog in AM/PM mode "/>
<Button
android:id="@+id/startDialog24"
android:layout_width="fill_parent"
android:layout_height="wrap_content"
android:text="Start TimePickerDialog in 24hr mode "/>
<LinearLayout
android:layout_width="fill_parent"
android:layout_height="fill_parent"
android:gravity="bottom"
>
<TextView
android:id="@+id/info"
android:layout_width="fill_parent"
android:layout_height="wrap_content" />
</LinearLayout>
</LinearLayout>


Related:
- android.widget.TimePicker


Sunday 20 May 2012

Really Cool Looking CSS3 Buttons

One of the advantages of CSS3 is you can create some really good looking widgets without images. After looking around a bit for some really good examples, I have decided these buttons on Web Designer Wall are the best.


The buttons look really good in Webkit and Firefox and the CSS is relatively simple. Believe me, you can find some really complex stuff out there. Anyway, if you are looking for some really good buttons to use on your site, check it out.

5.1.1 Jailbreak

Planetbeing, pod2g, and members of cdev are on their way to the HitB venue in Amsterdam. I wish I could have joined with them and been a part of the fun. This week is going to be very big for jailbreakers and newcomers to iOS devices stuck on 5.1.1 without any jailbreak.


These guys deserve your donations and your thanks. Pod and nikias did some amazing things. Planetbeing stepped in and resurrected some 'old' things to make them useful for this jailbreak. 


Any updates will be posted on cdev's main blog as well as here.