Monday 31 October 2011

Asus G74SX-DH72 Gaming Laptops Review, Specs and Price

new Asus G74SX-DH72
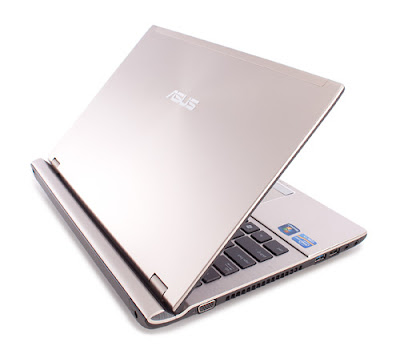
Asus one of the well-known laptops maker has announced the launch of its new gaming laptops namely, Asus G74SX-DH72. The G74SX-DH72 which powered by features a 17.3-inch laptop equipped with an Intel Core i7-2670QM 2.2GHz Processor, 16GB DDR3 1333MHz SDRAM, 160GB Solid State Drive (SSD), and 750GB 7200RPM SATA Hard Drive. The laptop sports a 17.3-Inch Full HD LED Backlit Display at 1920 x 1080 resolution, and NVIDIA GeForce GTX 560M Graphics with 3GB GDDR5 Video Memory.Asus G74SX-DH72The Asus G74SX-DH72 laptop also provide Integrated 2.0MP Webcam, Blu-Ray Burner & SuperMulti DVD�R/RW Combo Drive, Multi-in-1 Card reader, 802.11b/g/n Wireless LAN, and 8-cell Battery. The laptop runs on Windows 7 Home Premium 64-bit operating system. You see, such a configuration is good enough for our daily use, people are very happy with it. The details related to the specs of the device are discussed below.best Asus G74SX-DH72Asus G74SX-DH72 Gaming Laptop Specification :
  • Processor : Intel Core i7-2670QM 2.2GHz Processor with Turbo Boost 2.0 up to 3.1GHz (6MB Smart Cache)
  • Memory : 16GB DDR3 1333MHz SDRAM
  • Operating System: Windows 7 Home Premium 64-bit
  • Display : 17.3? Full HD LED Backlit Display (1920 x 1080)
  • Storage : 750GB 7200RPM SATA Hard Drive plus 160GB Solid State Drive (SSD)
  • Graphics : NVIDIA GeForce GTX 560M Graphics with 3GB GDDR5 Video Memory
  • Camera : Integrated 2.0MP Webcam
  • Optical Drive : Blu-Ray Burner & SuperMulti DVD�R/RW Combo Drive
  • Media Reader : Multi-in-1 Card reader
  • Ports : 1 x USB 3.0, 3 x USB 2.0, RJ-45 (LAN), Headphone-out, Microphone-in, VGA, HDMI
  • Connectivity : 802.11b/g/n Wireless LAN
  • Dimensions : 16.5 x 12.8 x 2.4 inches (WxDxH)
  • Battery : 8-cell Battery
  • Weight : 9.4 pounds
  • Warranty : 2-Year Limited Global Warranty, 1-Year Accidental Damage Warranty
Price Range : $1,947.99 (on Amazon)

Saturday 29 October 2011

Generate Random number, Random()

java.util.Random is a class provides methods that return pseudo-random values.

Normally (in other language/system), we will generate random number with seek of current time, to try to make the pseudo-random un-predictable. But in case of Android, it's not necessary and not recommended - Because "It is dangerous to seed Random with the current time because that value is more predictable to an attacker than the default seed." - refer to Android document java.util.Random.

The default constructs, Random(), already come with an initial state that is unlikely to be duplicated by a subsequent instantiation.

Here is a example to generate 10 integer using Random().

Generate Random number, Random()

package com.exercise.AndroidRandom;

import java.util.Random;

import android.app.Activity;
import android.os.Bundle;
import android.view.View;
import android.widget.Button;
import android.widget.TextView;

public class AndroidRandomActivity extends Activity {

Button generateRandom;
TextView randomResult;
Random myRandom;

/** Called when the activity is first created. */
@Override
public void onCreate(Bundle savedInstanceState) {
super.onCreate(savedInstanceState);
setContentView(R.layout.main);
generateRandom = (Button)findViewById(R.id.generate);
randomResult = (TextView)findViewById(R.id.randomresult);

generateRandom.setOnClickListener(new Button.OnClickListener(){

@Override
public void onClick(View arg0) {
// TODO Auto-generated method stub
String result = "";
myRandom = new Random();

for(int i = 0; i < 10; i++){
result += String.valueOf(myRandom.nextInt()) + "\n";
}

randomResult.setText(result);
}});

}
}


<?xml version="1.0" encoding="utf-8"?>
<LinearLayout xmlns:android="http://schemas.android.com/apk/res/android"
android:orientation="vertical"
android:layout_width="fill_parent"
android:layout_height="fill_parent"
>
<TextView
android:layout_width="fill_parent"
android:layout_height="wrap_content"
android:text="@string/hello"
/>
<Button
android:id="@+id/generate"
android:layout_width="fill_parent"
android:layout_height="wrap_content"
android:text="Generate Random Number"
/>
<TextView
android:id="@+id/randomresult"
android:layout_width="fill_parent"
android:layout_height="wrap_content"
/>
</LinearLayout>

Friday 28 October 2011

Inflate SlidingDrawer from XML

Inflate SlidingDrawer from XML

To inflate SlidingDrawer from XML, create our SlidingDrawer, /res/layout/horizontalslidingdrawer.xml.
<?xml version="1.0" encoding="utf-8"?>
<SlidingDrawer xmlns:android="http://schemas.android.com/apk/res/android"
android:id="@+id/drawer"
android:layout_width="fill_parent"
android:layout_height="fill_parent"
android:orientation="horizontal"
android:handle="@+id/handle"
android:content="@+id/content">
<ImageView
android:id="@id/handle"
android:layout_width="wrap_content"
android:layout_height="fill_parent"
android:src="@drawable/icon"/>
<LinearLayout
android:id="@id/content"
android:layout_width="fill_parent"
android:layout_height="fill_parent"
android:orientation="vertical"
android:padding="10dp"
android:background="#55000000">
<Button
android:layout_width="fill_parent"
android:layout_height="wrap_content"
android:text=" - Button - "/>
<Button
android:layout_width="fill_parent"
android:layout_height="wrap_content"
android:text=" - Button - "/>
<Button
android:layout_width="fill_parent"
android:layout_height="wrap_content"
android:text=" - Button - "/>
<Button
android:layout_width="fill_parent"
android:layout_height="wrap_content"
android:text=" - Button - "/>
<Button
android:layout_width="fill_parent"
android:layout_height="wrap_content"
android:text=" - Button - "/>
<Button
android:layout_width="fill_parent"
android:layout_height="wrap_content"
android:text=" - Button - "/>
</LinearLayout>
</SlidingDrawer>


In Java:
package com.exercise.SlidingDrawer;

import android.app.Activity;
import android.content.Context;
import android.os.Bundle;
import android.view.LayoutInflater;
import android.view.ViewGroup.LayoutParams;
import android.widget.LinearLayout;
import android.widget.SlidingDrawer;

public class AndroidSlidingDrawerActivity extends Activity {

/** Called when the activity is first created. */
@Override
public void onCreate(Bundle savedInstanceState) {
super.onCreate(savedInstanceState);

LinearLayout mainLayout = new LinearLayout(this);
LayoutParams mainLayoutParams
= new LayoutParams(LayoutParams.FILL_PARENT,
LayoutParams.FILL_PARENT);
mainLayout.setLayoutParams(mainLayoutParams);
mainLayout.setOrientation(LinearLayout.VERTICAL);

LayoutInflater inflater
= (LayoutInflater)getSystemService(
Context.LAYOUT_INFLATER_SERVICE);
SlidingDrawer mySlidingDrawer
= (SlidingDrawer)inflater.inflate(
R.layout.horizontalslidingdrawer,
mainLayout, false);
mainLayout.addView(mySlidingDrawer);

setContentView(mainLayout);

}
}


Related:
- SlidingDrawer in vertical
- SlidingDrawer in horizontal

Thursday 27 October 2011

Intel Ultrabooks here to Compete with MacBook Airs

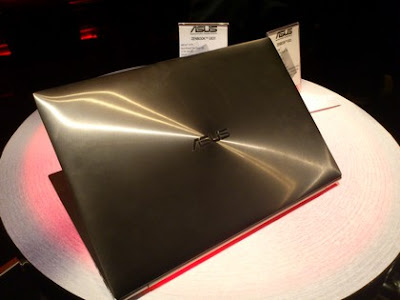
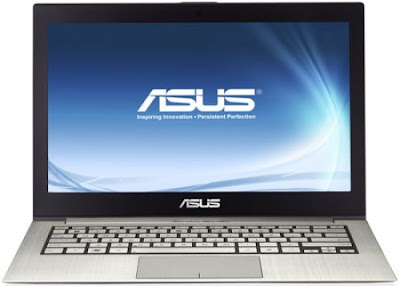
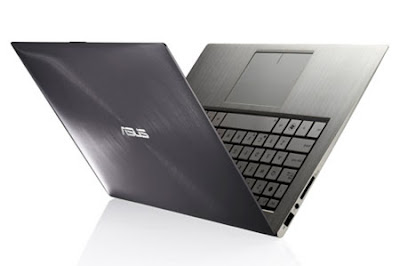
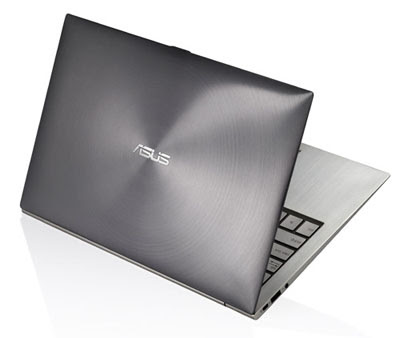
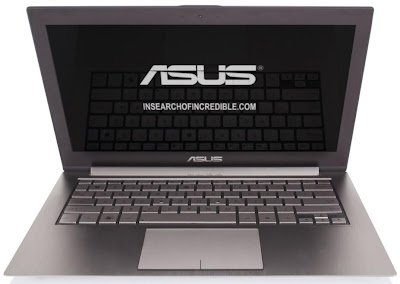
CNET has a writeup on the fist wave of Ultrabook laptops. These are part of an Intel program to design Windows based laptops to compete with the MacBook Air.


CNET: MacBook Air vs. Ultrabooks: The first wave


I think the most interesting thing is the price. At $900 to $1200 they are not much cheaper than the MacBook Air. So it does make one wonder, why would you buy a Rolex knock off when you could own a Rolex for the same price?


Methinks I would rather get the Air and just run Bootcamp.

Get XML parse event; using XmlResourceParser.getEventType()

The XML parsing interface returned for an XML resource. This is a standard XmlPullParser interface, as well as an extended AttributeSet interface and an additional close() method on this interface for the client to indicate when it is done reading the resource.

Normally, xml file will be placed under /res/xml/ folder; as a example /res/layout/main.xml is used here.

Get XML parse event; using XmlResourceParser.getEventType()

package com.exercise.XmlResourceParser;

import java.io.IOException;

import org.xmlpull.v1.XmlPullParser;
import org.xmlpull.v1.XmlPullParserException;

import android.app.Activity;
import android.content.res.XmlResourceParser;
import android.os.Bundle;
import android.widget.TextView;

public class AndroidXmlParserActivity extends Activity {
/** Called when the activity is first created. */
@Override
public void onCreate(Bundle savedInstanceState) {
super.onCreate(savedInstanceState);
setContentView(R.layout.main);
TextView result = (TextView)findViewById(R.id.result);

String XmlParseResult = getXmlEvent();
result.setText(XmlParseResult);
}

private String getXmlEvent(){
String xmlResult = "";

//Normally, the XML files should be placed under /res/xml/ folder
//XmlResourceParser xmlResourceParser = getResources().getXml(R.xml.xxx);
XmlResourceParser xmlResourceParser = getResources().getXml(R.layout.main);

try {
int eventType;
do{
xmlResourceParser.next();
eventType = xmlResourceParser.getEventType();

switch(eventType){
case XmlPullParser.START_DOCUMENT:
xmlResult += "START_DOCUMENT\n";
break;
case XmlPullParser.END_DOCUMENT:
xmlResult += "END_DOCUMENT\n";
break;
case XmlPullParser.START_TAG:
xmlResult += "START_TAG: " + xmlResourceParser.getName() + "\n";
break;
case XmlPullParser.END_TAG:
xmlResult += "END_TAG: " + xmlResourceParser.getName() + "\n";
break;
case XmlPullParser.TEXT:
xmlResult += "TEXT: " + xmlResourceParser.getText() + "\n";
break;
}

}while (eventType != XmlPullParser.END_DOCUMENT);

} catch (XmlPullParserException e) {
// TODO Auto-generated catch block
e.printStackTrace();
} catch (IOException e) {
// TODO Auto-generated catch block
e.printStackTrace();
}

return xmlResult;
}
}


/res/layout/main.xml
<?xml version="1.0" encoding="utf-8"?>
<LinearLayout xmlns:android="http://schemas.android.com/apk/res/android"
android:orientation="vertical"
android:layout_width="fill_parent"
android:layout_height="fill_parent"
>
<TextView
android:layout_width="fill_parent"
android:layout_height="wrap_content"
android:text="@string/hello"
/>
<TextView
android:id="@+id/result"
android:layout_width="fill_parent"
android:layout_height="wrap_content"
/>
</LinearLayout>


Download the files.


Wednesday 26 October 2011

Asus P43E-XH31 14" Laptops Review, Specs and Price

new Asus P43E-XH31
Asus one of the well-known laptops maker has announced the launch of its new pro P Series notebooks namely, Asus P43E-XH31. The Asuspro P Series notebooks are designed specifically for small to medium-sized businesses. Their streamlined and professional design does not compromise durability and reliability. It delivers powerful performance for budget-conscious customers, providing an unbeatable value proposition.Asus P43E-XH31The Asus P43E-XH31 notebook was designed for small and medium sized businesses, perfectly combining performance, style and value. The powerful Intel Core i3 processor allows for extreme multitasking, while the 500 GB hard drive provides plenty of storage for all of your important files. The crystal clear 14-inch LED backlit display produces an excellent WXGA resolution, while consuming less power than traditional LCD displays for extended battery life. The New P43E-XH31 runs on Microsoft Windows 7 Professional 64 Bit. Asuspro P Series notebooks are subjected to stringent quality trials that surpass industry standards, surviving drop tests, hinge test cycles, and panel pressure testing. Lets go deep in the topic to grab more about the Asus P43E-XH31 notebooks.best Asus P43E-XH31
Asus P43E-XH31 Laptops Specification :
  • Intel 2nd Generation Core i3-2330M (2.20GHz) Processor
  • Display : 14" HD 16:9 (1366 x 768) LED (Matte) Display
  • Cameras : Integrated 0.3 Megapixel
  • Memory : 4GB DDR3 1333MHz Memory
  • Hard Drive : 500 GB, Serial ATA-300, 7200 rpm
  • Operating System : Microsoft Windows 7 Professional 64 Bit
  • DVD Super Multi Drive
  • Battery : 6-cell 5200 mAh (56 Wh)
  • Dimension : (W)13.7" (D)9.3" (H)1.3"
  • Weight : 5.1 lbs (2.31 kg)
  • Warranty : 1 Year Limited
Price about : $549.00 - $568.99

Video Capture using MediaRecorder with Flash Light

During video recording using MediaRecorder, we can control the build-in flash light via Camera.setParameters().

Video Capture using MediaRecorder with Flash Light

Modify from the article "A simple exercise of Video Capture using MediaRecorder, for Android 2.3 or higher":

package com.exercise.AndroidVideoCapture;

import java.io.IOException;

import android.app.Activity;
import android.content.Context;
import android.hardware.Camera;
import android.hardware.Camera.Parameters;
import android.media.CamcorderProfile;
import android.media.MediaRecorder;
import android.os.Bundle;
import android.view.MotionEvent;
import android.view.SurfaceHolder;
import android.view.SurfaceView;
import android.view.View;
import android.widget.Button;
import android.widget.FrameLayout;
import android.widget.RadioButton;
import android.widget.Toast;

public class AndroidVideoCapture extends Activity{

private Camera myCamera;
private MyCameraSurfaceView myCameraSurfaceView;
private MediaRecorder mediaRecorder;

Button myButton;
RadioButton flashOff, flashTorch;
SurfaceHolder surfaceHolder;
boolean recording;

/** Called when the activity is first created. */
@Override
public void onCreate(Bundle savedInstanceState) {
super.onCreate(savedInstanceState);

recording = false;

setContentView(R.layout.main);

//Get Camera for preview
myCamera = getCameraInstance();
if(myCamera == null){
Toast.makeText(AndroidVideoCapture.this,
"Fail to get Camera",
Toast.LENGTH_LONG).show();
}

myCameraSurfaceView = new MyCameraSurfaceView(this, myCamera);
FrameLayout myCameraPreview = (FrameLayout)findViewById(R.id.videoview);
myCameraPreview.addView(myCameraSurfaceView);

myButton = (Button)findViewById(R.id.mybutton);
myButton.setOnClickListener(myButtonOnClickListener);

flashOff = (RadioButton)findViewById(R.id.flashoff);
flashTorch = (RadioButton)findViewById(R.id.flashtorch);
}

Button.OnTouchListener flashButtonOnTouchListener
= new Button.OnTouchListener(){

@Override
public boolean onTouch(View arg0, MotionEvent arg1) {
// TODO Auto-generated method stub

if(myCamera != null){
Parameters parameters = myCamera.getParameters();

switch (arg1.getAction()){
case MotionEvent.ACTION_DOWN:
parameters.setFlashMode(Parameters.FLASH_MODE_TORCH);
myCamera.setParameters(parameters);
break;
case MotionEvent.ACTION_UP:
parameters.setFlashMode(Parameters.FLASH_MODE_OFF);
myCamera.setParameters(parameters);
break;
};
}

return true;
}};

Button.OnClickListener flashModeButtonOnClickListener
= new Button.OnClickListener(){

@Override
public void onClick(View v) {
// TODO Auto-generated method stub

}
};

Button.OnClickListener myButtonOnClickListener
= new Button.OnClickListener(){

@Override
public void onClick(View v) {
// TODO Auto-generated method stub
if(recording){
// stop recording and release camera
mediaRecorder.stop(); // stop the recording
releaseMediaRecorder(); // release the MediaRecorder object

//Exit after saved
finish();
}else{

//Release Camera before MediaRecorder start
releaseCamera();

if(!prepareMediaRecorder()){
Toast.makeText(AndroidVideoCapture.this,
"Fail in prepareMediaRecorder()!\n - Ended -",
Toast.LENGTH_LONG).show();
finish();
}

mediaRecorder.start();
recording = true;
myButton.setText("STOP");
}
}};

private Camera getCameraInstance(){
// TODO Auto-generated method stub
Camera c = null;
try {
c = Camera.open(); // attempt to get a Camera instance
}
catch (Exception e){
// Camera is not available (in use or does not exist)
}
return c; // returns null if camera is unavailable
}


private String getFlashModeSetting(){
if(flashTorch.isChecked()){
return Parameters.FLASH_MODE_TORCH;
}else {
return Parameters.FLASH_MODE_OFF;
}
}

private boolean prepareMediaRecorder(){
myCamera = getCameraInstance();

Parameters parameters = myCamera.getParameters();
parameters.setFlashMode(getFlashModeSetting());
myCamera.setParameters(parameters);

mediaRecorder = new MediaRecorder();

myCamera.unlock();
mediaRecorder.setCamera(myCamera);

mediaRecorder.setAudioSource(MediaRecorder.AudioSource.CAMCORDER);
mediaRecorder.setVideoSource(MediaRecorder.VideoSource.CAMERA);

mediaRecorder.setProfile(CamcorderProfile.get(CamcorderProfile.QUALITY_HIGH));

mediaRecorder.setOutputFile("/sdcard/myvideo.mp4");
mediaRecorder.setMaxDuration(60000); // Set max duration 60 sec.
mediaRecorder.setMaxFileSize(5000000); // Set max file size 5M

mediaRecorder.setPreviewDisplay(myCameraSurfaceView.getHolder().getSurface());

try {
mediaRecorder.prepare();
} catch (IllegalStateException e) {
releaseMediaRecorder();
return false;
} catch (IOException e) {
releaseMediaRecorder();
return false;
}
return true;

}

@Override
protected void onPause() {
super.onPause();
releaseMediaRecorder(); // if you are using MediaRecorder, release it first
releaseCamera(); // release the camera immediately on pause event
}

private void releaseMediaRecorder(){
if (mediaRecorder != null) {
mediaRecorder.reset(); // clear recorder configuration
mediaRecorder.release(); // release the recorder object
mediaRecorder = null;
myCamera.lock(); // lock camera for later use
}
}

private void releaseCamera(){
if (myCamera != null){
myCamera.release(); // release the camera for other applications
myCamera = null;
}
}

public class MyCameraSurfaceView extends SurfaceView implements SurfaceHolder.Callback{

private SurfaceHolder mHolder;
private Camera mCamera;

public MyCameraSurfaceView(Context context, Camera camera) {
super(context);
mCamera = camera;

// Install a SurfaceHolder.Callback so we get notified when the
// underlying surface is created and destroyed.
mHolder = getHolder();
mHolder.addCallback(this);
// deprecated setting, but required on Android versions prior to 3.0
mHolder.setType(SurfaceHolder.SURFACE_TYPE_PUSH_BUFFERS);
}

@Override
public void surfaceChanged(SurfaceHolder holder, int format, int weight,
int height) {
// If your preview can change or rotate, take care of those events here.
// Make sure to stop the preview before resizing or reformatting it.

if (mHolder.getSurface() == null){
// preview surface does not exist
return;
}

// stop preview before making changes
try {
mCamera.stopPreview();
} catch (Exception e){
// ignore: tried to stop a non-existent preview
}

// make any resize, rotate or reformatting changes here

// start preview with new settings
try {
mCamera.setPreviewDisplay(mHolder);
mCamera.startPreview();

} catch (Exception e){
}
}

@Override
public void surfaceCreated(SurfaceHolder holder) {
// TODO Auto-generated method stub
// The Surface has been created, now tell the camera where to draw the preview.
try {
mCamera.setPreviewDisplay(holder);
mCamera.startPreview();
} catch (IOException e) {
}
}

@Override
public void surfaceDestroyed(SurfaceHolder holder) {
// TODO Auto-generated method stub

}
}
}


main.xml
<?xml version="1.0" encoding="utf-8"?>
<LinearLayout xmlns:android="http://schemas.android.com/apk/res/android"
android:orientation="vertical"
android:layout_width="fill_parent"
android:layout_height="fill_parent"
>
<LinearLayout
android:orientation="horizontal"
android:layout_width="fill_parent"
android:layout_height="fill_parent"
>
<FrameLayout
android:id="@+id/videoview"
android:layout_width="720px"
android:layout_height="480px"/>
<LinearLayout
android:orientation="vertical"
android:layout_width="fill_parent"
android:layout_height="fill_parent">
<Button
android:id="@+id/mybutton"
android:layout_width="fill_parent"
android:layout_height="wrap_content"
android:text="REC"
android:textSize="12dp"/>
<RadioGroup
android:layout_width="fill_parent"
android:layout_height="wrap_content"
android:orientation="vertical">
<RadioButton
android:id="@+id/flashoff"
android:layout_width="wrap_content"
android:layout_height="wrap_content"
android:text="OFF"
android:textSize="8dp"
android:checked="true"/>
<RadioButton
android:id="@+id/flashtorch"
android:layout_width="wrap_content"
android:layout_height="wrap_content"
android:text="Torch"
android:textSize="8dp"/>
</RadioGroup>
</LinearLayout>
</LinearLayout>
</LinearLayout>


Refer to the article "A simple exercise of Video Capture using MediaRecorder, for Android 2.3 or higher" for AndroidManifest.xml.

Download the files.

Tuesday 25 October 2011

Finding Restaurants with Google Maps

Google LogoHere is a very useful post from Dave Taylor.


Ask Dave Taylor: Finding Restaurants with Google Maps


He includes all the steps including screen shots.

SlidingDrawer in horizontal

SlidingDrawer in horizontal

<?xml version="1.0" encoding="utf-8"?>
<FrameLayout xmlns:android="http://schemas.android.com/apk/res/android"
android:layout_width="fill_parent"
android:layout_height="fill_parent">

<ImageView
android:layout_width="fill_parent"
android:layout_height="fill_parent"
android:src="@drawable/icon"/>

<SlidingDrawer
android:id="@+id/drawer"
android:layout_width="fill_parent"
android:layout_height="fill_parent"
android:orientation="horizontal"
android:handle="@+id/handle"
android:content="@+id/content">
<ImageView
android:id="@id/handle"
android:layout_width="wrap_content"
android:layout_height="fill_parent"
android:src="@drawable/icon"/>
<LinearLayout
android:id="@id/content"
android:layout_width="fill_parent"
android:layout_height="fill_parent"
android:orientation="vertical"
android:padding="10dp"
android:background="#55000000">
<Button
android:layout_width="fill_parent"
android:layout_height="wrap_content"
android:text=" - Button - "/>
<Button
android:layout_width="fill_parent"
android:layout_height="wrap_content"
android:text=" - Button - "/>
<Button
android:layout_width="fill_parent"
android:layout_height="wrap_content"
android:text=" - Button - "/>
<Button
android:layout_width="fill_parent"
android:layout_height="wrap_content"
android:text=" - Button - "/>
<Button
android:layout_width="fill_parent"
android:layout_height="wrap_content"
android:text=" - Button - "/>
<Button
android:layout_width="fill_parent"
android:layout_height="wrap_content"
android:text=" - Button - "/>
</LinearLayout>
</SlidingDrawer>
</FrameLayout>


Related:
- SlidingDrawer in vertical
- Inflate SlidingDrawer from XML


Monday 24 October 2011

Ice Cream Sandwich running on the Google Nexus One


Install Oracle JDK 7 on Ubuntu 11.10

Download JDK7 on http://www.oracle.com/technetwork/java/javase/downloads/index.html. The most updated is Java SE 7u1.

Follow the steps to Installation the JDK on Linux Platforms, http://download.oracle.com/javase/7/docs/webnotes/install/linux/linux-jdk.html.
eg. This procedure installs the Java Development Kit (JDK) for 32-bit Linux, using an archive binary file (.tar.gz).

These instructions use the following file:

jdk-7u<version>-linux-i586.tar.gz
1. Download the file. Before the file can be downloaded, you must accept the license agreement. The archive binary can be installed by anyone (not only root users), in any location that you can write to. However, only the root user can install the JDK into the system location.

2. Change directory to the location where you would like the JDK to be installed. Move the .tar.gz archive binary to the current directory.

3. Unpack the tarball and install the JDK.

% tar zxvf jdk-7u<version>-linux-i586.tar.gz
The Java Development Kit files are installed in a directory called jdk1.7.0_<version> in the current directory.

4. Delete the .tar.gz file if you want to save disk space.


Up to now, you have downloaded and installed JDK7 on your machine, but not yet installed in your system!

In Terminal, type the command to install the java alternative.
$sudo update-alternatives --install /usr/bin/javac javac /usr/lib/jvm/jdk1.7.0/bin/javac 1

Where:
  • /usr/lib/jvm/ is the directory the JDK installed, on step 2; such that javac should be at /usr/bin/javac javac /usr/lib/jvm/jdk1.7.0/bin/javac.
  • The last number, 1, is an integer of "priority"; it should be work on any integer number.


Finally, may be you have to config your javac alternative, if you have more than one javac installed.
$sudo update-alternatives --config javac

Note: Up to this minute, only JDK 5 and JDK 6 are officially supported for Android development, according to Android SDK document: System Requirements. May be, it will be officially support JDK 7 in short future.

Acer Aspire S3-951-6646 Ultrabooks Review, Specs and Price

new Acer Aspire S3-951-6646 Ultrabooks
Acer one of the well-known notebooks maker has announced the launch of its new Ultra Portable Notebooks namely, Acer Aspire S3-951-6646. The Aspire S3-951 comes with a Intel 2nd Generation Core i5-2467M (1.60GHz) Processor, Acer CineCrystal 13.3 Inch (1366 x 768) LED Display, 4GB DDR3 Memory, 320GB Hard Drive + 20GB Solid State Drive (SSD), Intel HD Graphics 3000 with 128MB of dedicated System Memory, Bluetooth V4.0 Ready, Microsoft Windows 7 Home Premium 64 Bit. The details related to the specs of the device are discussed below.
Acer Aspire S3-951-6646 UltrabooksAcer Aspire S3-951-6646 Ultrabooks Specification :
  • 13.3? HD Widescreen CineCrystal�
  • LED-backlit Display resolution: (1366 x 768) 16:9 aspect ratio
  • 2nd generation Intel� Core� i5-2467M Processor 1.6GHz
  • Intel� HD Graphics 3000 with 128MB of dedicated system memory
  • 320GB SATA Hard Drive
  • 20GB SSD Drive
  • 2-in-1 Digital Media Card Reader
  • 802.11b/g/n Wi-Fi CERTIFIED�
  • Bluetooth� 4.0+HS
  • 1.3MP HD Webcam(1280 x 1024)
  • Dolby� Home Theater� v4 audio enhancement
  • Two Built-in Acer 3DSonic stereo speakers
  • 2- USB 2.0 Ports
  • 1- HDMI� Portwith HDCP Support
  • 3-cell Lithium polymer Battery
  • Up to 8-hours battery life
  • 3.08 lbs. system unit onlybest Acer Aspire S3-951-6646 Ultrabooks
The Acer Aspire S3-951-6646 Ultrabook now available for sale at $ 899.99 in US and Canada. It is the first Laptop that you can call a MacBook Air competitor and would be available in a weeks time.

Gateway NV57H50U 15.6 inch Laptop Review, Specs and Price

new Gateway NV57H50U
Gateway one of the well-known notebooks maker has announced the launch of its new laptop namely, Gateway NV57H50U. The NV57H50U notebook comes with a 15.6 inch LED-backlit LCD HD widescreen screen by using the Intel High definition Graphics card 3000 plus the Ultrabright technologies. This laptop also powered by Intel Celeron B800 processor chip, a 2 gigabytes of DDR3 Ram memory(expandable around 8 gigabyte), a 320 gigabyte SATA hdd, a DVD�RW/CD-RW drive having double-layer support, the HDMI output and also a multi cards readers. The Gateway NV57H50U laptop runs on Microsoft Windows 7 Home Premium 64-bit os. It has 6-cell lithium-ion battery pack offers for around 4 hrs of operation time. The details related to the specs of the device are discussed below.
best Gateway NV57H50UGateway NV57H50U 15.6 inch Laptop Specifications :
  • Processor : Intel Celeron Processor B800 (2M Cache, 1.50 GHz)
  • Main Memory : 2GB DDR3 memory expandable to 8GB
  • Hard Disk : 320GB Serial ATA hard drive (5400 rpm)
  • Graphic system : Intel HD Graphics 3000
  • Display : 15.6? LED-backlit LCD high-definition widescreen display
  • Webcamera : 1.3MP high-definition webcam
  • Optical Disc Drive : Multiformat DVD�RW/CD-RW drive with double-layer support
  • Wireles : 802.11b/g/n
  • Input/Output Port : 2 x USB 2.0, 1 x USB 3.0, 1 x HDMI, 1 x VGA, 1 x LAN
  • Expansion Slots : Multi-in-1 media reader
  • Operating System : Microsoft Windows 7 Home Premium 64-bit
  • Battery : 6-cell lithium-ion battery, up to 4 hours to give you more time away from an outlet

The Gateway NV57H50U 15.6 inch laptop retails price around $369 (on Amazon)

Samsung Laptop $349.99


Click here for the Best Buy Homepage


Samsung Laptop with Intel Pentium Processor, 4GB DDR3 Memory, and 320GB Hard Drive, $349.99.

Best buy has this as their laptop deal of the week.

A simple exercise of Video Capture using MediaRecorder, for Android 2.3 or higher

Refer to my old exercise "A simple exercise of Video Capture using MediaRecorder" for SDK Level 8 Android 2.2. But it fail to run on Android 2.3!!! So I re-write it for SDK Level 10, Android 2.3.3. Tested on Nexus One running Android 2.3.6.

A simple exercise of Video Capture using MediaRecorder, run on Nexus One running 2.3.6

Main Code:
package com.exercise.AndroidVideoCapture;

import java.io.IOException;

import android.app.Activity;
import android.content.Context;
import android.hardware.Camera;
import android.media.CamcorderProfile;
import android.media.MediaRecorder;
import android.os.Bundle;
import android.view.SurfaceHolder;
import android.view.SurfaceView;
import android.view.View;
import android.widget.Button;
import android.widget.FrameLayout;
import android.widget.Toast;

public class AndroidVideoCapture extends Activity{

private Camera myCamera;
private MyCameraSurfaceView myCameraSurfaceView;
private MediaRecorder mediaRecorder;

Button myButton;
SurfaceHolder surfaceHolder;
boolean recording;

/** Called when the activity is first created. */
@Override
public void onCreate(Bundle savedInstanceState) {
super.onCreate(savedInstanceState);

recording = false;

setContentView(R.layout.main);

//Get Camera for preview
myCamera = getCameraInstance();
if(myCamera == null){
Toast.makeText(AndroidVideoCapture.this,
"Fail to get Camera",
Toast.LENGTH_LONG).show();
}

myCameraSurfaceView = new MyCameraSurfaceView(this, myCamera);
FrameLayout myCameraPreview = (FrameLayout)findViewById(R.id.videoview);
myCameraPreview.addView(myCameraSurfaceView);

myButton = (Button)findViewById(R.id.mybutton);
myButton.setOnClickListener(myButtonOnClickListener);
}

Button.OnClickListener myButtonOnClickListener
= new Button.OnClickListener(){

@Override
public void onClick(View v) {
// TODO Auto-generated method stub
if(recording){
// stop recording and release camera
mediaRecorder.stop(); // stop the recording
releaseMediaRecorder(); // release the MediaRecorder object

//Exit after saved
finish();
}else{

//Release Camera before MediaRecorder start
releaseCamera();

if(!prepareMediaRecorder()){
Toast.makeText(AndroidVideoCapture.this,
"Fail in prepareMediaRecorder()!\n - Ended -",
Toast.LENGTH_LONG).show();
finish();
}

mediaRecorder.start();
recording = true;
myButton.setText("STOP");
}
}};

private Camera getCameraInstance(){
// TODO Auto-generated method stub
Camera c = null;
try {
c = Camera.open(); // attempt to get a Camera instance
}
catch (Exception e){
// Camera is not available (in use or does not exist)
}
return c; // returns null if camera is unavailable
}

private boolean prepareMediaRecorder(){
myCamera = getCameraInstance();
mediaRecorder = new MediaRecorder();

myCamera.unlock();
mediaRecorder.setCamera(myCamera);

mediaRecorder.setAudioSource(MediaRecorder.AudioSource.CAMCORDER);
mediaRecorder.setVideoSource(MediaRecorder.VideoSource.CAMERA);

mediaRecorder.setProfile(CamcorderProfile.get(CamcorderProfile.QUALITY_HIGH));

mediaRecorder.setOutputFile("/sdcard/myvideo.mp4");
mediaRecorder.setMaxDuration(60000); // Set max duration 60 sec.
mediaRecorder.setMaxFileSize(5000000); // Set max file size 5M

mediaRecorder.setPreviewDisplay(myCameraSurfaceView.getHolder().getSurface());

try {
mediaRecorder.prepare();
} catch (IllegalStateException e) {
releaseMediaRecorder();
return false;
} catch (IOException e) {
releaseMediaRecorder();
return false;
}
return true;

}

@Override
protected void onPause() {
super.onPause();
releaseMediaRecorder(); // if you are using MediaRecorder, release it first
releaseCamera(); // release the camera immediately on pause event
}

private void releaseMediaRecorder(){
if (mediaRecorder != null) {
mediaRecorder.reset(); // clear recorder configuration
mediaRecorder.release(); // release the recorder object
mediaRecorder = null;
myCamera.lock(); // lock camera for later use
}
}

private void releaseCamera(){
if (myCamera != null){
myCamera.release(); // release the camera for other applications
myCamera = null;
}
}

public class MyCameraSurfaceView extends SurfaceView implements SurfaceHolder.Callback{

private SurfaceHolder mHolder;
private Camera mCamera;

public MyCameraSurfaceView(Context context, Camera camera) {
super(context);
mCamera = camera;

// Install a SurfaceHolder.Callback so we get notified when the
// underlying surface is created and destroyed.
mHolder = getHolder();
mHolder.addCallback(this);
// deprecated setting, but required on Android versions prior to 3.0
mHolder.setType(SurfaceHolder.SURFACE_TYPE_PUSH_BUFFERS);
}

@Override
public void surfaceChanged(SurfaceHolder holder, int format, int weight,
int height) {
// If your preview can change or rotate, take care of those events here.
// Make sure to stop the preview before resizing or reformatting it.

if (mHolder.getSurface() == null){
// preview surface does not exist
return;
}

// stop preview before making changes
try {
mCamera.stopPreview();
} catch (Exception e){
// ignore: tried to stop a non-existent preview
}

// make any resize, rotate or reformatting changes here

// start preview with new settings
try {
mCamera.setPreviewDisplay(mHolder);
mCamera.startPreview();

} catch (Exception e){
}
}

@Override
public void surfaceCreated(SurfaceHolder holder) {
// TODO Auto-generated method stub
// The Surface has been created, now tell the camera where to draw the preview.
try {
mCamera.setPreviewDisplay(holder);
mCamera.startPreview();
} catch (IOException e) {
}
}

@Override
public void surfaceDestroyed(SurfaceHolder holder) {
// TODO Auto-generated method stub

}
}
}


main.xml
<?xml version="1.0" encoding="utf-8"?>
<LinearLayout xmlns:android="http://schemas.android.com/apk/res/android"
android:orientation="vertical"
android:layout_width="fill_parent"
android:layout_height="fill_parent"
>
<LinearLayout
android:orientation="horizontal"
android:layout_width="fill_parent"
android:layout_height="fill_parent"
>
<FrameLayout
android:id="@+id/videoview"
android:layout_width="720px"
android:layout_height="480px"/>
<Button
android:id="@+id/mybutton"
android:layout_width="fill_parent"
android:layout_height="wrap_content"
android:text="REC"
android:textSize="12dp"/>
</LinearLayout>
</LinearLayout>


AndroidManifest.xml
<?xml version="1.0" encoding="utf-8"?>
<manifest xmlns:android="http://schemas.android.com/apk/res/android"
package="com.exercise.AndroidVideoCapture"
android:versionCode="1"
android:versionName="1.0">
<uses-sdk android:minSdkVersion="10" />
<uses-permission android:name="android.permission.RECORD_AUDIO"></uses-permission>
<uses-permission android:name="android.permission.CAMERA"></uses-permission>
<uses-permission android:name="android.permission.WRITE_EXTERNAL_STORAGE"></uses-permission>
<application android:icon="@drawable/icon" android:label="@string/app_name">
<activity android:name=".AndroidVideoCapture"
android:label="@string/app_name"
android:theme="@android:style/Theme.NoTitleBar.Fullscreen"
android:screenOrientation="landscape">
<intent-filter>
<action android:name="android.intent.action.MAIN" />
<category android:name="android.intent.category.LAUNCHER" />
</intent-filter>
</activity>

</application>
</manifest>


Download the files.

next:
- Video Capture using MediaRecorder with Flash Light

Reference:
- Android Dev Guide: Camera

Friday 21 October 2011

Android 4.0 on Nexus One

ICS Android 4.0 for Nexus One


Google Reader Getting Updated this Week

Google LogoExpect an update to Google Reader this week. Features include an updated interface and better integration with Google+.


Google Reader Blog: New Features

What's LTE (3GPP Long Term Evolution)?

3GPP Long Term Evolution (LTE) is a standard for wireless communication of high-speed data. It is based upon GSM/EDGE and Universal Mobile Telecommunications System/High Speed Packet Access (UMTS/HSPA) network technologies.[1][2] The standard is maintained as a project of the 3rd Generation Partnership Project (3GPP), operating under a name trademarked by one of the associations within the partnership, the European Telecommunications Standards Institute (ETSI).

The goal of LTE is to increase the capacity and speed of wireless data networks utilizing cutting-edge hardware and Digital Signal Processing (DSP) techniques that have recently been developed. Its wireless interface is incompatible with 2G and 3G networks, and so it must be operated on separate wireless spectrum.

Features of LTE include an all-IP flat network architecture, end-to-end QoS including provisions for low-latency communications, peak download rates nearing 300 Mbps and upload rates of 75 Mbps, capacity exceeding 200 active users per cell, the ability to manage fast-moving mobiles, and support for multi-cast and broadcast streams.


- Read more from Wikipedia - 3GPP Long Term Evolution

Thursday 20 October 2011

Call JavaScript inside WebView from Android activity, with parameter passed.

The last exercise "Run Android Java code from Webpage" show how to call from WebView JavaScript to Android activity. Here will show how to call in reverse direction: Call JavaScript inside WebView from Android activity, with parameter passed.

Call JavaScript inside WebView from Android activity, with parameter passed.

/assets/mypage.html
<!DOCTYPE html>
<html>
<head>
<meta charset="UTF-8">
<meta name="viewport" content="width=device-width; user-scalable=0;" />
<title>My HTML</title>
</head>
<body>
<h1>MyHTML</h1>
<p id="mytext">Hello!</p>
<input type="button" value="Say hello" onClick="showAndroidToast('Hello Android!')" />
<input type="button" value="Open Dialog" onClick="openAndroidDialog()" />
<script language="javascript">
function showAndroidToast(toast) {
AndroidFunction.showToast(toast);
}

function openAndroidDialog() {
AndroidFunction.openAndroidDialog();
}

function callFromActivity(msg){
document.getElementById("mytext").innerHTML = msg;
}
</script>

</body>
</html>


main.xml
<?xml version="1.0" encoding="utf-8"?>
<LinearLayout xmlns:android="http://schemas.android.com/apk/res/android"
android:orientation="vertical"
android:layout_width="fill_parent"
android:layout_height="fill_parent"
>
<TextView
android:layout_width="fill_parent"
android:layout_height="wrap_content"
android:text="@string/hello"
/>
<EditText
android:id="@+id/msg"
android:layout_width="fill_parent"
android:layout_height="wrap_content" />
<Button
android:id="@+id/sendmsg"
android:layout_width="fill_parent"
android:layout_height="wrap_content"
android:text="Msg to JavaScript"
/>
<WebView
android:id="@+id/mybrowser"
android:layout_width="fill_parent"
android:layout_height="fill_parent"
/>
</LinearLayout>


main code:
package com.exercise.AndroidHTML;

import android.app.Activity;
import android.app.AlertDialog;
import android.content.Context;
import android.os.Bundle;
import android.view.View;
import android.webkit.WebView;
import android.widget.Button;
import android.widget.EditText;
import android.widget.Toast;

public class AndroidHTMLActivity extends Activity {

WebView myBrowser;
EditText Msg;
Button btnSendMsg;

/** Called when the activity is first created. */
@Override
public void onCreate(Bundle savedInstanceState) {
super.onCreate(savedInstanceState);
setContentView(R.layout.main);
myBrowser = (WebView)findViewById(R.id.mybrowser);

final MyJavaScriptInterface myJavaScriptInterface
= new MyJavaScriptInterface(this);
myBrowser.addJavascriptInterface(myJavaScriptInterface, "AndroidFunction");

myBrowser.getSettings().setJavaScriptEnabled(true);
myBrowser.loadUrl("file:///android_asset/mypage.html");

Msg = (EditText)findViewById(R.id.msg);
btnSendMsg = (Button)findViewById(R.id.sendmsg);
btnSendMsg.setOnClickListener(new Button.OnClickListener(){

@Override
public void onClick(View arg0) {
// TODO Auto-generated method stub
String msgToSend = Msg.getText().toString();
myBrowser.loadUrl("javascript:callFromActivity(\""+msgToSend+"\")");

}});

}

public class MyJavaScriptInterface {
Context mContext;

MyJavaScriptInterface(Context c) {
mContext = c;
}

public void showToast(String toast){
Toast.makeText(mContext, toast, Toast.LENGTH_SHORT).show();
}

public void openAndroidDialog(){
AlertDialog.Builder myDialog
= new AlertDialog.Builder(AndroidHTMLActivity.this);
myDialog.setTitle("DANGER!");
myDialog.setMessage("You can do what you want!");
myDialog.setPositiveButton("ON", null);
myDialog.show();
}

}
}


Download the files.

Anti-Glare Matte Laptops 10/19/11

If you are like me and spend most of your day in front of a computer, you know how nice it is to have a matte finish. Briefly, a matte finish display reduces glare from other light sources, especially natural light. When turned off, an anti-glare matte display looks dark with little or no reflection. Contrast that with today's ultra bright displays that when turned off look like a mirror. This super reflectivity can lead to eye strain and headaches for some people.


Here is the list of matte anti-glare laptops for the week of 10/19/11. More details for all models. I have also found Dell offerings and added them to the list. Next time I'll try to add HP machines.


Apple

As always, Apple provides the best laptops on the market. All systems come with Mac OS X but thanks to Bootcamp, can run Windows just fine.


15 inch Macbook Pro - $1799. 15 inch anti-glare display. Quad Core Intel Core i7, 4GB RAM, 500 GB Hard Drive, 1440x900 resolution. 5 lbs.


17 inch Macbook Pro - $2499. 17 inch anti-glare display. Quad Core Intel Core i7, 4GB RAM, 500 GB Hard Drive, 1920x1200 resolution. 6.6 lbs. The screen resolution can be tough on middle aged eyes for this machine.


Dell


Vostro 14" - $549. 14 inch anti-glare display. Dual Core Intel Core i3, 4GB RAM, 320 GB Hard Drive, 1366x768, 4.8 lbs


Vostro 15" - $549. 15.6 inch anti-glare display. Dual Core Intel Core i3, 4 GB RAM, 320 GB Hard Drive, 1366x78, 5.2 lbs


Lenovo


T420 - $799. 14 inch anti-glare display. Dual Core Intel Core i3, 4GB RAM, 320GB Hard Drive, 1600x900 resolution display work as an option. Under 5lbs


E520 - $549. 15.6 inch anti-glare display. Dual Core Intel Core i3, 4GB RAM, 320GB Hard Drive, 1366x768 5.5 lb laptop


Run Android Java code from Webpage

Using JavascriptInterface you can create interfaces between webpage's JavaScript code and Android Java code. For example, your JavaScript code can call a method in your Android code to display a Dialog, or Toast.

To bind a new interface between your JavaScript and Android code, call addJavascriptInterface(), passing it a class instance to bind to your JavaScript and an interface name that your JavaScript can call to access the class.

Caution: Using addJavascriptInterface() allows JavaScript to control your Android application. This can be a very useful feature or a dangerous security issue. When the HTML in the WebView is untrustworthy (for example, part or all of the HTML is provided by an unknown person or process), then an attacker can include HTML that executes your client-side code and possibly any code of the attacker's choosing. As such, you should not use addJavascriptInterface() unless you wrote all of the HTML and JavaScript that appears in your WebView. You should also not allow the user to navigate to other web pages that are not your own, within your WebView (instead, allow the user's default browser application to open foreign links�by default, the user's web browser opens all URL links, so be careful only if you handle page navigation as described in the following section).

Example:

Run Android Java code from Webpage

Modify from last exercise "Load local HTML webpage inside APK":

Modify /assets/mypage.html to add two button to call JavascriptInterface in Android Java code.
<!DOCTYPE html>
<html>
<head>
<meta charset="UTF-8">
<meta name="viewport" content="width=device-width; user-scalable=0;" />
<title>My HTML</title>
</head>
<body>
<h1>MyHTML</h1>

<input type="button" value="Say hello" onClick="showAndroidToast('Hello Android!')" />

<script type="text/javascript">
function showAndroidToast(toast) {
AndroidFunction.showToast(toast);
}
</script>

<input type="button" value="Open Dialog" onClick="openAndroidDialog()" />

<script type="text/javascript">
function openAndroidDialog() {
AndroidFunction.openAndroidDialog();
}
</script>

</body>
</html>


Keep using main.xml from last exercise.

Main code, to add our JavascriptInterface.
package com.exercise.AndroidHTML;

import android.app.Activity;
import android.app.AlertDialog;
import android.content.Context;
import android.os.Bundle;
import android.webkit.WebView;
import android.widget.Toast;

public class AndroidHTMLActivity extends Activity {

WebView myBrowser;

/** Called when the activity is first created. */
@Override
public void onCreate(Bundle savedInstanceState) {
super.onCreate(savedInstanceState);
setContentView(R.layout.main);
myBrowser = (WebView)findViewById(R.id.mybrowser);
myBrowser.addJavascriptInterface(new MyJavaScriptInterface(this), "AndroidFunction");

myBrowser.getSettings().setJavaScriptEnabled(true);
myBrowser.loadUrl("file:///android_asset/mypage.html");

}

public class MyJavaScriptInterface {
Context mContext;

MyJavaScriptInterface(Context c) {
mContext = c;
}

public void showToast(String toast){
Toast.makeText(mContext, toast, Toast.LENGTH_SHORT).show();
}

public void openAndroidDialog(){
AlertDialog.Builder myDialog
= new AlertDialog.Builder(AndroidHTMLActivity.this);
myDialog.setTitle("DANGER!");
myDialog.setMessage("You can do what you want!");
myDialog.setPositiveButton("ON", null);
myDialog.show();
}

}
}


Download the files.

next:
- Call JavaScript inside WebView from Android activity, with parameter passed.

Load local HTML webpage inside APK

Using WebView, your app can load local HTML file (inside your APK).

Load local HTML webpage inside APK

Create your own HTML file under /assets/ folder.

/assets/mypage.html
<!DOCTYPE html>
<html>
<head>
<meta charset="UTF-8">
<meta name="viewport" content="width=device-width; user-scalable=0;" />
<title>My HTML</title>
</head>
<body>
<h1>MyHTML</h1>
</body>
</html>


Modify main.xml to add a WebView
<?xml version="1.0" encoding="utf-8"?>
<LinearLayout xmlns:android="http://schemas.android.com/apk/res/android"
android:orientation="vertical"
android:layout_width="fill_parent"
android:layout_height="fill_parent"
>
<TextView
android:layout_width="fill_parent"
android:layout_height="wrap_content"
android:text="@string/hello"
/>
<WebView
android:id="@+id/mybrowser"
android:layout_width="fill_parent"
android:layout_height="fill_parent"
/>
</LinearLayout>


Java code
package com.exercise.AndroidHTML;

import android.app.Activity;
import android.os.Bundle;
import android.webkit.WebView;

public class AndroidHTMLActivity extends Activity {

WebView myBrowser;

/** Called when the activity is first created. */
@Override
public void onCreate(Bundle savedInstanceState) {
super.onCreate(savedInstanceState);
setContentView(R.layout.main);
myBrowser = (WebView)findViewById(R.id.mybrowser);

myBrowser.loadUrl("file:///android_asset/mypage.html");

}
}


Download the files.

Related article:
- AndroidBrowser, implement a Android Browser using WebView
- Run Android Java code from Webpage


Wednesday 19 October 2011

Asus U46E-BAL6 Entertainment Laptops Review, Specs and Price

new Asus U46E-BAL6
Asus one of the well-known laptops maker has announced the launch of its new notebook named as, Asus U46E-BAL6. The U46E-BAL6 which powered by performance its CPU handling 8 threads simultaneously. This U46E-BAL6 laptop sports has high-speed Intel Core i7-2620M 2.7 GHz dual-core CPU processor, 8 GigaByte DDR3 RAM module, an integrated Intel HD Graphics 3000 graphics chipset, an ultra-slim and very light 14-inch LED display screen, and a 750 GigaByte 7200 rpm hard disk drive. http://elaptops.blogspot.combest Asus U46E-BAL6This Asus U46E-BAL6 Notebook runs on Windows 7 Home Premium operating system and powered by an 8-cell Li-ion battery that promises upto 7 hours of life usage with weight 4.9 lbs. The U46E-BAL6 also comes with features multiformat DVD�RW optical drive, 4G WiMAX broadband technology, Ethernet LAN connectivity, Wi-Fi 802.11n access, 0.3 MegaPixel webcam with facial recognition, two USB 2.0 ports, a superfast USB 3.0 port, and a Multiformat media reader.Asus U46E-BAL6
Price about : $850

Error in creating Emulator for Android 4.0

Android SDK for version 4.0 was just released. The setup procedure is almost same as before, so I don't want to repeat again.

But - after you install the SDK components and try to create AVD for Android 4.0, may be you will prompted with the error:

Unable to find a 'userdata.img' file for ABI armeabi to copy into the AVD folder.

It's because you have no Android 4 system image installed!

Solution:
Start Android SDK Manager, expand Android 4.0, click to select install ARM EABI v7a System Image. May be you have to re-start Eclipse after new component installed.
install ARM EABI v7a System Image
Good Luck.

Tuesday 18 October 2011

Android 4.0 Platform and Updated SDK Tools

Android 4.0 Platform
Today Google are announcing Android 4.0, Ice Cream Sandwich � a new version of the platform that brings a refined, unified user experience for phones, tablets, and more.

For developers, Android 4.0 introduces many new capabilities and APIs. Here are some highlights:
  • Unified UI toolkit: A single set of UI components, styles, and capabilities for phones, tablets, and other devices.
  • Rich communication and sharing: New social and calendar APIs, Android Beam for NFC-based instant sharing, Wi-Fi Direct support, Bluetooth Health Device Profile support.
  • Deep interactivity and customization: Improved notifications, lockscreen with camera and music controls, and improved app management in the launcher.
  • New graphics, camera, and media capabilities: Image and video effects, precise camera metering and face detection, new media codecs and containers.
  • Interface and input: Hardware-accelerated 2D drawing, new grid-based layout, improved soft keyboard, spell-checker API, stylus input support, and better mouse support.
  • Improved accessibility: New accessibility APIs and text-to-speech APIs for writing new engines.
  • Enhancements for enterprise: Keychain and VPN APIs for managing credentials and connections, a new administrator policy for disabling the camera.

For a complete overview of what�s new for users and developers, please read the Android 4.0 Platform Highlights.

Alongside the new Android platform, we are releasing new versions of the SDK Tools (r14) and ADT Plugin (14.0) for Eclipse. Among the highlights are:
  • Improved build performance in Ant and Eclipse
  • Improved layout and XML editors


Read more: http://android-developers.blogspot.com/2011/10/android-40-platform-and-updated-sdk.html

OS X Tip: Figuring out Server, Background Issues

Problem: I try to start Web Sharing, File Sharing, or a similar background process in OS X and it fails. The process quits with no error message. What do I do?


Solution: Open your Applications --> Utilities folder. In there, start the Console application. This little app captures all the error messages and warnings thrown by the operating system. Try starting the process again. You should see the error message display in the console. From here, you can start figuring out what is wrong.

iPod Sale at Best Buy this Week


Best Buy has a number of iPods on sale this week. Deals include some nice iPod Touch models. Sale ends Saturday 10/22/11.

Mac OS X Lion After Upgrading Review Notes

Well after upgrading to iOS 5 last week I found out iCloud does not work with OS X Snow Leopard. Yes that is a bit bizarre. So over the weekend I upgraded to OS X Lion. Here is a quick summary of my thoughts and findings with Lion.


UI Enhancements

You will get the most benefit from UI enhancements if you are using a trackpad. Switching desktops, and calling Expose (now called Mission Control) can all be controlled with a three finger swipe. Very cool.


Another feature of note is the direction of scrolling has been flipped. The idea is that scrolling should match the direction you use for a touch interface. However, my Mac doesn't have a touch interface. In addition, I'm constantly switching between Windows, Linux, and OS X. So changing the scrolling direction on one OS is really annoying. Thankfully you can still turn this off.


iCloud

Well it turns out the iCloud feature that I really want to use, music syncing, will not be available until the end of October. So enabling the feature has been a bit disappointing. You can sync bookmarks, address book, and calendars. However, unless this will work on other operating systems its kind of useless for me. GMail already keeps all my iOS devices synced and it works on any platform. I still need to do more investigation on syncing between Mac and Windows to really understand what works.


Other Surprises

Installing OS X Lion removes Java from your machine. You can download it from Apple and get it back easily. I did find this a bit odd. Also my Apache Web servers no longer worked on upgraded machines. I had to comment out the FastCGI plugin so Apache would start.


Overall

It has some nice enhancements and pretty much is not that different from Snow Leopard. All my apps seem to run fine (knock on wood), and stability seems to be good. So far so good. But I have to say, it sure was a lot of work just to be able to use iCloud. :)


Delete file in Internal Storage

The method deleteFile() delete the given private file associated with this Context's application package.

Modify the code in last exercise "Read file from Internal Storage via FileInputStream", add OnClickListener DeleteListener called by an additional button "Delete" inside fileDialog.

Delete file in Internal Storage

package com.exercise.AndroidInternalStorage;

import java.io.FileInputStream;
import java.io.FileNotFoundException;
import java.io.FileOutputStream;
import java.io.IOException;

import android.app.Activity;
import android.app.AlertDialog;
import android.content.Context;
import android.content.DialogInterface;
import android.content.DialogInterface.OnClickListener;
import android.os.Bundle;
import android.view.View;
import android.view.ViewGroup.LayoutParams;
import android.widget.AdapterView;
import android.widget.AdapterView.OnItemClickListener;
import android.widget.ArrayAdapter;
import android.widget.Button;
import android.widget.EditText;
import android.widget.ListView;
import android.widget.TextView;
import android.widget.Toast;

public class AndroidInternalStorageActivity extends Activity {

EditText edFileName, edContent;
Button btnSave;
ListView listSavedFiles;

String[] SavedFiles;

/** Called when the activity is first created. */
@Override
public void onCreate(Bundle savedInstanceState) {
super.onCreate(savedInstanceState);
setContentView(R.layout.main);
edFileName = (EditText)findViewById(R.id.filename);
edContent = (EditText)findViewById(R.id.content);
btnSave = (Button)findViewById(R.id.save);
listSavedFiles = (ListView)findViewById(R.id.list);

ShowSavedFiles();

btnSave.setOnClickListener(new Button.OnClickListener(){

@Override
public void onClick(View arg0) {
// TODO Auto-generated method stub
String fileName = edFileName.getText().toString();
String content = edContent.getText().toString();

FileOutputStream fos;
try {
fos = openFileOutput(fileName, Context.MODE_PRIVATE);
fos.write(content.getBytes());
fos.close();

Toast.makeText(
AndroidInternalStorageActivity.this,
fileName + " saved",
Toast.LENGTH_LONG).show();

} catch (FileNotFoundException e) {
// TODO Auto-generated catch block
e.printStackTrace();
} catch (IOException e) {
// TODO Auto-generated catch block
e.printStackTrace();
}

ShowSavedFiles();

}});

listSavedFiles.setOnItemClickListener(listSavedFilesOnItemClickListener);

}

void ShowSavedFiles(){
SavedFiles = getApplicationContext().fileList();
ArrayAdapter<String> adapter
= new ArrayAdapter<String>(this,
android.R.layout.simple_list_item_1,
SavedFiles);

listSavedFiles.setAdapter(adapter);
}

OnItemClickListener listSavedFilesOnItemClickListener
= new OnItemClickListener(){

@Override
public void onItemClick(AdapterView<?> parent, View view, int position,
long id) {
// TODO Auto-generated method stub
String clickedFile = (String) parent.getItemAtPosition(position);
OpenFileDialog(clickedFile);
}

};

void OpenFileDialog(final String file){

//Read file in Internal Storage
FileInputStream fis;
String content = "";
try {
fis = openFileInput(file);
byte[] input = new byte[fis.available()];
while (fis.read(input) != -1) {}
content += new String(input);
} catch (FileNotFoundException e) {
e.printStackTrace();
} catch (IOException e) {
e.printStackTrace();
}

//Create a custom Dialog
AlertDialog.Builder fileDialog
= new AlertDialog.Builder(AndroidInternalStorageActivity.this);
fileDialog.setTitle(file);

TextView textContent = new TextView(AndroidInternalStorageActivity.this);
textContent.setText(content);
LayoutParams textViewLayoutParams
= new LayoutParams(LayoutParams.WRAP_CONTENT, LayoutParams.WRAP_CONTENT);
textContent.setLayoutParams(textViewLayoutParams);

fileDialog.setView(textContent);

fileDialog.setPositiveButton("OK", null);

//Delete file in Internal Storage
OnClickListener DeleteListener = new OnClickListener(){

@Override
public void onClick(DialogInterface dialog, int which) {
// TODO Auto-generated method stub
deleteFile(file);
Toast.makeText(
AndroidInternalStorageActivity.this,
file + " deleted",
Toast.LENGTH_LONG).show();
ShowSavedFiles();
}

};
fileDialog.setNeutralButton("DELETE", DeleteListener);

fileDialog.show();
}
}


Download the files.


Monday 17 October 2011

Asus Zenbook UX21E and UX31E Ultrabooks Review, Specs and Price

Asus a well-known global manufacturer of consumer electronics and IT gadgets has announced to launch its new UX21E and UX31E series zenbooks namely, X21E-DH52, UX21E-DH71,UX31E-DH52 ,UX31E-DH53 and UX31E-DH72. All The details related to the specs of the device are discussed below.
Asus UX21E, UX31E Zenbook UltrabooksAsus UX21E-DH52 Specification :
  • Dispaly Screen : 11.6? 1366 x 768
  • Processor : Intel Core i5-2467M
  • Storage : 128GB
  • RAM : 4GB
  • Graphics : Intel HD integrated
  • Connectivity : Wi-Fi & Bluetooth
  • USB : 1xUSB 2.0 & 1xUSB 3.0
  • Video : micro HDMI & micro VGA
  • SD card reader : No
  • Audio : Stereo speakers; Bang and Olufsen Ice Power
  • Webcam : 0.3-megapixel
  • Operating System : Windows 7 Home Premium 64
  • Dimensions : 11.7? (W) x 7.7? (D) x 0.11?-0.67?(H)
  • Weight : 2.43 pounds
  • Battery : 35Whr; more than 5 hours; up to 7 days stand by
  • Price : $999
top Asus UX21E, UX31E Zenbook UltrabooksAsus UX21E-DH71 Specification :
  • Dispaly Screen : 11.6? 1366 x 768
  • Processor : Intel Core i7-2677M
  • Storage : 128GB
  • RAM : 4GB
  • Graphics : Intel HD integrated
  • Connectivity : Wi-Fi & Bluetooth
  • USB : 1xUSB 2.0 & 1xUSB 3.0
  • Video : micro HDMI & micro VGA
  • SD card reader : No
  • Audio : Stereo speakers; Bang and Olufsen Ice Power
  • Webcam : 0.3-megapixel
  • Operating System : Windows 7 Home Premium 64
  • Dimensions : 11.7? (W) x 7.7? (D) x 0.11?-0.67?(H)
  • Weight : 2.43 pounds
  • Battery : 35Whr; more than 5 hours; up to 7 days stand by
  • Price : $1,199
hitz Asus UX21E, UX31E Zenbook UltrabooksAsus UX31E-DH52 Specification :
  • Dispaly Screen : 13.3? 1600 x 900
  • Processor : Intel Core i5-2557M
  • Storage : 128GB
  • RAM : 4GB
  • Graphics : Intel HD integrated
  • Connectivity : Wi-Fi & Bluetooth
  • USB : 1xUSB 2.0 & 1xUSB 3.0
  • Video : micro HDMI & micro VGA
  • SD card reader : Yes
  • Audio : Stereo speakers; Bang and Olufsen Ice Power
  • Webcam : 0.3-megapixel
  • Operating System : Windows 7 Home Premium 64
  • Dimensions : 12.8? (W) x 8.8? (D) x 0.11?-0.71? (H)
  • Weight : 2.86 pounds
  • Battery : 50Whr; more than 7 hours; up to 10 days stand by
  • Price : $1,099
new Asus UX21E, UX31E Zenbook UltrabooksAsus UX31E-DH53 Specification :
  • Dispaly Screen : 13.3? 1600 x 900
  • Processor : Intel Core i5-2557M
  • Storage : 256GB
  • RAM : 4GB
  • Graphics : Intel HD integrated
  • Connectivity : Wi-Fi & Bluetooth
  • USB : 1xUSB 2.0 & 1xUSB 3.0
  • Video : micro HDMI & micro VGA
  • SD card reader : Yes
  • Audio : Stereo speakers; Bang and Olufsen Ice Power
  • Webcam : 0.3-megapixel
  • Operating System : Windows 7 Home Premium 64
  • Dimensions : 12.8? (W) x 8.8? (D) x 0.11?-0.71? (H)
  • Weight : 2.86 pounds
  • Battery : 50Whr; more than 7 hours; up to 10 days stand by
  • Price : $1,349
best Asus UX21E, UX31E Zenbook Ultrabooks
Asus UX31E-DH72 Specification :
  • Dispaly Screen : 13.3? 1600 x 900
  • Processor : Intel Core i7-2677M
  • Storage : 256GB
  • RAM : 4GB
  • Graphics : Intel HD integrated
  • Connectivity : Wi-Fi & Bluetooth
  • USB : 1xUSB 2.0 & 1xUSB 3.0
  • Video : micro HDMI & micro VGA
  • SD card reader : Yes
  • Audio : Stereo speakers; Bang and Olufsen Ice Power
  • Webcam : 0.3-megapixel
  • Operating System : Windows 7 Home Premium 64
  • Dimensions : 12.8? (W) x 8.8? (D) x 0.11?-0.71? (H)
  • Weight : 2.86 pounds
  • Battery : 50Whr; more than 7 hours; up to 10 days stand by
  • Price : $1,499